Wooden Pumpkins from Fence Boards
This post may contain affiliate links which won't change your price but will share some commission. Read more here.Want a cute rustic pumpkin that’s easy to make and very affordable? Try these fun and easy wooden pumpkins made from leftover fence boards.

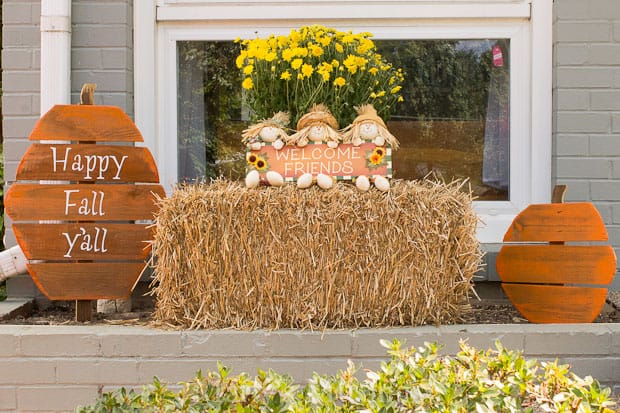
Decorating the entry of your home is such a fun way to bring each season alive. I’ve used these primitive wooden pumpkins for several years and in two different homes. With just a few materials I’ll show you how to personalize them for your home!
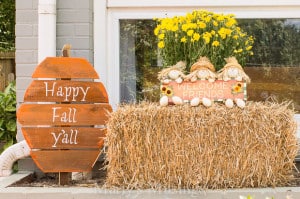
Fall is everywhere in my home, but one of my favorite places is greeting friends and family with good ol’ southern fall decor! I believe the front porch of a home sets the mood for enjoyment within the home.
This was before we gutted our front stoop and built a deck on the front of our ranch style house.
How do you make a wooden pumpkin?
Scrap wood pumpkins can be made out of many materials but I love the idea of using scrap wood such as pallets, barn wood or fence boards like I used. Go to your scrap pile and see what goodies you can find!
How to decorate wooden pumpkins?
I chose to use vinyl letters but permanent markers, acrylic paint or craft paint are also options. (Make sure to waterproof to prevent runs.) You can decorate with fabric, a bow, metal, jute or raffia, materials found at craft stores. Use non-traditional colors if that’s your thing or paint stripes on the autumn wood pumpkins! Just let your creativity dictate the direction your autumn decor will go!
Will a wooden pumpkin withstand weather outside?
These wooden pumpkins have been used for years and are still going strong. You can always use a spray sealant as a way of sealing if you’re concerned about longevity. I like to use this easy DIY pumpkin during Halloween and Thanksgiving because it makes such a fun beginner project.
Wooden Pumpkins from Fence Boards
(I’ve included some affiliate links for your convenience. Click here to read my full disclosure policy.)
Wooden Pumpkin Ideas to buy if you’re not crafty!
- Large wooden pumpkin cutouts
- Block wood raw pumpkins
- Wooden pumpkin signs
- Rustic pumpkin outdoor sign
- Farmhouse wooden pumpkin decor
Materials:
5-inch Disc Sander
Frog Tape Painter’s Tape
Orange Spray Paint and Primer
Cricut Explore Air
Adhesive Vinyl
Transfer Paper
Permanent labels
Step 1: Locate and prepare wood.
It’s important to let the wood weather so this is a project that might require some forethought and planning. If you’re using fence board just lean the wood against a fence or your house a few weeks before beginning the DIY wooden pumpkins.
Remove any nails from the boards and lightly sand if necessary.
The wood is pretty green looking in the picture below. The wood has just weathered that way. It’s possible to pressure wash or even sand the raw slats, depending on how the wood will be finished.
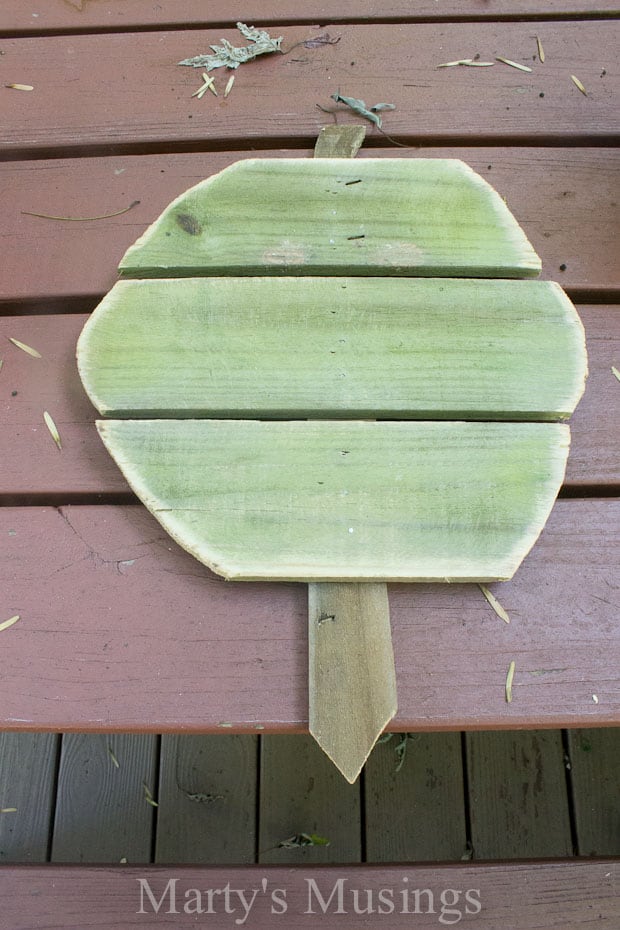
The real appeal of this material is its raw, naked beauty. To take advantage of that, I like an intentionally distressed, imperfect feel.
Step 2: Cut out design.
It’s perfectly okay to use pumpkin patterns or draw on the wood to achieve the design you want.

For these pumpkins, I first determined the length for the widest middle piece, then backed off each direction roughly two inches with each slat. The ends were cut with a chop saw and then rounded with a jig saw.
The vertical center stake was the anchor point and also the stem of the pumpkin, with a point on the other end to penetrate soil.
Step 3: Distress wood.
For extra distressing, I used a disc sander with a 60-grit wheel (which is like gravel glued to sandpaper) and roughed-up all the edges. This also helped grab the orange paint a bit better.

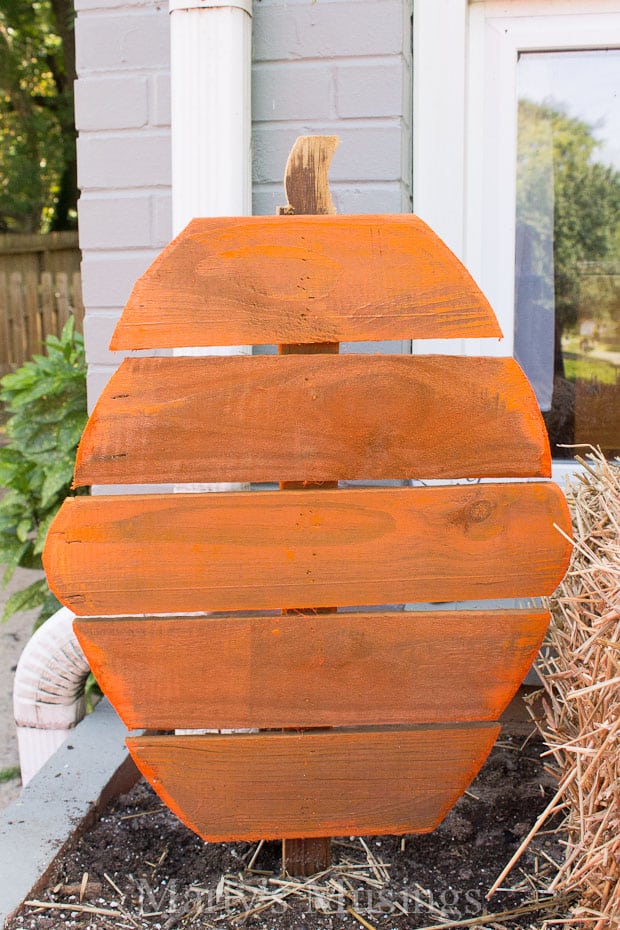
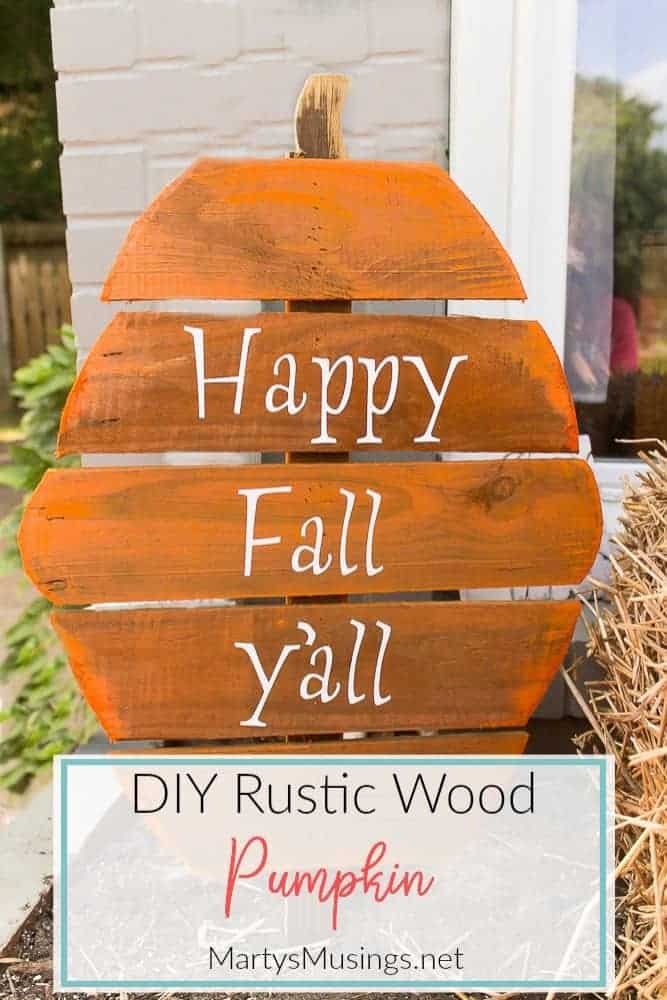
Step 4: Paint pumpkin.
This was a super-fast, super-simple project. To finish it off I taped off each end of the center stake and over-sprayed the top of the pumpkin with the orange gloss spray paint. Two coats here, just to enhance the color. The stake will remain a neutral wood color. Make sure to cover your work surface if you’re a messy painter like me!
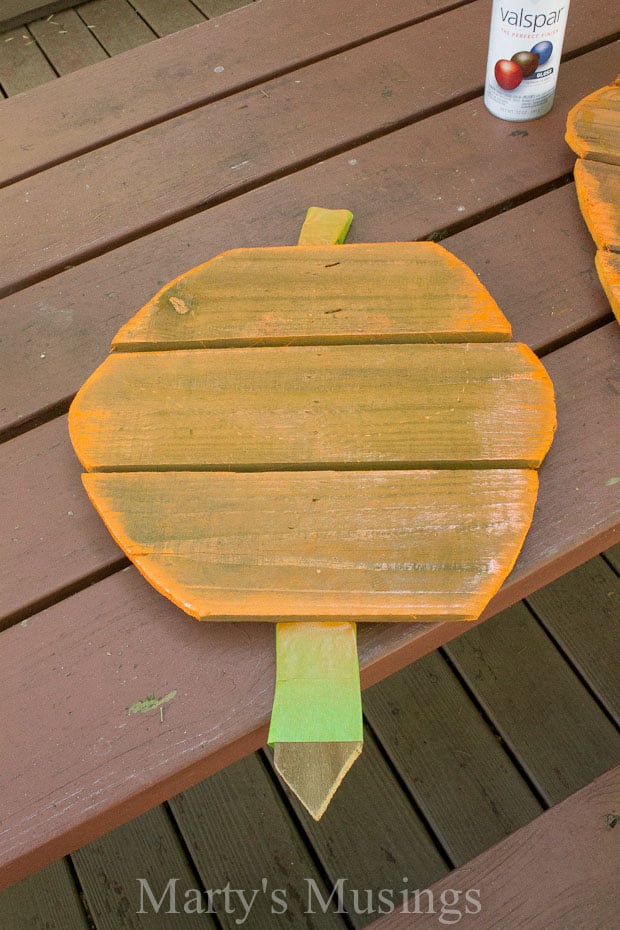
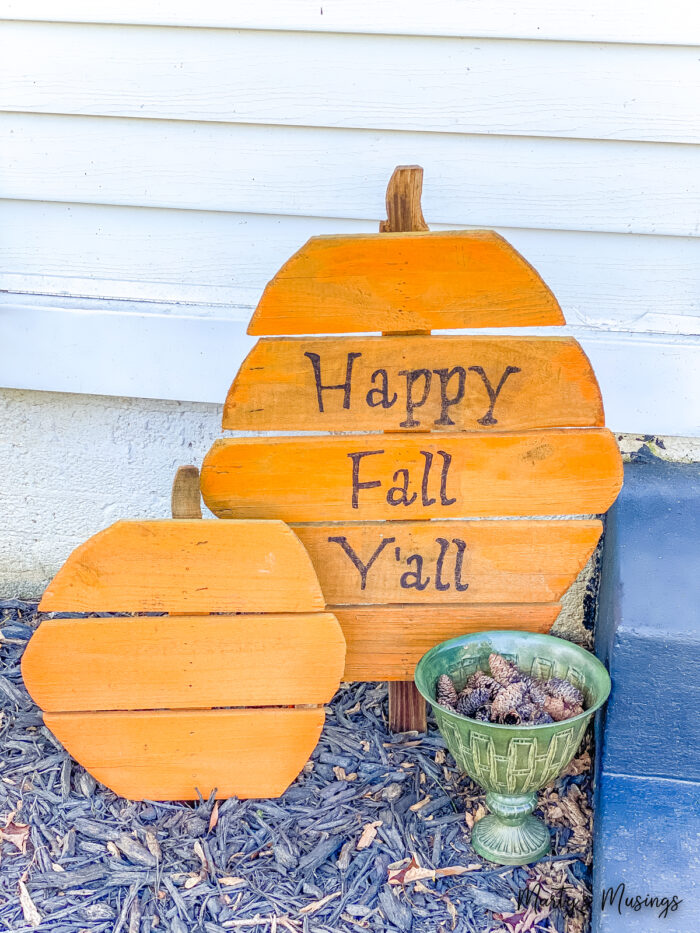
Same for the larger pumpkin. I love how the wood takes the color but also retains the imperfections in the grain.

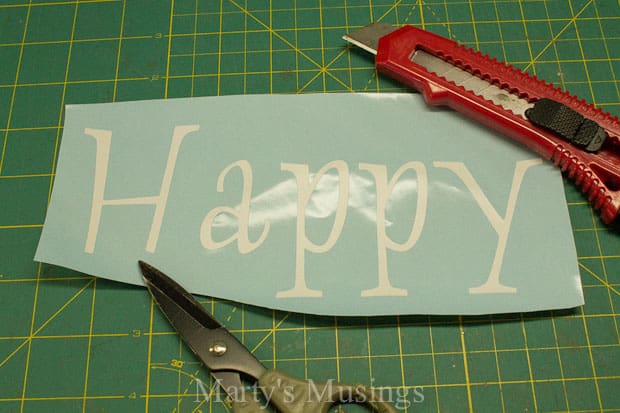
Step 5: Add adhesive letters.
I liked the plain pumpkins a lot but thought I could add my own style to it.
I hauled out my trusty Cricut diecutting machine and went to work. I chose the Lyrical Letters font for this project.
You can see the details of the exact process on how I use my vinyl letters on fence board on this scrap wood Christmas tree or learn how to make a family gallery wall with vinyl lettering here.
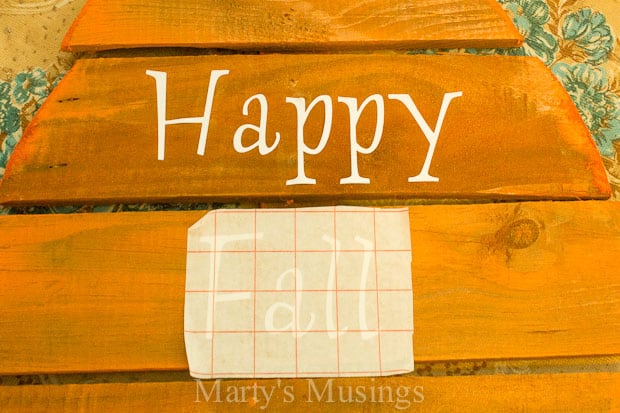
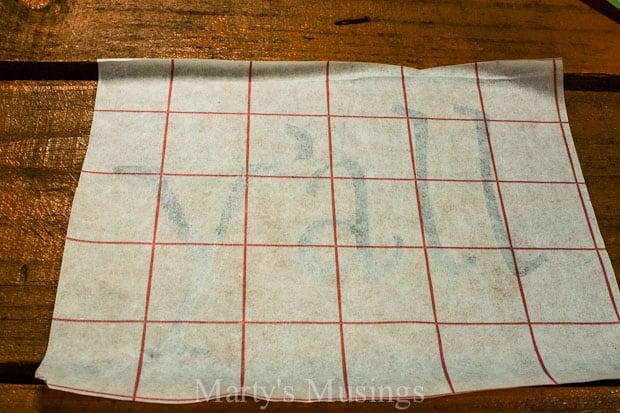
A good vinyl and transfer paper are necessary (this is my favorite vinyl and transfer paper).
Here’s the wood pumpkin without the greeting.
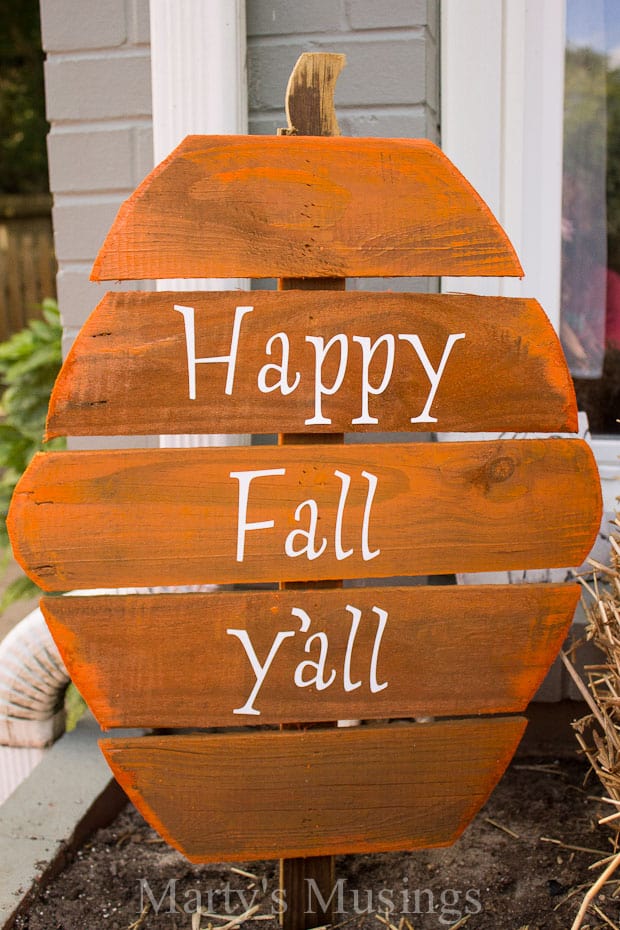
And here is my pumpkin decor, so much more welcoming and happy!
It’s perfectly fine to use permanent stickers or labels on your rustic pumpkins. As you can see below my stickers kinda lost their stickiness about year four or so. Permanent markers to the rescue!
These two pumpkins have followed me to my new home (read all about my new home after divorce here) and form their own little pumpkin patch! I’m thinking I might need to add a buffalo check ribbon to the display!
Wooden Pumpkins from Fence Boards
Ingredients
- 1 5-inch disc sander
- 1 Painters tape
- 1 Orange spray paint and primer
- 1 Circuit Explore Air
- 1 Adhesive vinyl
- 1 Transfer paper
- 1 Permanent labels
Instructions
- Locate and prepare wood.
- Cut out design.
- Distress wood.
- Paint pumpkin.
- Add adhesive letters.
Great idea. When does the fun part come? So far its been a lot of work and I am not having that fun part…….
Lol it’s probably only fun if that’s your skill set. I’m not a builder so it would be much harder for me. Good luck!
I think this is adorable! I would gladly pay you to make me a set!!
Hey friend. Wish I was that talented! They are cute, though!
Just a friendly note to let you know that this project was featured today on my post of 20 Pumpkin Crafts! Hope you’ll come by and check out the amazing Halloween inspiration!
http://www.thejohnsonsplusdog.com/2015/10/13/fall-favorites-20-pumpkin-crafts/
Thanks for the feature, Chelsea!
These are so cute and simple to make! Love it!
Thanks, Alison!
Thank you for linking up with the OMHG WW! Please link up with us again this week and share your great posts! xx
This is such an adorable pumpkin project! 🙂 Thank you for linking up at “A Little Bird Told Me” Wednesday link party. You have been featured on Mama’s Happy Hive blog! 🙂
Super cute and great tutorial! Thanks for sharing at the #HomeMattersParty – hope to see you again next week!
What a creative and fun idea! I love this! Thanks so much for sharing at Share The Wealth Sunday!
xoxo
Lisa