Painting Basics: Prep Your Brush and Roller
This post may contain affiliate links which won't change your price but will share some commission. Read more here.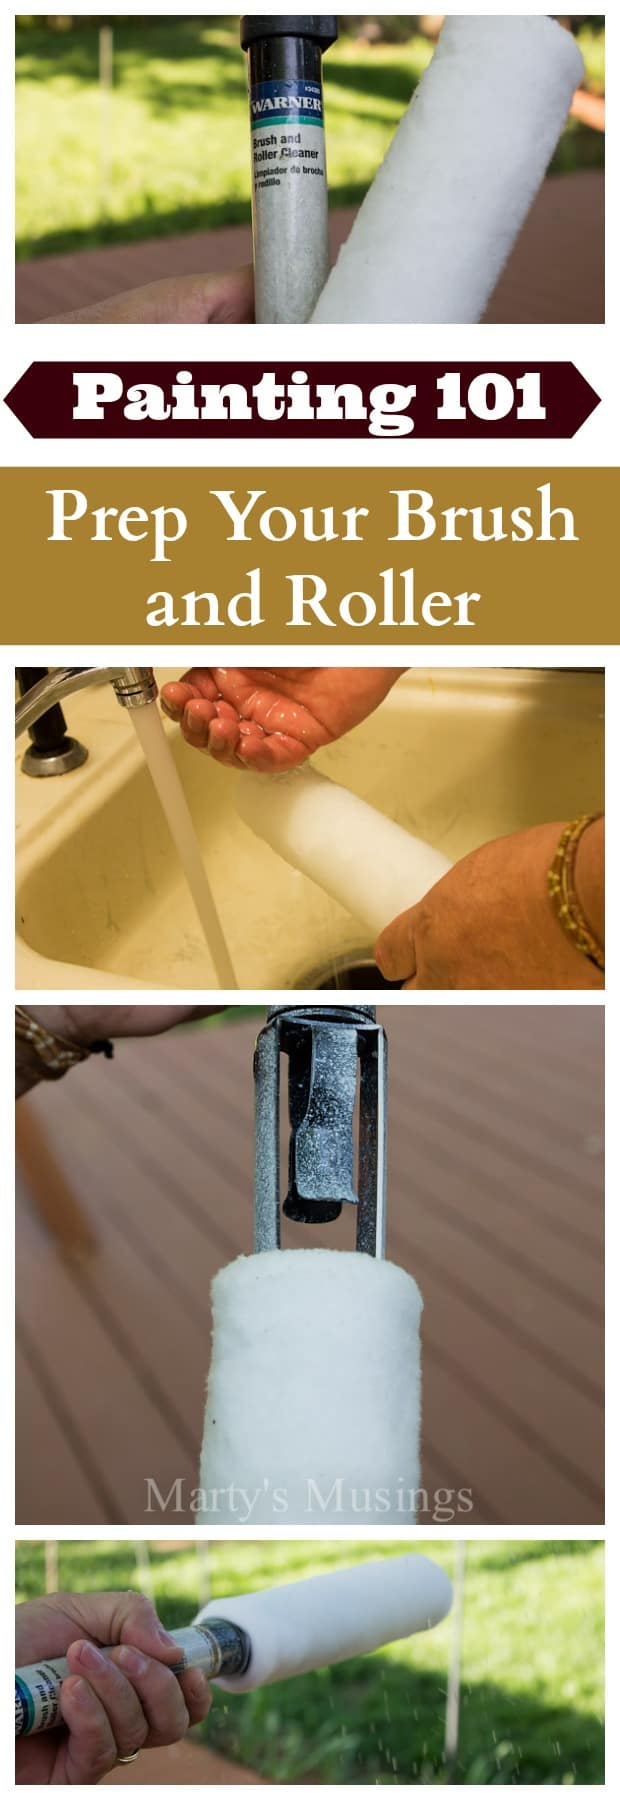
Here’s a new painting basics tip from my DIY hubby (who also happens to be a professional painting contractor!)
From Tim: This tip is actually called “setting your roller/brush” and is something you may have never heard of or even thought about doing. Let me tell you the benefits first and then we can move into the how-to.
When beginning your painting project, your tools (roller cover and brush) are dry. So when you introduce paint to them there can be an initial period of time where, even while you’re using them, they have yet to absorb the medium to a desired degree. “Setting” them eliminates this break-in time and lets you jump start with great coverage almost immediately. This process will also really help your clean-up and makes both tools much easier to remove paint from at the end of the job.
This isn’t rocket science and even the novice painter can benefit from the tip!
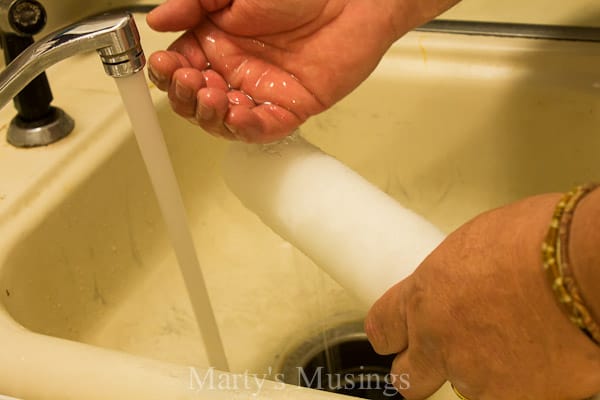
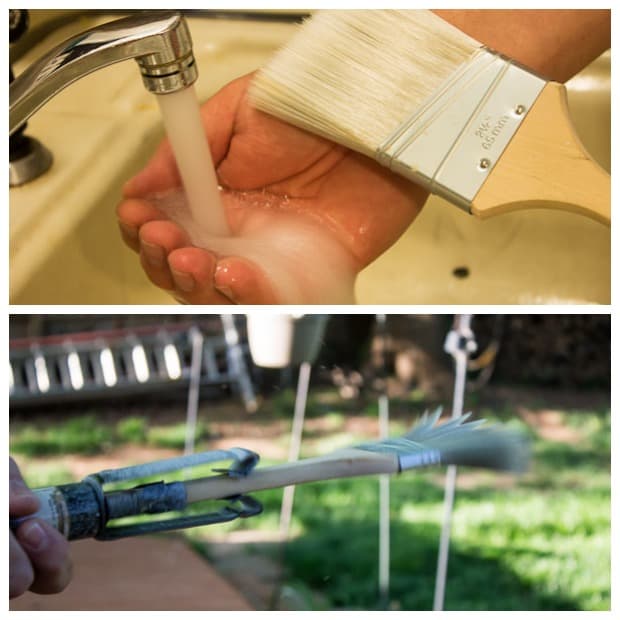
Simply introduce a small amount of water to the roller cover by letting the water run over your hand and then pressing the water into the cover. Rotate a few times, covering the entire surface with just a sprinkle of liquid. That’s it! Now, if you get it too wet, I’ll show you a great tool to take care of the excess.
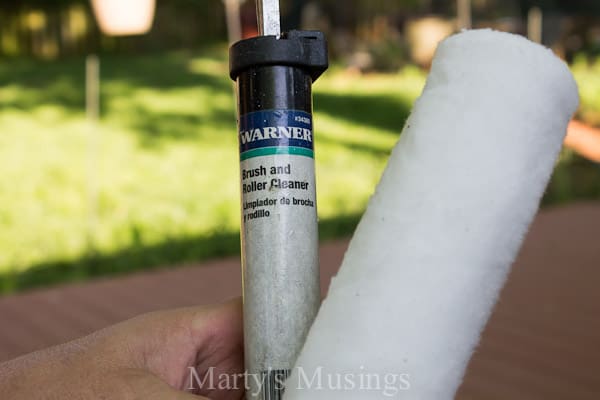
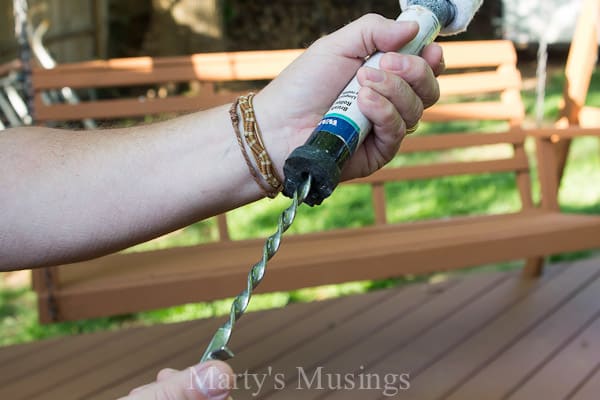
This is the Warner Brush and Roller Cleaner and it is an essential in the painter’s toolbox. It is nothing more than a spinning clamp, pump-powered by a spiraled handle. It works much like a bicycle pump but spins when the handle is depressed.
Place the wet roller cover on the perfectly designed clamp frame, all the way to the top.
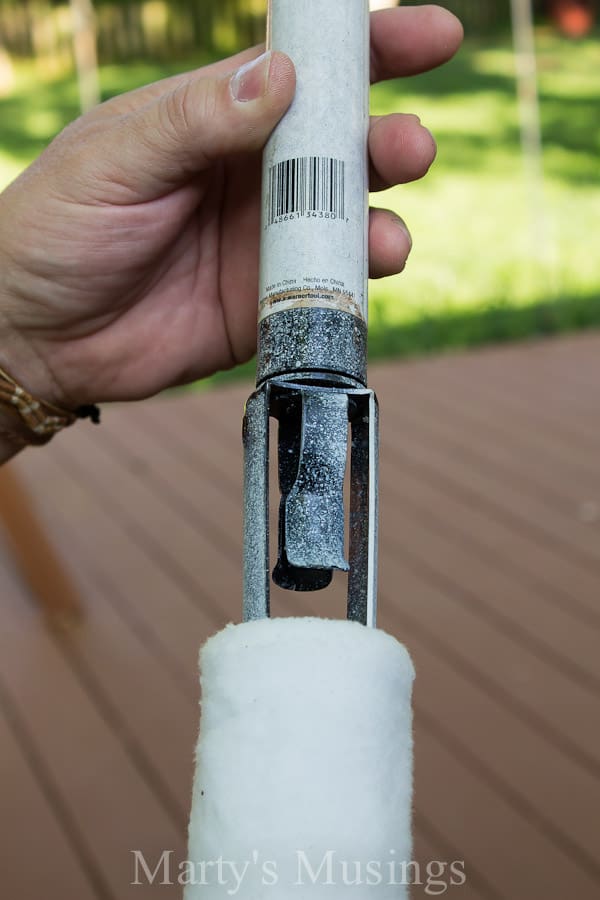
Clasp the body of the Cleaner and pull the handle back
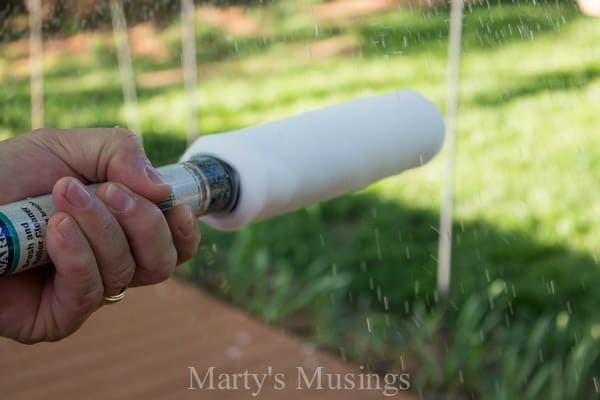
then pump the handle back and forth, spinning off all the excess water! I wish I had thought of this product!

“Awesome!” you say, “but what about the brush?” Same process here; just lightly wet the brush, kneading the water into the bristles. Again, if you get too much water, the Cleaner is also designed to accommodate a brush. Carefully (’cause this thing will poke a finger) press the brush into the double clamps and spin away!
This really is a great tool and a great tip to save you time on both the front end of the project and the clean-up end as well. FYI – if you are using oil-based paints, you can still go through this process using mineral spirits/paint thinner in lieu of water. Just be careful about where you disperse the excess.
For more Painting 101 Tips for both novice and experienced painters:
More Painting Tips
Practical painting tips for the home that anyone can use, including chalk painting, accent walls and choosing the right colors.
I’ve never heard this tip before, Marty! Thanks for sharing it!
Thanks Marty, I’m always grateful for painting tips. I love to paint, but anything that makes it easier works!