How to DIY Plank Walls with Chalk Paint
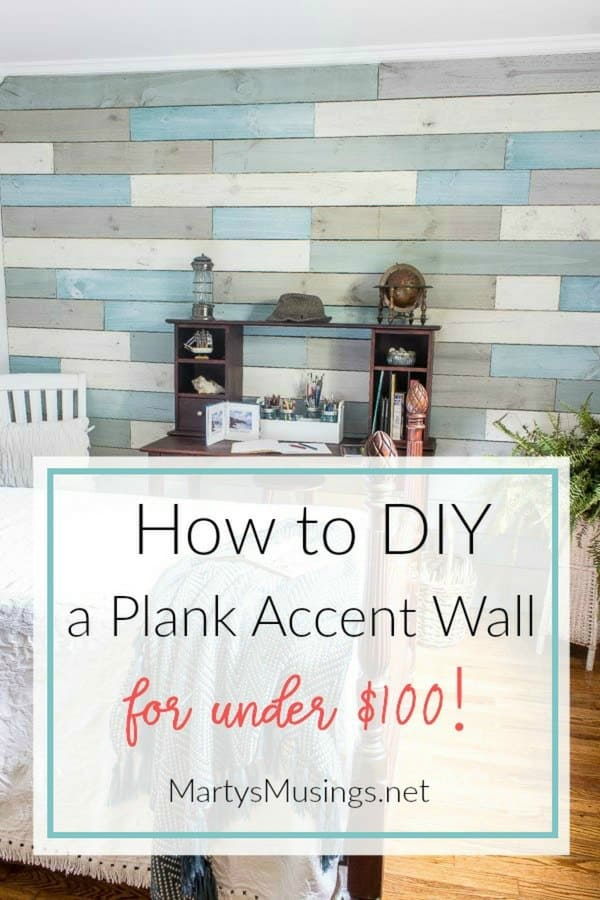
This post may contain affiliate links which won't change your price but will share some commission. Read more here.Let me show you how to DIY plank walls with chalk paint because they’re not only drop dead GORGEOUS but they cost under $100!
Sometimes when we’re unhappy with our home we feel like we have to completely start over.
Go back to the drawing board. Make a huge change, start from a fresh slate.
Can you relate?
I totally understand this feeling but I want to propose that maybe one project is all you need for the WOW factor you’re looking for. This one of kind creative accent wall made a huge impact in our small coastal bedroom makeover.

My DIY hubby and I have slowly been working our way around our home over the last few years, and I’ve been discovering my own personal style through the process. Slow and steady wins the race, right?
It also helps that my kids have been moving out and I’ve had some rooms to play around with! (You can read the story about this particular room here.)
Plank walls (similar to shiplap made popular by the show Fixer Upper) are not a new trend. We just didn’t have a space we wanted to play with until we made over this small bedroom into a coastal retreat.
Y’all know we love a good repurposing project (here are 13 of our favorites!) but for this project we had to start from scratch.
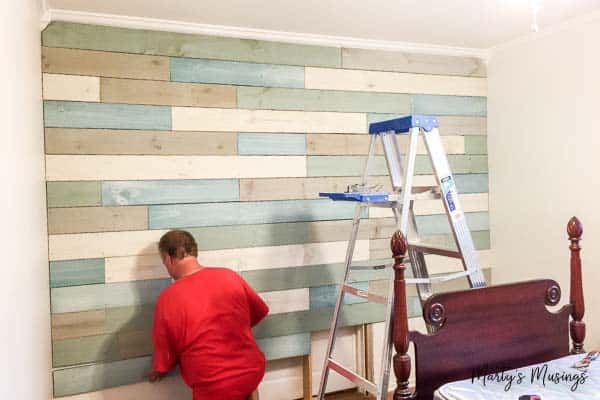
We really like to make our makeovers pop so here’s our youngest son’s room in all its teenage angst/computer building mess.
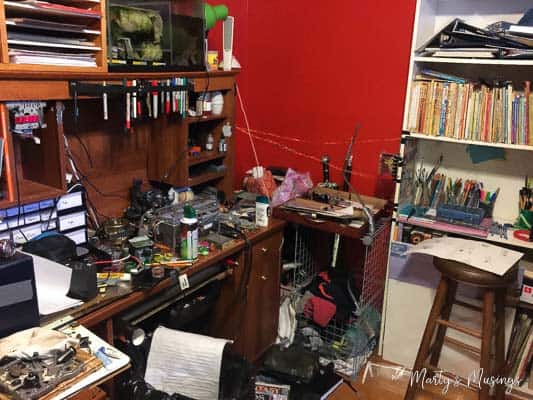
I know. Red walls. Glory. Behind that desk is a ginormous chalkboard wall that the artist kid wasn’t even interested in. Sigh. Again with the angst. Parents of teenagers unite!
This room is weird because behind the bookcase there are french doors and a step down into the addition in the back of the house and our youngest daughter’s bedroom. Our daughter has a dresser in front of the doors so there’s not an access point between the two rooms.
When we first moved into the house we thought about making the two rooms into a big master suite, but alas, five kids = end of that dream.
With the addition of the plank wall we were making the decision to seal off that end of the house FOR GOOD. Or until we sell the house and someone else goes crazy with a sledge hammer.
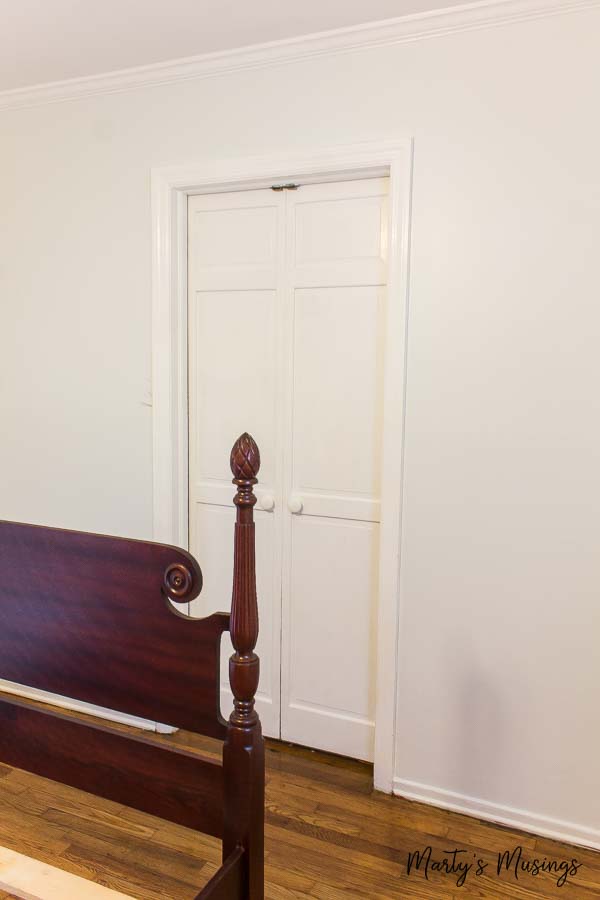
My hubby had already painted the room in preparation and he has some great tips on how to paint over dark walls. He also refinished the hardwoods which look ah-mazing!
How to DIY Plank Walls with Chalk Paint:
- Remove casing, baseboard and locate/mark studs.
- Decide on type of wood.
- Chalk paint wood.
- Begin piecing wall together.
- Determine pattern.
- Finish as you desire.
Materials:
(All the materials cost under $100!)
(I’ve included some affiliate links for your convenience. Click here to read my full disclosure policy.)
6′ x 5 1/2″ unfinished fence slats (available at any home improvement store)
2″ finish nails
DecoArt Americana Chalky Paint Escape (aqua color)
DecoArt Americana Chalky Paint Serene (light blue)
DecoArt Americana Chalky Paint Yesteryear (gray)
DecoArt Americana Chalky Paint Everlasting (white)
Paint Brush
How to DIY Plank Walls with Chalk Paint
From Tim:
This door linked two bedrooms, both requiring a bit more privacy than the door provided, so we chose this wall for the accent. It was a good, sound wall and, except for the casing, was free of obstacles.
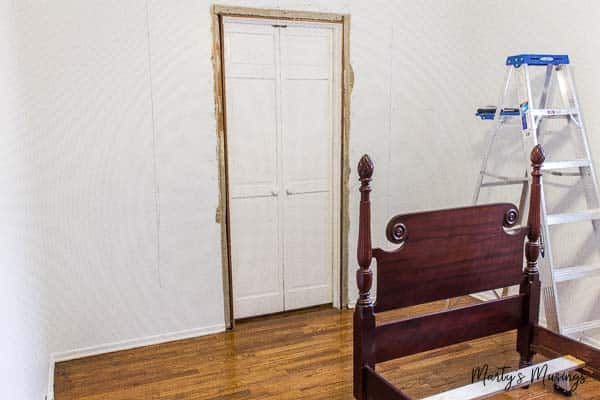
Step 1. Remove casing, baseboard and locate/mark studs
The first step was to remove the casing around the door and locate/mark the studs. Because I wanted secure nailing points for the ends of every board, finding the studs was critical.
Use a stud finder or go old-school and drive nails in the wall until you find the stud and mark vertical lines, floor to ceiling.
I also removed the baseboard for ease of installation and did not replace it.
Step 2. Decide on type of wood
In every other project I’ve done using re-purposed wood, I’ve used, well, re-purposed wood! With this wall, we tried something different in both material and appearance.
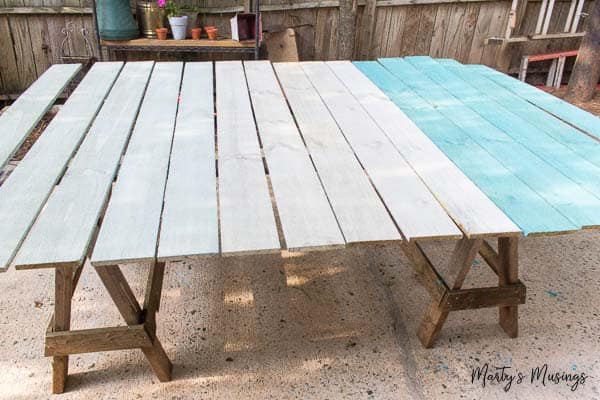
I decided to use fence slats purchased from Home Depot; just normal 6′ x 5 1/2″ unfinished slats. I then cut the corners.
Step. 3. Chalk paint wood
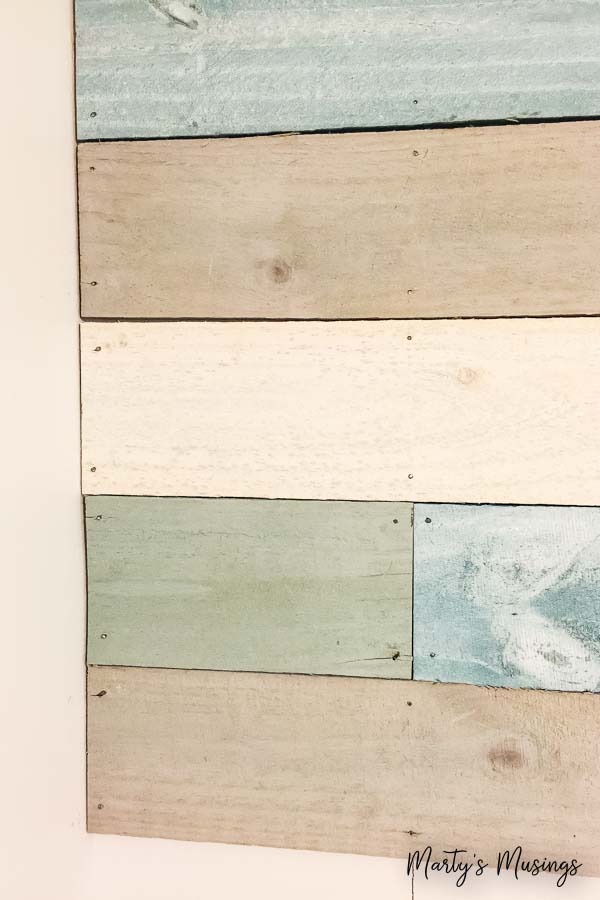
We played with several different colors and really wanted all of them to be somewhat transparent, so once we landed on the final four, I mixed the chalk paint with water (a 3:1 ratio, water to paint).

This softened the colors, especially the blue, let the imperfections of the wood show through, and gave them an almost smokey feel.
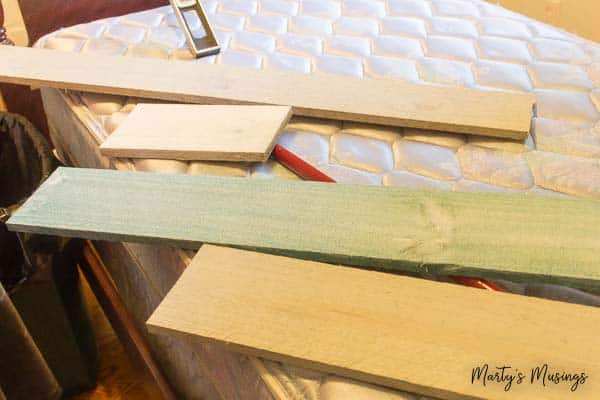
I chose not to seal with a wax. You can see the board after prep and painting.
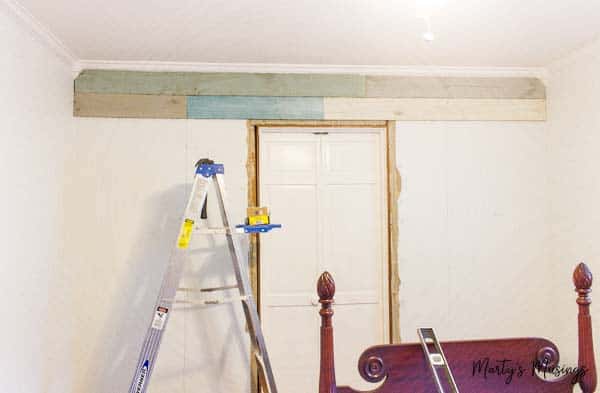
Step 4. Begin piecing wall together
Starting point is your choice, but I wanted full pieces showing at the top, so that’s where I started. Cut pieces to fit near the floor was fine with me.
So, remember the part where I said I wanted to hit the studs at the end of every board? Well, that decision wasn’t made until the second row!
That one seam on the top row was not on a stud, and I could tell doing that might cause problems with curling.
I also discovered, as you can tell from two pictures away, that I needed to add a stud in the middle of the door to achieve the pattern breaks I wanted. This pic…no stud. Two pics below…stud. More on the pattern breaks in a bit!
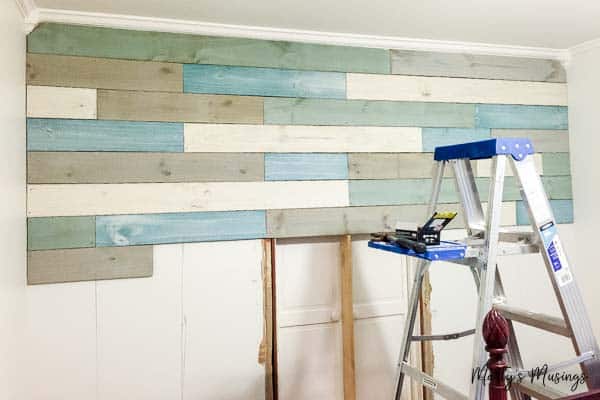
Step 5. Determine pattern
The fun of this project was that it was almost like a giant Tetris game! Remember that? You fit different colored and shaped blocks into complete lines as they dropped from the top of the screen.
While totally random, my color pattern was intentionally non-repeating, but still landing on the studs.
However, my goal was to not have any repeated seams…and I almost did it. I’ll confess my boo-boo in a minute.
The measure-and-cut was quite tedious, since I did all the cutting outside, on the other side of the house. But, they were all straight cut cuts, so it only cost me steps.
Here, you can see the intentional randomness of the pattern…and two deviations from my plan! That one repeated seam is right above the tool platform of my step ladder. See it?
Two seams right on top of each other on the center stud of the door! DRATS! The other is that first gray board on the bottom row.
See the issue? It doesn’t end on a stud! But, it was a short board that I was pretty confident was not going to curl, so I left it to alter the pattern even more. Look close, there’s more of those.
I used 2″ finish nails and was not precise as to how I let the boards meet. This is NOT ship-lap or tongue-and-groove, so they don’t lock together.
The only thing you want to do is make sure you stay as level as you can, checking each board before nailing into place. You will have to compensate for deviation in the way the slats were milled.
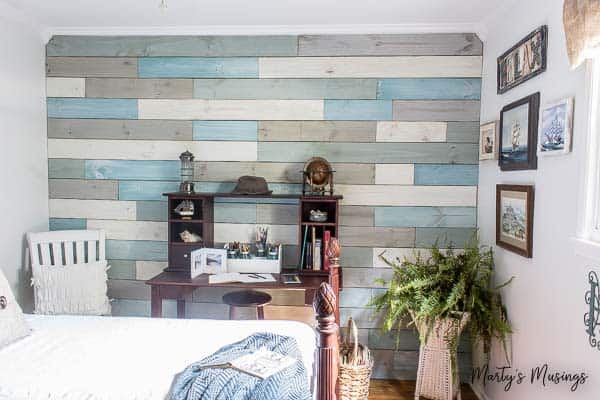
6. Finish to your liking
Nearing the bottom and the end! I mentioned I did not replace the baseboard, but I also chose not to install any kind of molding along the sides. I liked the rougher finish and my cut lines were nice and true.
The last row along the floor was just scribed to fit and also left with no molding. And one more goes in the “finished” column!
And one more goes in the “finished” column!
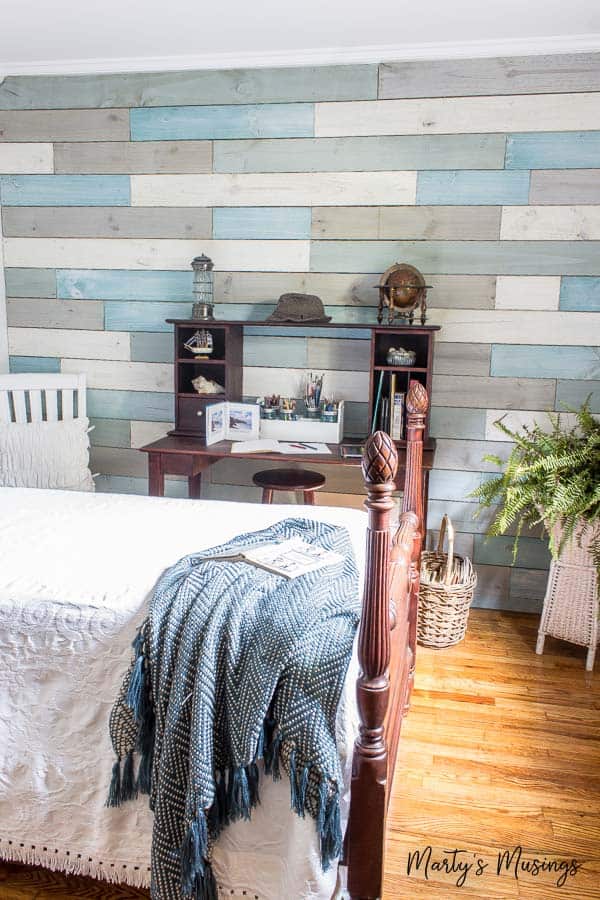
Back to Marty: Did you notice I don’t have a single piece of artwork on this wall? The wall IS the artwork!
My hubby did such an amazing job with the instructions on how to DIY plank walls with chalk paint, don’t you think?
He makes it seem so easy, but I’ll let you in on a secret. He thinks through the process in great detail before he begins.
Both of us research projects in our own way, me from the design aspect and him from a technical one.
Luckily, it all works out in the end!
Read all the posts in our Coastal Bedroom Makeover series:
♥ How to Paint over Dark Walls
♥ Teen Boy Bedroom Makeover
♥ How to Design a Room Around an Inspiration Piece
♥ How to Paint Furniture with Chalk Paint
♥ How to DIY Plank Walls with Chalk Paint (you’re here)
♥ Inexpensive DIY Beach Decor Ideas and a Bedroom Makeover
I’d love if you’d share this as inspiration to create your own treasured home!

Hi Marty, I have done something similar two years ago in my home in Fort Worth and then again recently in my condo on Galveston Island with old wooden fence that blew down from a storm out of my backyard.
My question is I wanted to chalk paint the wall but I did not do the boards prior to nailing them to the wall so now I have a brown recycled fence on my wall! Lol
Any suggestions on how to chalk paint in a pattern such as how you did once the boards are already nailed to the wall please?
Thank you in advance, Trish
Hi, Trish. I think it would be possible to chalk paint the boards if you used a rag or even a brush if you keep it from dripping. Then I would just paint from the top down and do a little bit at a time. Let me know if this works!
!) Did you just use the 8 oz jars of paint?
2) How did you cut the corners? Can you explain further
3) Did you do something to distress the wood? Sand the paint back off?
Hi, Dairlis. We did use 8 oz jars of paint and the number you need depends on the size of your wall. If you read in the tutorial, we diluted the paint so that will definitely stretch it. We did NOT distress the wood, sand them or apply a wax. Hope this helps.
This is so cool! Definitely trying this at home. My bedroom could use a makeover.
Would this painting technique work on finished wood? I love the natural look where you can still see the wood grain and I have an old book case that I would love to modernize
You can chalk paint on finished wood but when you distress you’ll see whatever is just below the chalk paint. You could always remove the finish so there is a natural grain underneath the chalk paint. Hope this helps!
Hi, did you remove the baseboard on that wall ? In the first pic where you’ve removed the door trim, the baseboard is still there. But in the final pic it appears it is not.
Hi, Gina. Yes, we did remove the baseboards and just planked all the way down to the floor. Hope this helps!
Love this! Did you use anything to seal the chalk paint? Or you just left it “natural”. Thanks!
Hi, Kathryn. We did not wax or seal the plank wall. It’s been four years and the wall is in pristine shape. Good question!
I’m about to do this project. Did you have to prime the wood before painting? I’m using plywood. And Did you have to sand down the planks afterwards?
Hi, Valorie.We did NOT prime the wood before painting. If you weren’t sure what you want to do I’d try priming and also not priming on a sample piece of wood so you can see how the chalk paint looks before you attempt the entire wall. We also did NOT sand the planks afterwards. Good luck!
So glad I found your page. Wow, that is absolute beautiful! We are re-doing our bathroom and my husband already has unfinished, horizontal pine boards (kind of like shiplap) up. I would like to do the variegated chalk paint colors on one wall using grey, white and light tourqouise. Would it be okay to do this over the unfinished pine?
I am curious what lengths you cut your boards. I have 8 ft boards and a 10 ft wide wall. What would you recommend I do? I know 8 can cut in 6 and 2, 4 and 4, 5 and 3 and 3, 3 and 2. I want variety in length and colors but don’t want to drive myself crazy! Thank you for your input!
Hi, Marta. Here’s my husband’s response: If you are mounting the planks on a sheetrock wall, the length of your boards will really be determined by the distance between studs. If you don’t nail right into studs, you’ll likely need to use anchors, which would really be a pain. If not, the planks will pull off the wall. Another option would be to use construction glue, like Liquid Nails, and glue them on the wall, along with nails.
So, my planks were variations on 16”, I think, since that was the distance between each stud (center to center).
Finally, the more colors you use, the more variation you will achieve, especially if your lengths are mandated by stud distance.
Hope this helps!
Drop dead gorgeous! I love everything about this and appreciate your including the colors.
Hi, Ryan. Thanks so much. We love this space and especially the unique wall. I hope you’ll find some other projects and ideas throughout my blog!
Love love love this. Will be doing this above our fireplace. We have a two story great room with a arched inset above the fireplace. I will be using browns and greens….I think it will look fabulous. Our room is a country “horse type theme”. Thanks sooooooooooooooooooooooooo much. Can’t wait for our winter project.
Hi, Gayle. Thanks so much! Your great room sounds amazing and perfect for a plank wall! Send me a pic when you’re done!
It looks really nice. Why did you cover the door? Just curious.
Never mind, I saw your comment of the connection between the two bedrooms.
Hi, Maria. This room has 2 doors and we covered the one that went into another bedroom to give both rooms more privacy.
Yes please share the colors you chose for this pictures would even be better!
Hi, Veronica. I went back and added the exact colors I used to the post so you’ll find all the info you’ll need there. There are also links for the products. Thanks for asking!
I love this! Can you tell me what colors you used? Those are exactly the colors that would match my den. It’s gorgeous! Thank you for sharing!
Hi, Kathy. Thanks so much! I went back and added the specific colors I used to the post so you’ll find all the info you’ll need there. Thanks for asking!
I love this! Can you tell me what colors you used? Those are exactly the colors that would match my bedroom. It’s gorgeous! Thank you for sharing!
Hi, Debbie. I went back and added the exact colors I used to the post so you’ll find all the info you’ll need there. Thanks for asking!
May I asked why you cut the corners? Was it a necessity or just choice. I’m not fond of that and would love for wasn’t needed.
It seems it was needed to compensate for the trim at the top of the wall.
Hi, Cat. We’ve got crown moulding around the ceiling and in the corners there are corner blocks and my husband just fit the planks around them. If you don’t have those then you’re good!
What a great tour MARTY! I can’t wait to see the rest of your pictures and I can’t wait to see it in person!