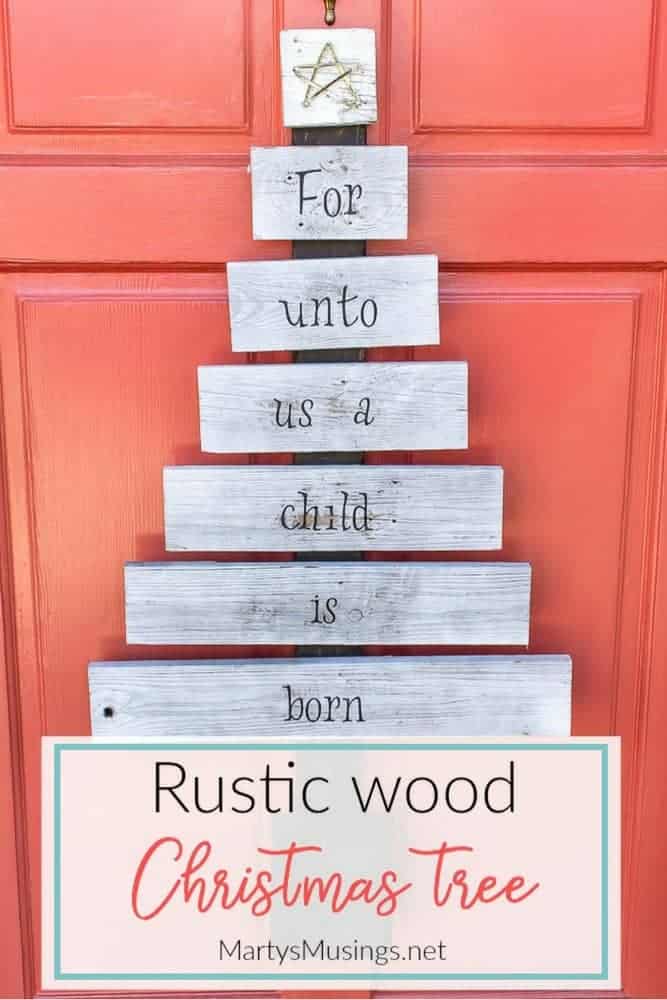
Scrap Wood Christmas Tree
This post may contain affiliate links which won't change your price but will share some commission. Read more here.Want unique repurposed holiday decor you can make yourself? This creative scrap wood Christmas tree is made from old fence boards and vinyl letters.
I love decorating for Christmas, but I don’t want my home to look like everyone else’s!
Inspiration for my projects can come most anywhere, but my husband and I both enjoy finding ways to repurpose old wood into something new and beautiful.
From Tim: This scrap wood Christmas tree was a fantastically simple project (inspired by this sign)!
My bride asked, “Can you make me this Chr…” and it was done. Well, maybe not THAT fast, but it did clock in at around 8 minutes – total!
I did it on my Super Pinterest Saturday, where I completed a handful of Pinterest projects in one day.
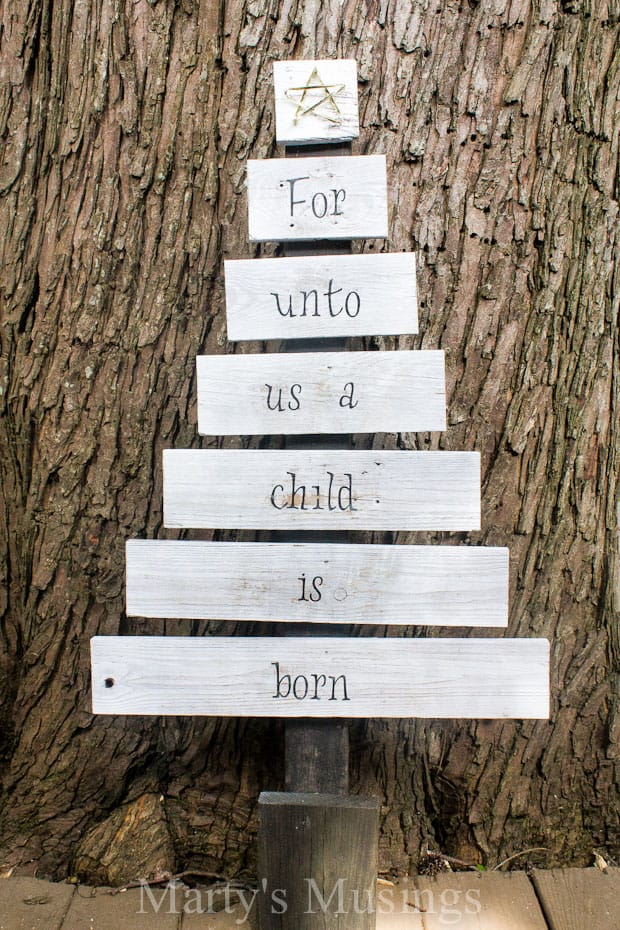
Every bit of it was pulled from my scrap wood re-purposing pile; the trunk of the tree was part of an old bookshelf and was already a dark stain, the “branches” were my favorite re-purposed fence slat wood, and the “stand” was just a chunk of 2″ x 6″.
Scrap Wood Christmas Tree
(I’ve included some affiliate links for your convenience. Click here to read my full disclosure policy.)
Materials:
Scrap wood or fence boards
Zinsser 1-2-3 Spray Primer
Black Spray Paint
Cricut diecutting machine
Lyrical Letters font
Black glossy vinyl
Step 1. Choose wood
Honestly, I don’t throw anything into the fire pit anymore! The picture shows a rough set-up of the tree for approval…and a picture, of course. Man, the photographer slows me down sometimes!

While I liked the rough, unfinished look of the wood, I wanted a bit more uniformity to accommodate the vinyl lettering to happen later.
Step 2. Spray lightly with aerosol primer
All I did was lay out the “branches” and dust them with a light aerosol primer (just happened to have some Zinser 1-2-3 oil-based primer). No need to do the back, but I did hit all the edges and ends.

See! That light spray gave a nice look, while still showing the grain and imperfection of the lumber.
Step 3. Attach to center board
I didn’t want perfection, so I fought my need to measure the center of each board and adjust the spacing between each one and achieve maximum symmetry…bah! I just banged each piece in with two finish nails and let them lay where they wanted to go.
Step 4. Spray paint “stand”
I did give the “stand” a good coat of black spray paint, but just because I had it in the shop. Gotta love my design philosophy.

My work here was now done! I turned it over to the photographer my wife who labored over the vinyl lettering.
I also drove five nails in the top piece for her to make a beautiful ribbon star, but she will probably insert her own words at this point.

Again, you wouldn’t believe how easy and fast this little piece was, and it is such a nice, new addition to our Christmas explosion decorations.
From Marty: Yes, my husband can make most anything. He may not completely follow the directions, but he’s good at winging it (much like with his acting skills!)
This particular Saturday he was a man possessed and finished projects faster than I could take and edit pictures, write and post the project!
The hardest part of this project was the lettering.
Step 5. Use a die cutting machine to cut out vinyl letters
I hooked up my trusty Cricut diecutting machine and practiced cutting the letters on cardstock.
I decided on the Lyrical Letters font and set the size to 2 inches. Every time I do a vinyl project I have to go back and watch this video to help me!
(The new Circuit machines don’t use individual fonts that you buy but I’m still using my oldie but goodie machine!)
Even with that I still messed up the letters the first time.
After I cut out the black vinyl it was time to press the letters to the wood. Easier said than done.
The vinyl did not stick well at first and there was a learning curve in figuring out the right pressure to get the letters to stick without ripping them.
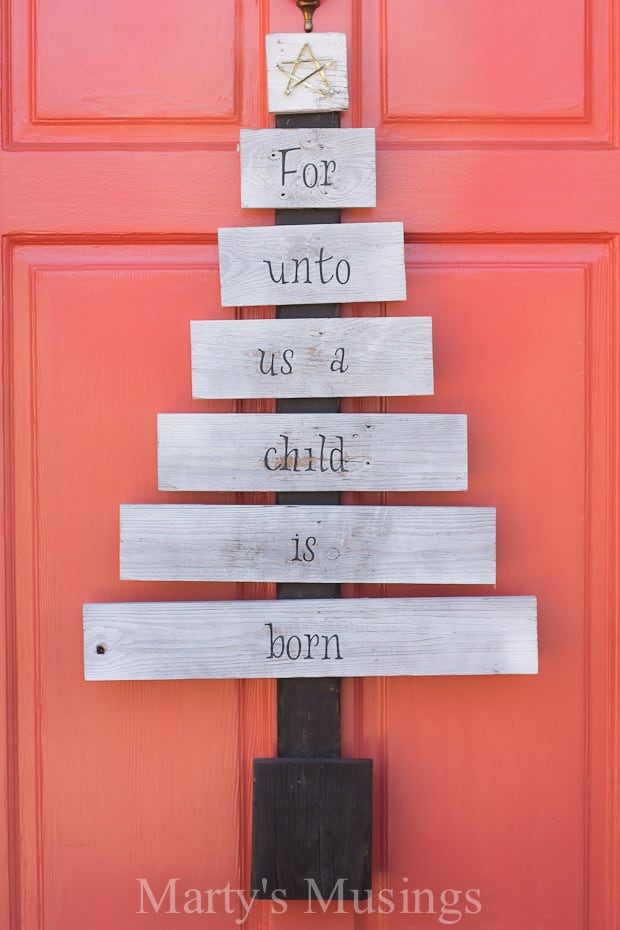
Step 6. Attach to wood and distress letters with sandpaper
I had to do a couple of letters over and once I got through the first couple of words I started to get the hang of it. I distressed the letters with sandpaper to give a more vintage feel to the wood.
Several friends that have been to our home thought the letters were routed out of the wood. Score one for realism!

We had this ornament hanging on our real tree and thought it would have special meaning hanging on this project. Without Christ there is no “Christ”mas.

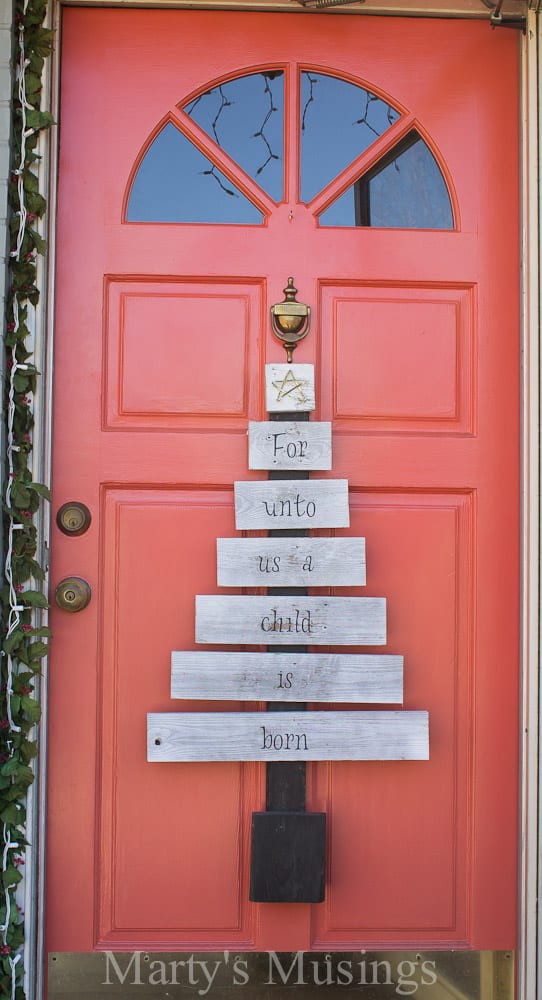
I’ve also used my favorite Christmas tree on my front door in place of a wreath.
How do you like my scrap wood Christmas tree?
The tree looks absolutely WONDERFUL!
Thanks so much for sharing this at The DIY Dreamer… From Dream To Reality!
Thanks, Christine, for the sweet comment on our scrap wood Christmas tree. I appreciate you hosting a link party each week and I’m always there! Blessing!
Marty@Marty’s Musings
“Without Christ there is no “Christ”mas.” Amen, sister! Love the tree.
Hi, Kristen! I’m so glad you visited our scrap wood Christmas tree post. It is a sweet, simple reminder of the season. Blessings!
Marty@Marty’s Musings
I LOVE this! Would you sell these?
Hi, Deb. We have actually made a few of these projects for gifts. Were you interested in buying one of the scrap wood Christmas trees? I imagine they would be quite expensive to ship. My hubby also ran out of wood so we have to scrounge around for some more for future projects!
Marty@Marty’s Musings
What a wonderful idea!! . I am visiting you via Somewhat Simple. I look forward to seeing you at My Dream Canvas. Happy Holidays. Anu
Such a great idea!
Thanks for visiting Marty’s Musings, Megan, and my scrap wood Christmas tree. Hope your holiday is blessed!
Marty
looks wonderful!
New fan here from Frugal Days. If you haven’t already, I would love for you to come visit me at Fresh Eggs Daily and share at my weekly Farm Girl Blog Fest: http://fresh-eggs-daily.blogspot.com/2012/12/farm-girl-friday-blog-fest-12.html
Happy Holidays!
Lisa
Fresh Eggs Daily
Hi, Lisa. Thanks for visiting Marty’s Musings and I did link up again this week! Thank you for hosting.
Marty@Marty’s Musings
A beautiful tree with a beautiful message. I like how you used the star on top: perfect!
Thanks you for reminding us of the reason for the season…
hugs x
Crystelle
Thanks, Crystelle, for visiting my blog and leaving a sweet comment on my scrap wood Christmas tree. It’s a good reason to remember what the season is really about. Blessings!
Marty@Marty’s Musings
wow totally love this great project
Wonderful project and so true! Jesus IS the reason for the season.
JoAnn, thanks for visiting my post on our scrap wood Christmas tree! It’s a great reminder of the reason for the season!
Marty@Marty’s Musings
How pretty!!! Hi! I’m your newest follower and was kinda maybe sorta hopin’ that you’d hop on by my blog and follow me back!!
xoxo-
Sarah
http://www.enjoyingtheepiphany.com
Thanks, Sarah, for visiting my blog. I wish you great success in your endeavor as well!
Marty@Marty’s Musings
I love this!! Just wanted to let you know I’m featuring this blog post in my Christmas Projects round up tomorrow:)
Katie
http://www.funhomethings.com
Thanks so much, Katie, for featuring my scrap wood Christmas tree! It was a fun project and a simple reminder of the season. Blessings to you!
Marty@Marty’s Musings
This is so great! I love how the letters look carved out….you did goooood! 😉 It’s great to have such talented hubbys!! Visiting from Sugar Bee
Love this tree – thanks for sharing. Joining from Inspire Me Monday http://allthoseartsygirls.blogspot.com/
That is beautiful, Marty. I would love to have that hanging on my wall! I would love for you to share it at SHOW-licious Craft Showcase.
http://sew-licious.blogspot.com/search/label/craftshowcase.
I hope to see you soon! 🙂
btw…my name is Marti, too! HA,
Thanks for visiting Marty’s Musings, Marti! Are you a Martha, too? For years, the only Marty I knew was a guy so I’m glad to know there are more of us out there! Thanks for visiting my scrap wood Christmas tree post!
so cute! i love the star added to the top!
Hi, Cassie. Thanks for visiting my scrap wood Christmas tree post. Love easy and high impact!
Marty@Marty’s Musings
I think this is one of the best ideas that I have seen.
Hi, Jet. I’m glad you liked the scrap wood Christmas tree we made and I appreciate your kind comment. Hope you’ll visit my blog again soon!
Marty@Marty’s Musings
Love this! I especially like the ornament you chose. What a humbling truth!
I’d love it you linked this up at my Show & Tell party. http://www.gingerlymade.com/2012/12/show-and-tell-4.html It runs from Thursday – Tuesday each week.
Merry Christmas!
I really love this project. Its got that rustic feel but is meaningful. If you get a chance I would love for you to come link up at my Pin Party.
http://sarahdawndesigns.blogspot.com/2012/12/pintastic-monday-20.html#.UMYpFazxxgg
Love anything made from scraps.
Homa Style is having a 12 Days of Christmas link party going on now.
I would love it if you linked up your scrap wood Christmas tree.
The link is http://homastyle.com/wp/2012/12/01/12-days-of-christmas/
I Love your decorating ideas an the colors you put together are my favorites.
I absolutely love this!!! Thanks for sharing!
I love this project! Love using what you have!
Hey, Danni! Thanks for always commenting on my posts. I appreciate the support!
Marty@Marty’s Musings
Marty I love the way it came out… I also made one using scrap drift wood. I like the words on yours! Nice job!
Susan
Susan, I’m so glad you like my scrap wood Christmas tree! I would love to have some drift wood to use for a project. It’s amazing what you can do with nature’s provisions!
Marty@Marty’s Musings
I love simple projects with a big impact! I’ve been wanting to do something similar for a while. Might just have to whip up one of these tomorrow! Headed over to follow you…looks like you have some great projects to inspire 🙂
Becky, I’m so glad you found my blog and liked the Christmas tree project. I don’t have anything for that wall in the kitchen since we’ve redone it so that buys me some time!
Marty@Marty’s Musings
That is SO cute!! I love the look of it. Beautiful!
Michelle, I’m glad you liked my scrap wood Christmas tree. It was a fun and fairly quick project. Love that!
Marty@Marty’s Musings
This is so perfect for Christmas. What a great idea! Thank you- Lani
I love this! There are so many variations of the scrap wood Christmas tree and this is by far my favorite! Thanks for posting this.
Awww, thanks Audra! I love our Christmas tree made of fence boards, too! Thanks for visiting Marty’s Musings.
Marty
Hi Marty. Just finished my scrap wood tree. You can check it out here: http://renewedprojects.blogspot.com/2012/12/scrap-trim-christmas-tree.html
Gave your site full credit for the idea. Thanks again!
Oooh – I love this y’all! You made it look so simple. The gray’ish color is perfect too. Great job!
LOVE it!!!
Great job, Tim & Marty! Your gifts certainly compliment each other.
Can’t wait to see what other projects you completed.
🙂 🙂 🙂