How to Make a Gallery Wall with Family Photos
This post may contain affiliate links which won't change your price but will share some commission. Read more here.Complete tutorial on how to make a gallery wall with family photos with everything you need to know from layout to choosing frames, pictures, words or inspiration.
We have transformed several areas of our home in the last three months and I want to start out sharing the one that tickles me the most.
When I first started transforming our home a few years ago I was enthralled by Pinterest and created too many boards to count.
I still use it to organize my ideas but the inspiration for my project is found here. I was totally enthralled with the details on how to make a gallery wall in our den.
How to Make a Gallery Wall
(This post contains some affiliate links for your convenience. Click here to read my full disclosure policy.)
Step 1: Collect Frames and Paint
Since I am a yard saler/cheapskate thrifter I began by collecting frames from around the house and up in my personal store, otherwise known as the attic.
I had no idea how I would do the arrangement but I got enough frames to use 4×6, 5×7 and 8×10 black and white pictures.
Whenever Walgreens had a sale on prints (or a free offer) I would order more black and whites in various sizes.
I did NOT think through where everything would go and in which frame ahead of time. I just ordered pictures I liked or ones that would give me some variety.
My husband spray painted the frames with an aerosol primer and white spray paint. He even sprayed some of the mats. The additional mats I bought half off at Michael’s.
This process of ordering pictures and gathering the frames was time consuming, lasting over a few weeks. It was a little tedious. Okay, very tedious.
Step 2: Layout on Floor or Flat Surface
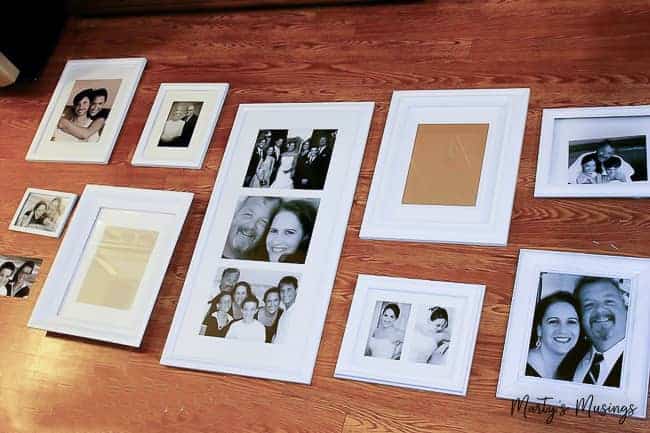
I then started randomly inserting pics in frames and created an arrangement on the kitchen floor where I could get an idea what I still needed and which frames I would be working with.
Step 3: Hang Frames
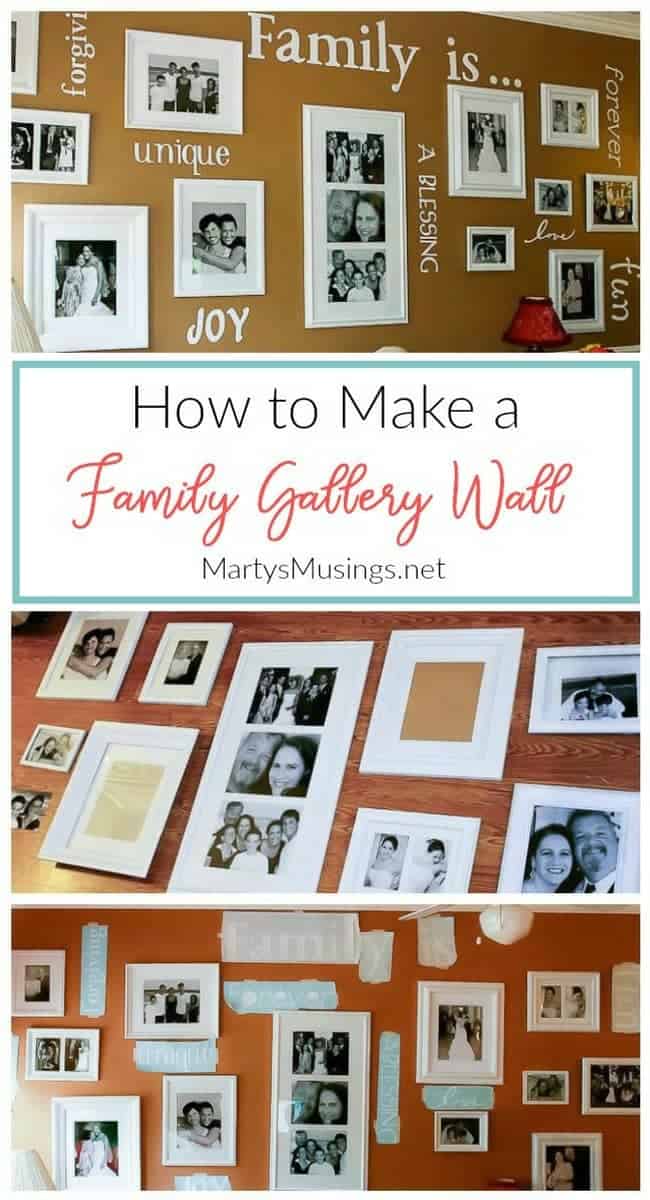
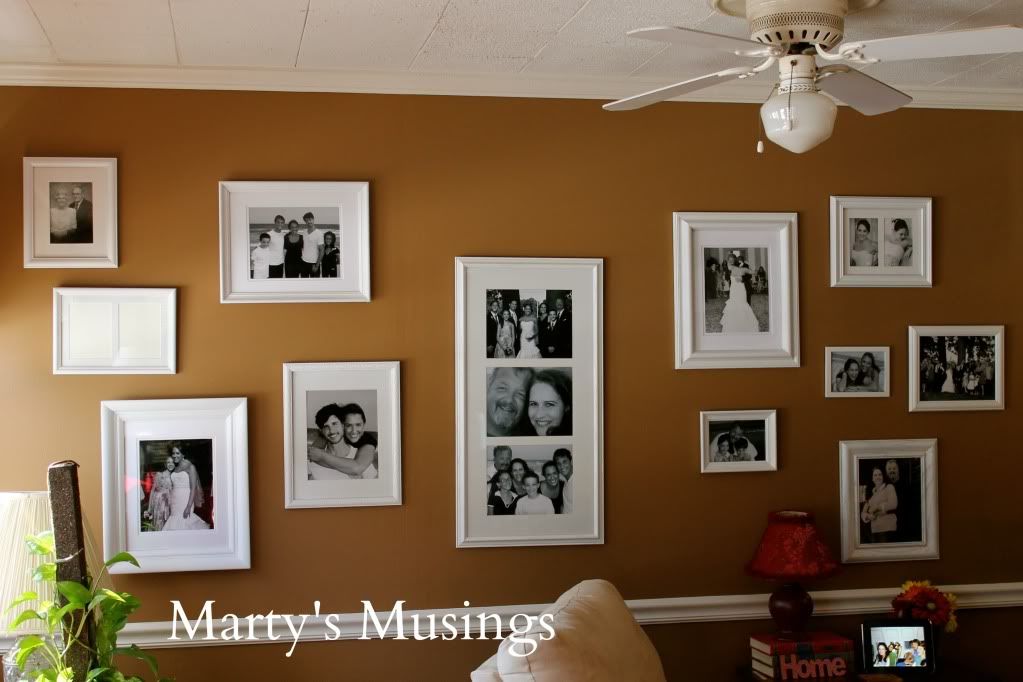
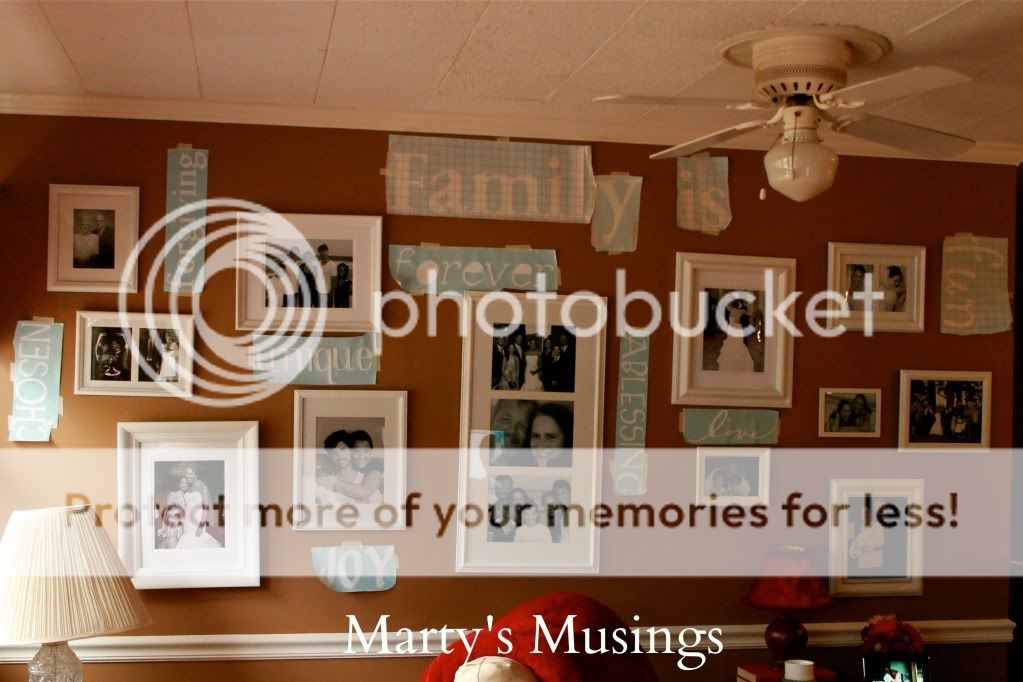
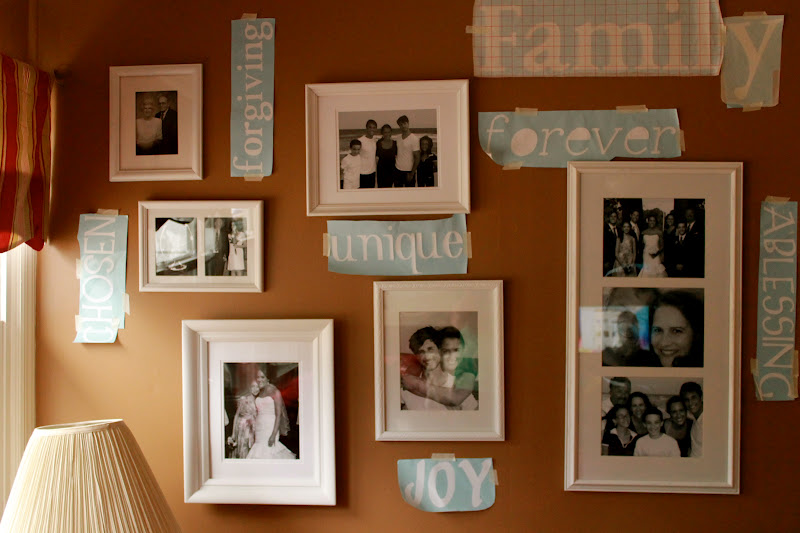
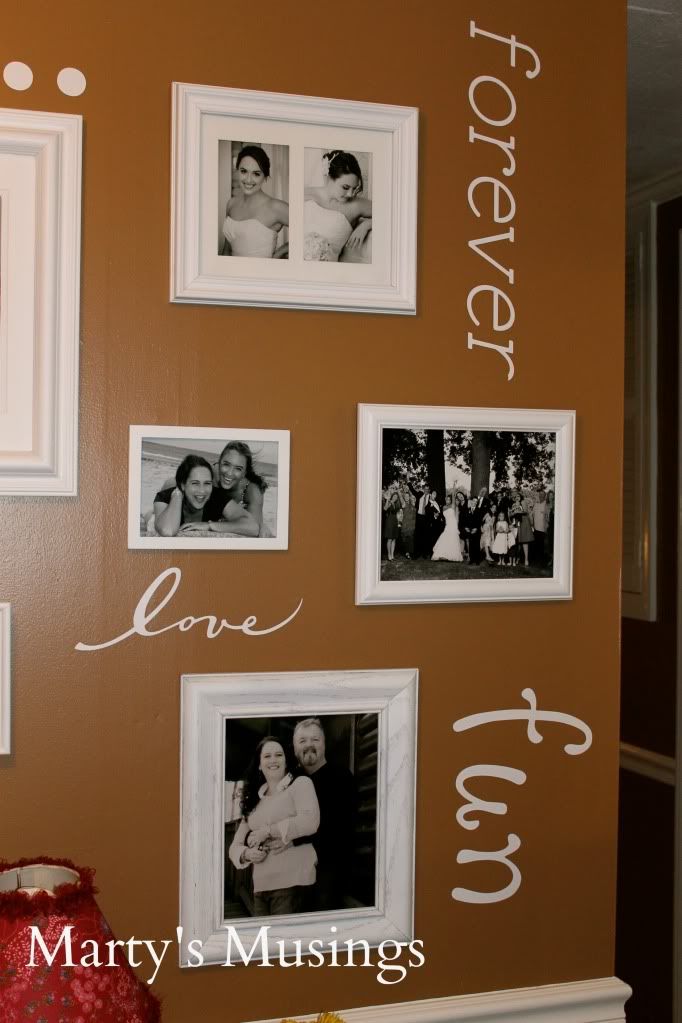
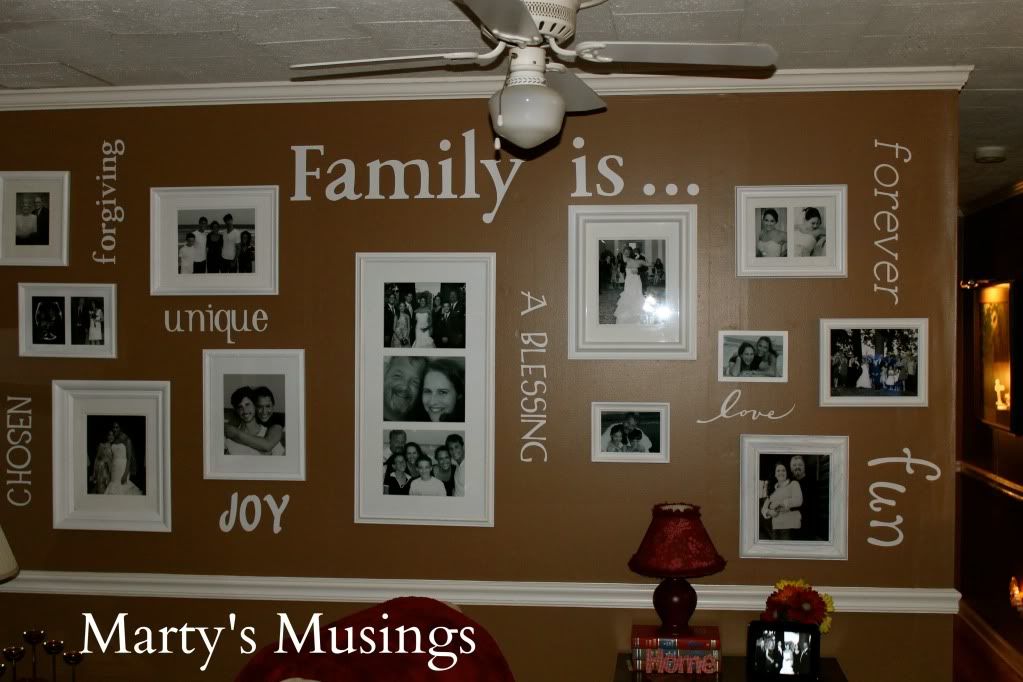
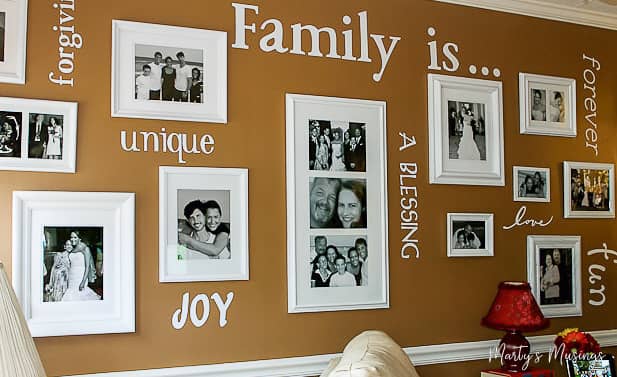
For this wall the most important part was deciding on the center frame which contained three 8×10’s. My husband centered this on the wall and just started randomly hanging the rest.
There are certainly more precise ways to go about this but we knew we didn’t want a symmetrical grouping.
Step 4: Decide on Words/Saying
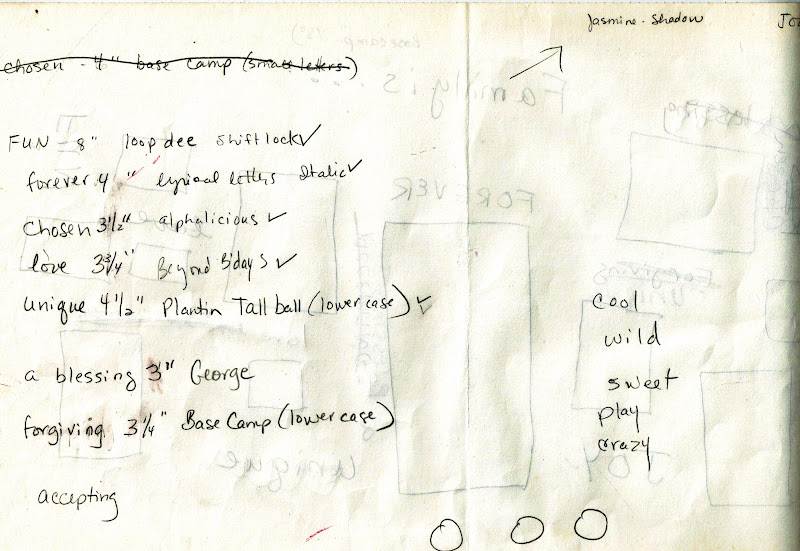
On a sheet of paper I laid out the “family is” phrase and loosely diagrammed the frames.
I enlisted my family to give me words they felt described our family. I then sketched the words around the frames. (None of this was done in precise measurements….obviously.) You can tell by the sketch that I later moved words around.

As the weeks passed while I was working on this project I was also buying white vinyl for my Cricut, using coupons, of course, from various craft stores around town.

Step 5: Use Diecutting Machine to Cut out Words
The part I dreaded most and kept putting off was the final step of cutting the words out with my Cricut Expression.
Using the 12×24 cutting mat, I chose one word and font (cartridge) at a time.
I measured in between the frames to get an idea of the size I would need. However, the size is relative when using the Cricut so I cut out each word from cardstock first to make sure they would fit in the allotted space. I also kept a list of which fonts and sizes I used so I wouldn’t duplicate them.
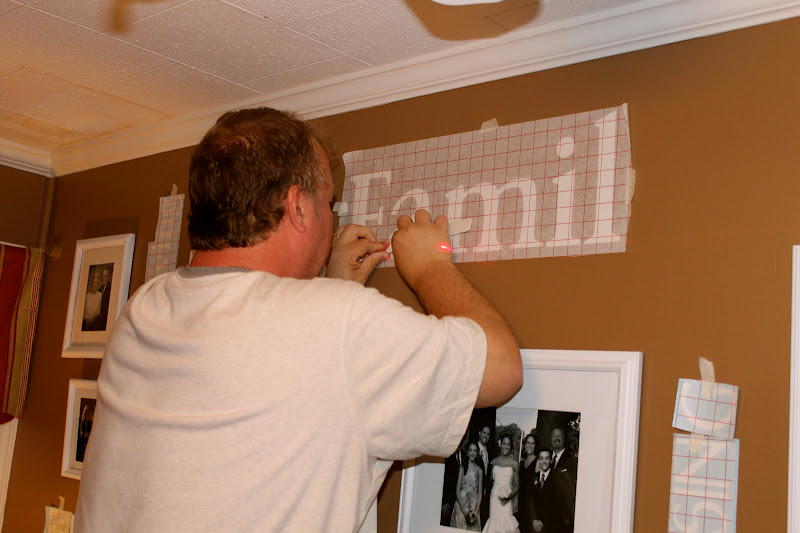
Step 6: Attach to Wall
Next I used masking tape to align the words on the wall as I was deciding where to place them. I loved the flexibility of moving the words around to find the best look.
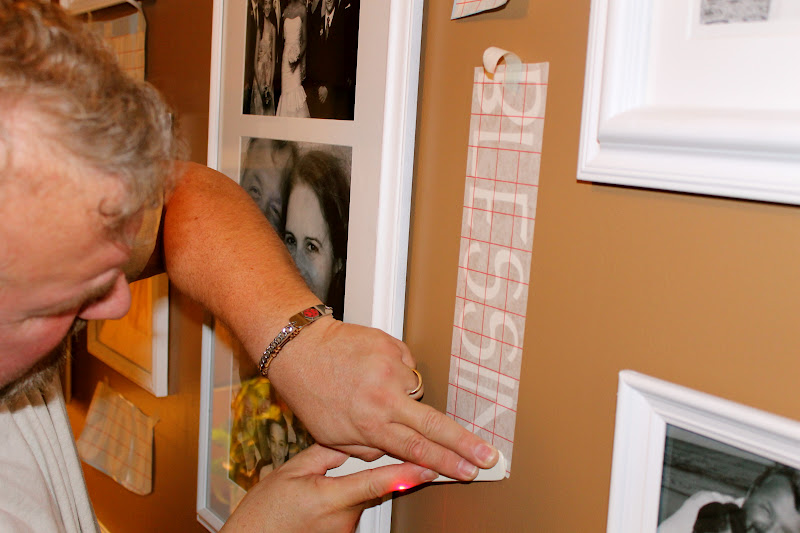
I let my husband do the actual work of attaching the vinyl since he is much more of a perfectionist than I am and is also better at detail work.
He found this little gadget that was an amazing help. It’s a laser level that mounts to the wall with removable adhesive tape and projects up to a 15 ft. laser line. Lining up the words….easy peasy.


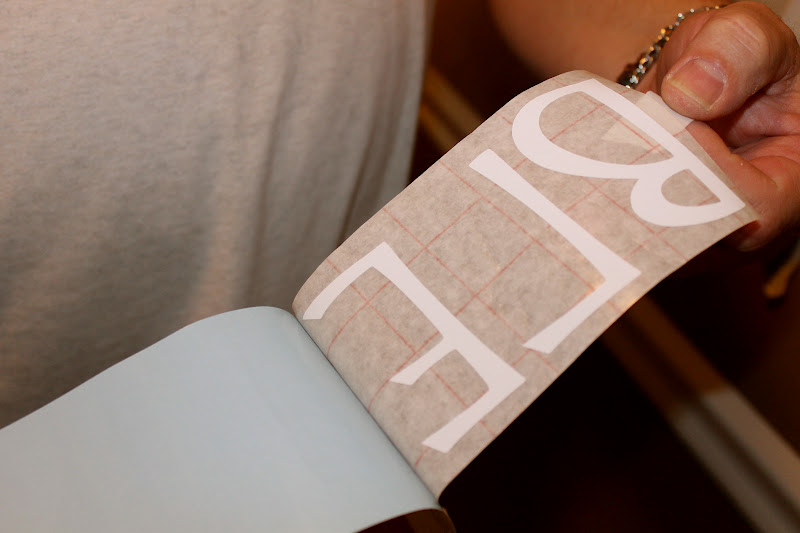
Peeling the transfer paper off the vinyl word.
Our family motto is “families are forever.
My husband using the bone folder to attach the vinyl to the wall.
The finished product! I had such a hard time photographing this wall without a glare.
Total cost of my Gallery Wall
Estimated: $75
Includes laser level, frames, mats, black and white photos, spray paint and primer, vinyl and transfer paper.
I love this wall! I can’t wait to start my own! I also love the wall color. Do you mind me asking what it is.?
Glad you like it, Debbie. Here’s the info on the den color: Behr Interior Satin Enamel Paint and Primer (brand) in Sherwin Williams #6095 Toasty (color)
I like your gallery wall, it looks great! I couldn’t plan one like you did, mine would have to evolve more than anything… oh well – yours turned out really good!
Hi, Heather. Ours did evolve somewhat in that we just took out a bunch of frames, moved them around and hoped for the best. We only had a fairly small area to fit it in so it did take some decision making skills! Thanks for visiting my blog!
I love, love your wall. Your family is beautiful. I am working on a gallery wall in our family room. It has been a lot of fun. I spray painted some old frames I had and bought some at the Goodwill……a great way to save money.
Debbi
Marty!! I just love this wall and the vinyl letters really make it something special. *pinned*
Thanks for sharing at Throwback Thursdays.
xoxo
Denyse
Do you use Cricut craft room? Its on the cricut site, you can load all of your carts for the cricuit to the room and never have to unload again. It is so easy I love it! I can cut from several carts all at the same time now Give it a try if you haven’t yet. Cricut.com and its free
Hi, Janice. I’m way late on replying to comments on my blog but I’m here now! You asked whether I use Cricut craft room and I haven’t yet. I’m kinda overwhelmed with blogging and other DIY projects. I actually bought a used Gypsy but I haven’t had time to figure that out, either! I have a scrapbook retreat next month and I’m ready for it!
Marty@Marty’s Musings
Marty, This was a very informative post. I have been thinking of doing something similar and did not know exactly how to get started. Thanks to your post; I now have some answers about how to get started. Your wall turned out really great; it’s amazing how inexpensively you were able to invest in it. Thank you for posting.
Hi, Debbie. You commented on my family gallery wall and I just wanted to thank you for the compliment. I’d love to hear how your wall turns out! It’s one of my most favorite projects.
Marty@Marty’s Musings
Marty,
Your gallery wall is amazing! Those spray painted frames (and mats too — I need to remember that idea) with the vinyl looks perfect!
Thanks so much for sharing at our spray paint link party!
🙂
Linda
Thank you, Linda. I thought it was pretty clever to spray paint the mats, too, and I have no idea where the idea came from! My husband is a painter so I’m happy for him to do the actual spraying himself! Hope you’ll come back and visit again soon!
Wow – what a beautiful gallery wall with such great sentiment you have pulled together. Thanks so much for sharing it at our link party. Take care, Laura
You are very welcome, Laura. It’s one of my favorite places in our home and a constant reminder of how important family is.
my favorite wall !!!!!!
http://babyemilycloset.blogspot.co.uk