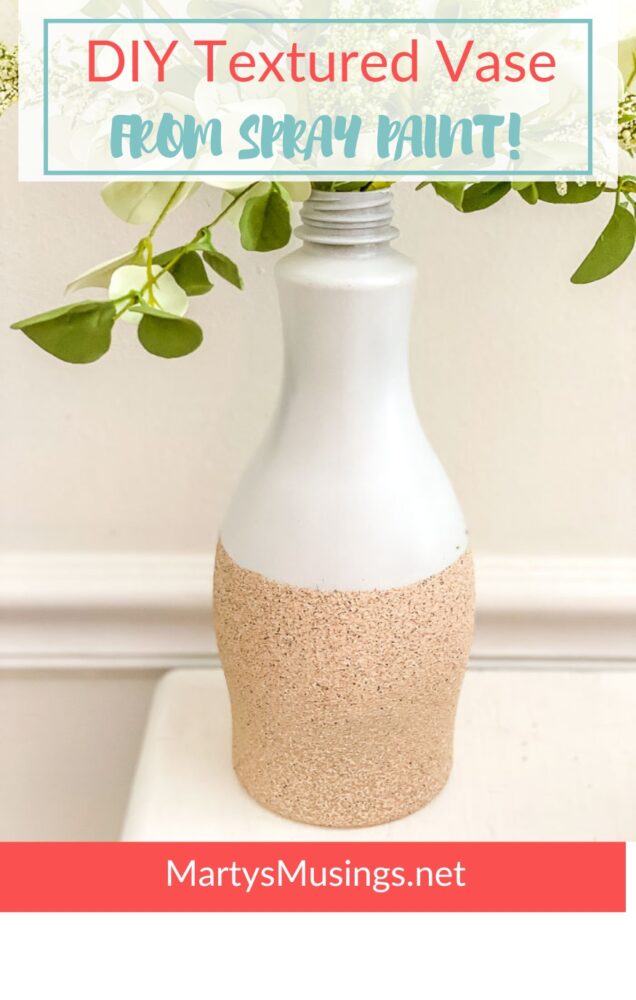
DIY Textured Vase with Spray Paint
This post may contain affiliate links which won't change your price but will share some commission. Read more here.Don’t waste money on high priced home decor. Use spray paint to turn this plastic milk carton into a clever DIY textured vase!
Recently I was admiring the look of two tone vases from higher end stores, but the price point was way past my budget. I saw some at Pottery Barn for $20-$60.
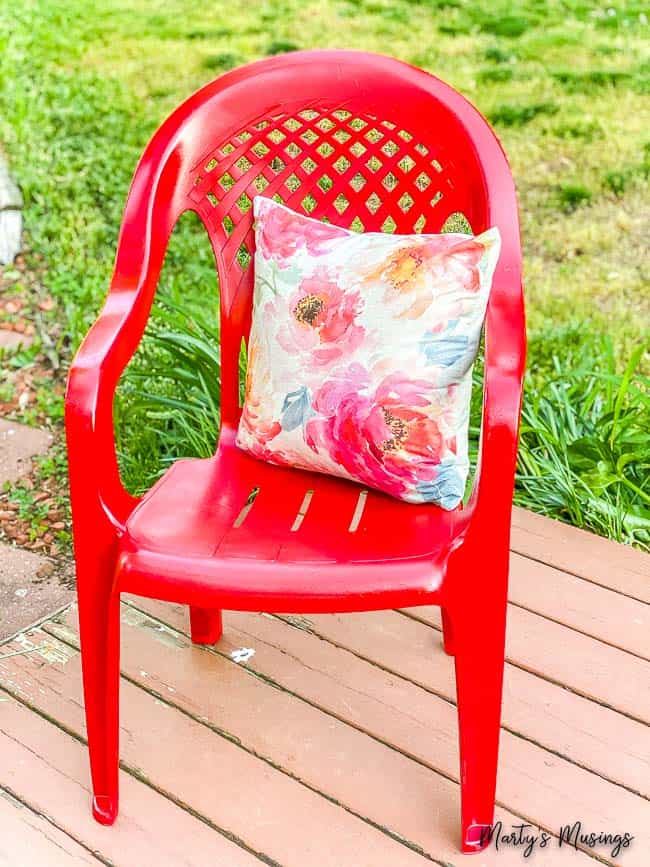
I liked the general idea but I wanted to create unique and fun crafts. Since I love using spray paint to change the look of most everything I was game to try a new to me product! (See how to spray paint plastic chairs as an example!)
This easy DIY project is perfect if you’re looking to repurpose plastic, glass or even a ceramic vase into the look of stoneware. Spray paint is the easiest way to go!
Materials
(I’ve included some affiliate links for your convenience. Click here to read my full disclosure policy.)
Oat milk plastic bottle (or your choice of containers)
White matte spray paint
Stone textured spray paint
Frog tape
Wheat stems
Weights (marbles, pennies, etc.)
Instructions
Step 1. Decide on container.
This could be a plastic oat milk bottle like I used or any kind of glass bottle (think spaghetti jar, mason jar or something with a unique shape.) Thrift stores and yard sales are also great places to pickup glass vases.

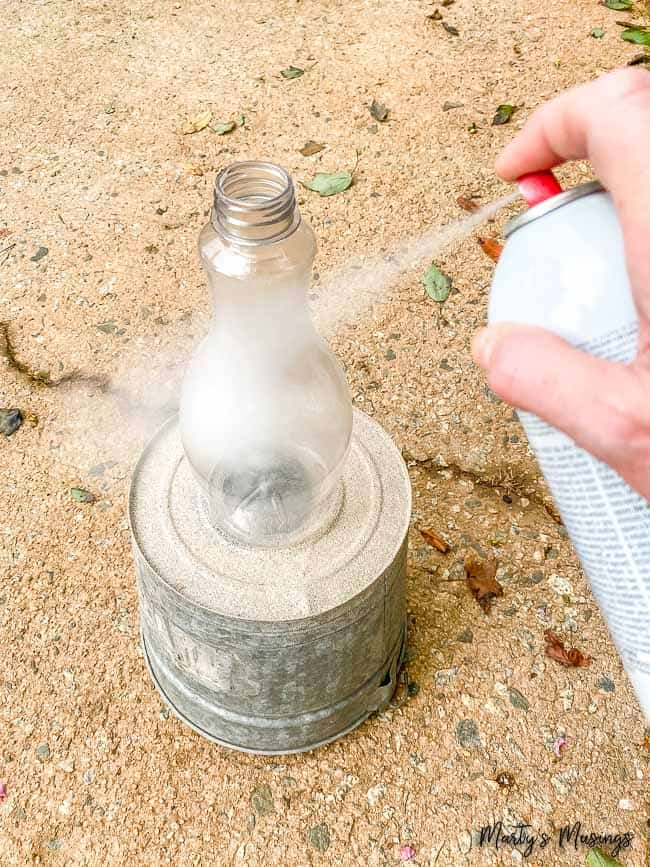
Step 2. Apply three layers of white paint on the top half or until completely covered.
I used white as my base color and chose not to tape off anything during this step because it was easier!
Always follow the directions on your specific paint as to drying time and make sure you have the proper ventilation.
I like to setup an area outside where I can spray paint and not make a mess. I’m definitely a messy painter so you might want to watch how windy it is the day you create this project! Oh, and wear old clothes/shoes that can get dirty/messy without regrets!
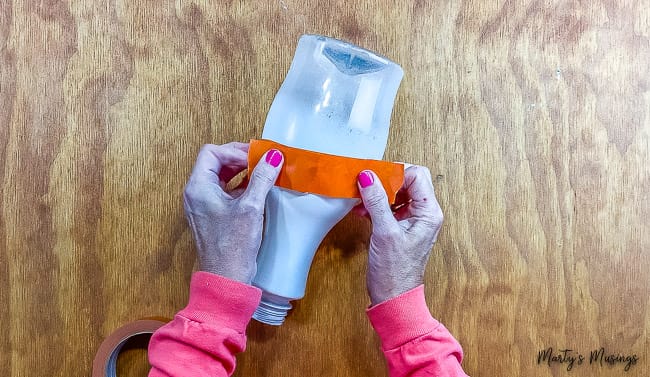
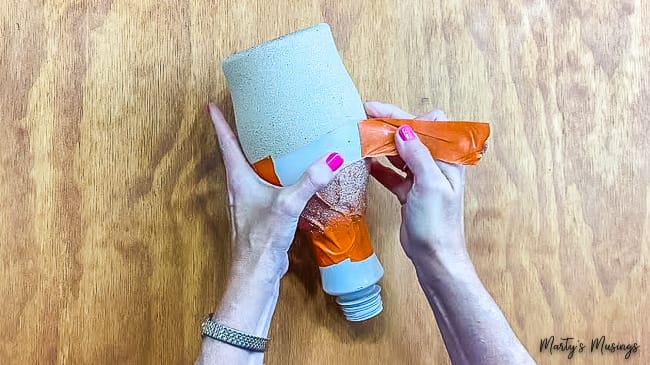
Step 3. Wrap frog tape on top layer of white.
I found this to be the most difficult step! Just keep wrapping until completely covered. You can even take your fingernail and adjust the tape so the line around the bottle is even.
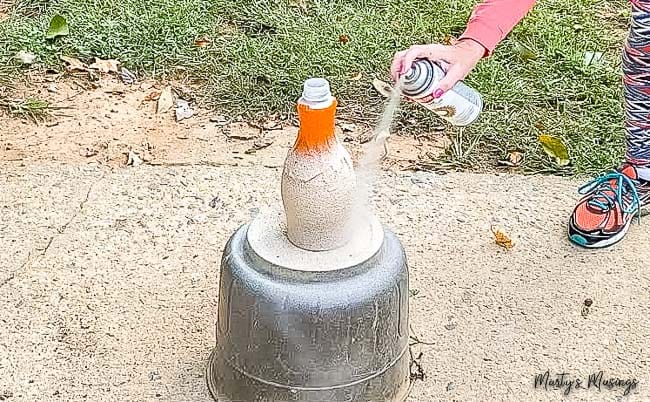
Step 4. Add textured spray paint in three coats, drying in between coats.
This paint sprays absolutely beautifully and easily. I’m throughly impressed by it and am brain storming more ways to use it in my home.

Step 5. Peel off frog tape and you’re done!
Step 6. If necessary, weigh the container down inside with marbles, weights, pennies or whatever you have on hand.
The container may be off balance depending on the weight of the stems you use. I just “borrowed” some pennies from my grandsons’ penny jar!
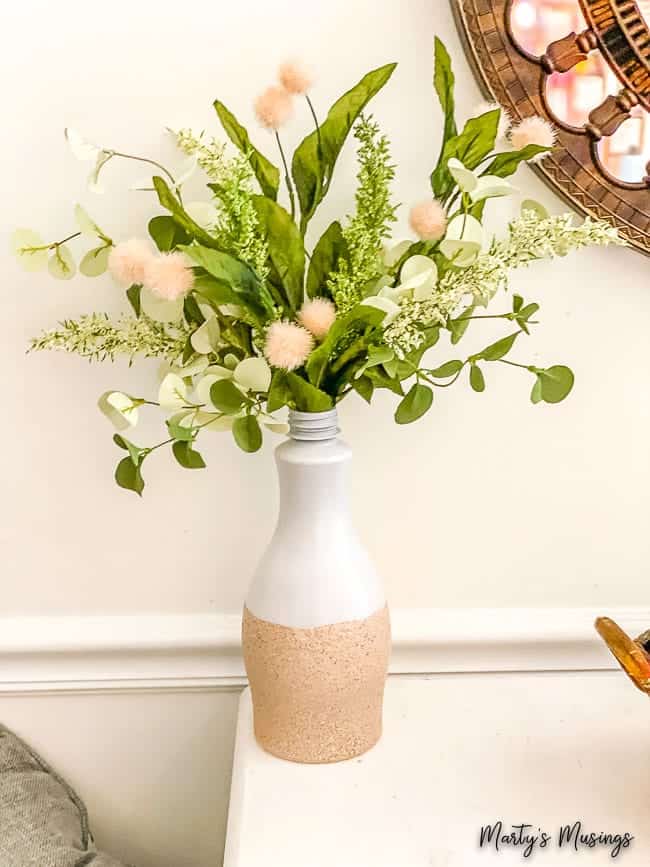
I love this project for fall or even the upcoming Christmas season. Heck, I’d use it any time of the year!
This DIY textured vase is inexpensive, on trend and easy enough for anyone to try and looks way classier than it costs!

And I knew this tutorial was a winner when my daughter’s fiancé told me he wanted one!
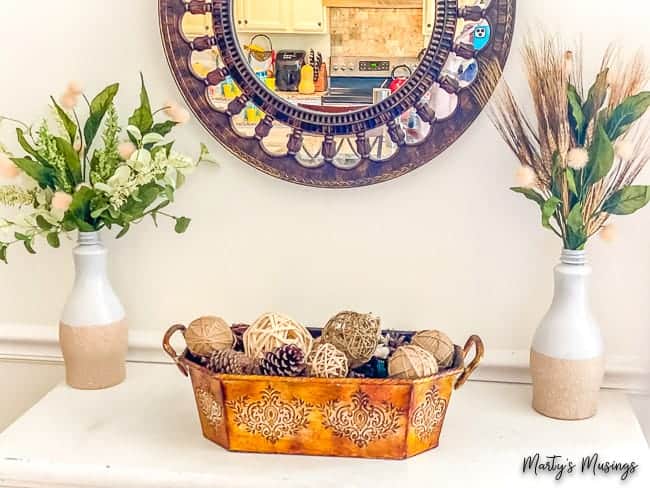
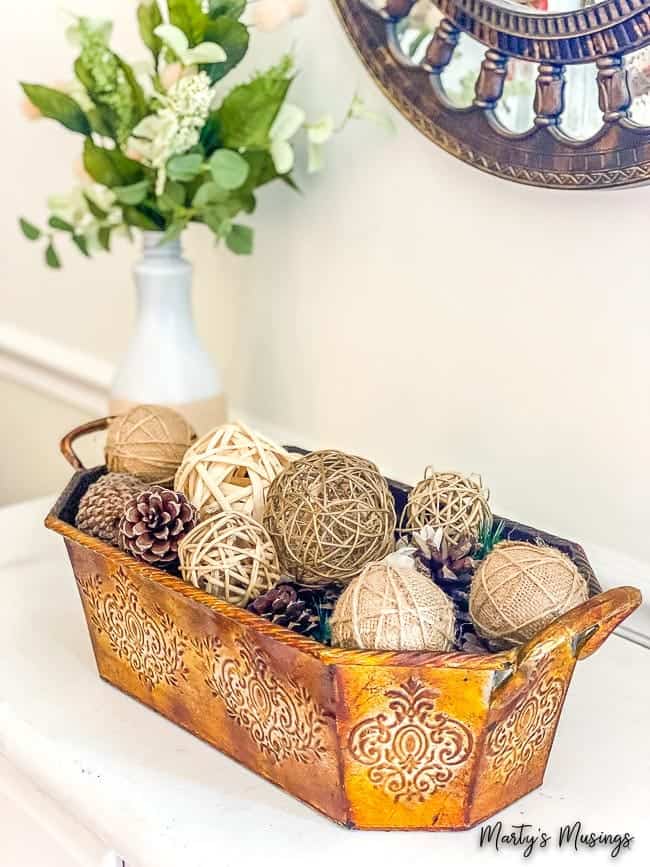
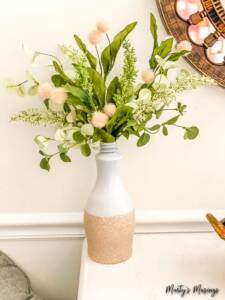
I added a $1 yard sale copper container with seasonal elements in it and created a simple vignette! Of course, you can also use it with fresh flowers of your choice as well!
FAQs about spray painting
More Painting Tips
Practical painting tips for the home that anyone can use, including chalk painting, accent walls and choosing the right colors.
DIY Textured Vase with Spray Paint
Ingredients
Instructions
- Decide on container.
- Apply three layers of white spray paint on the top half or until completely covered.
- Wrap frog tape on top layer of white.
- Add textured spray paint in three coats, drying in between coats.
- Peel off frog tape and you’re done!
- If necessary, weigh the container down inside with marbles, weights, pennies or whatever you have on hand.
Video
What a creative and ingenious idea, Marty! I love this fresh, new look for any style. Thanks for sharing.
Thanks, Meegan! I absolutely love this product and it comes it different colors!
Great knockoff and I love the shape of those bottles too!
Hi, Kim. Isn’t it amazing what you can make out of ordinary products! Always love a good repurposing project!
So pretty Marty, I would never have guessed that they were plastic!
Thanks so much, Kim. It was a fun project!
This is just up my street, I love creating from recycled materials. Your look is just as good as the high end one without the huge price tag. Well done, I love them.
Thanks, Anita! I just love this spray paint so much!
I love this! My husband drinks Pom Wonderful (which has the cutest shaped bottle) and I have stored a couple thinking there must be something to do with them! This is perfect.
Hi, Libbie. I’ve not heard of that product but I’ll have to check it out! Thanks!
Love these beautiful textures vases! Wonderful DIY Marty!
Thanks so much, Lori!
Thank goodness there are people like you in this world Marty. When money is tight it’s always such a great feeling to find a DIY version of pretty store decor that’s so budget-friendly. Love how the vases turned out.
You’re so encouraging, Michelle! I definitely decorate on a budget!
Gorgeous vases from up-cycled bottles. What a great for budget-friendly decorating.
Hugs,
Kippi
Thanks, Kippi! And thanks for the shares!
Marty is a great idea. I love saving different shaped bottles. I have an almond milk bottle to try this on now. Thank you for the videol.
You’re very welcome, Deana. It was a super fun project!
Great transformation! I have used the stone effect but never though to use it in this way; love it!
Isn’t it a great product, Sara? So many ideas roaming around in my head!