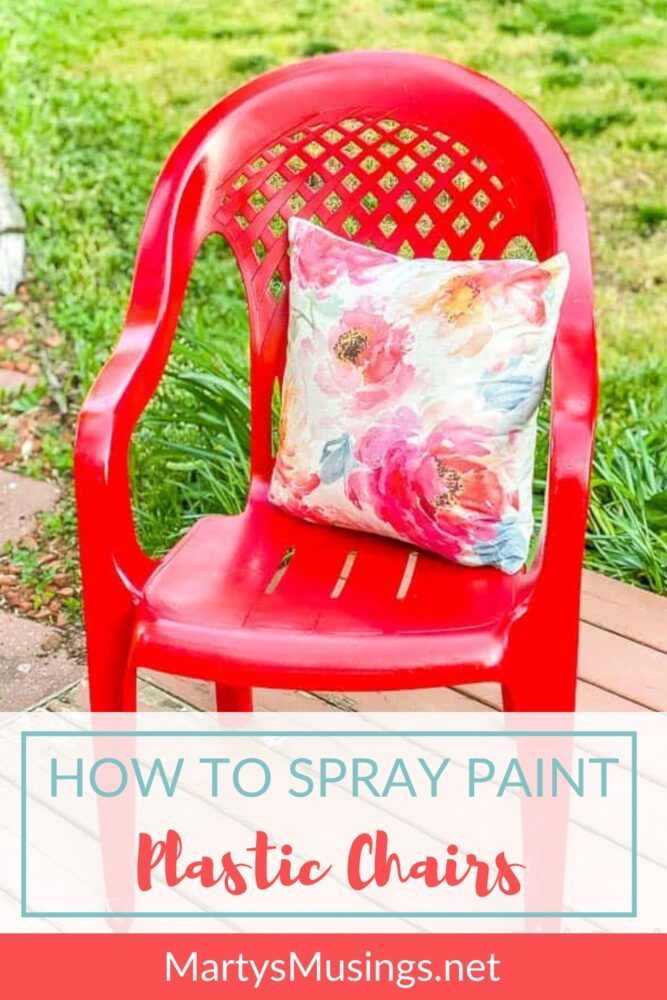
How to Spray Paint Plastic Chairs
This post may contain affiliate links which won't change your price but will share some commission. Read more here.Don’t throw away that UGLY outdoor furniture! This easy DIY ANYONE can do shows how to spray paint plastic chairs without spending a lot of money or time!
I like free stuff. Free is good, but sometimes you need to spruce up the free stuff. Know what I mean?
Today’s project is a short little tutorial on how to spray paint plastic chairs. I’m thinking you probably have a couple of ugly plastic outdoor chairs in your backyard that need a makeover, too! Or maybe a little kid’s table or side table made of plastic.
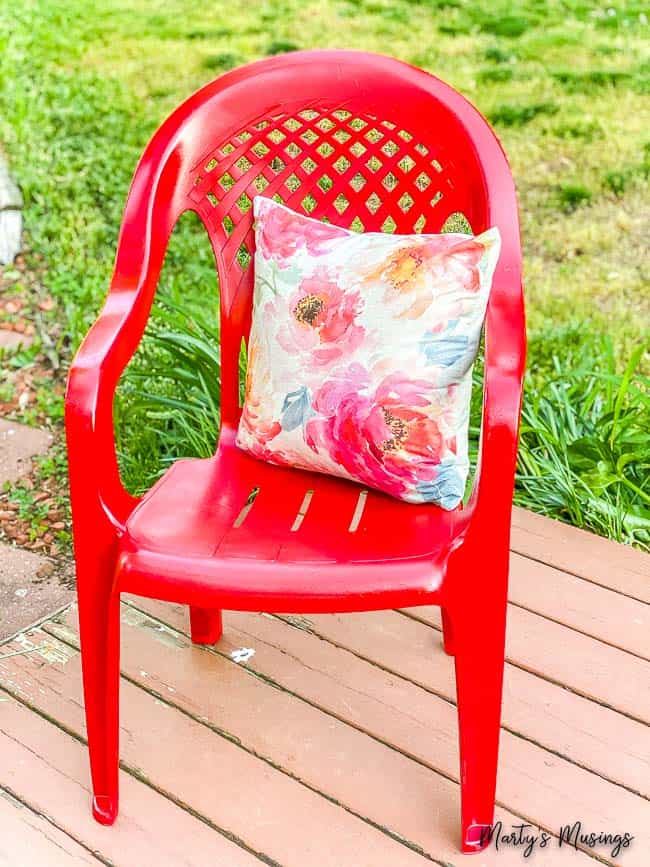
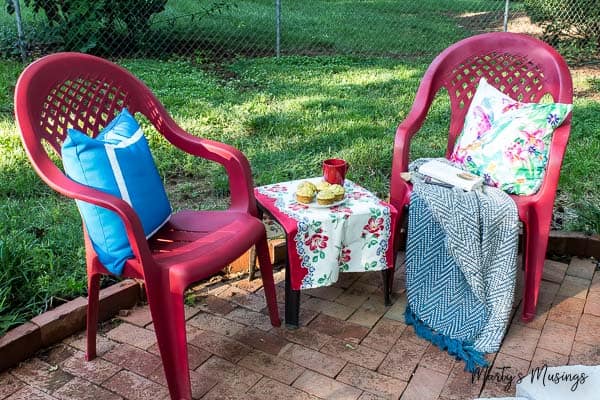
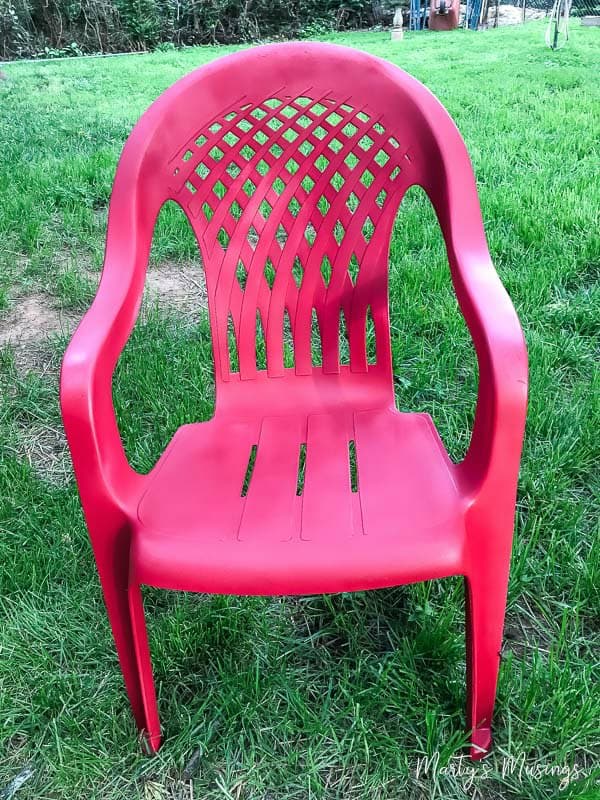
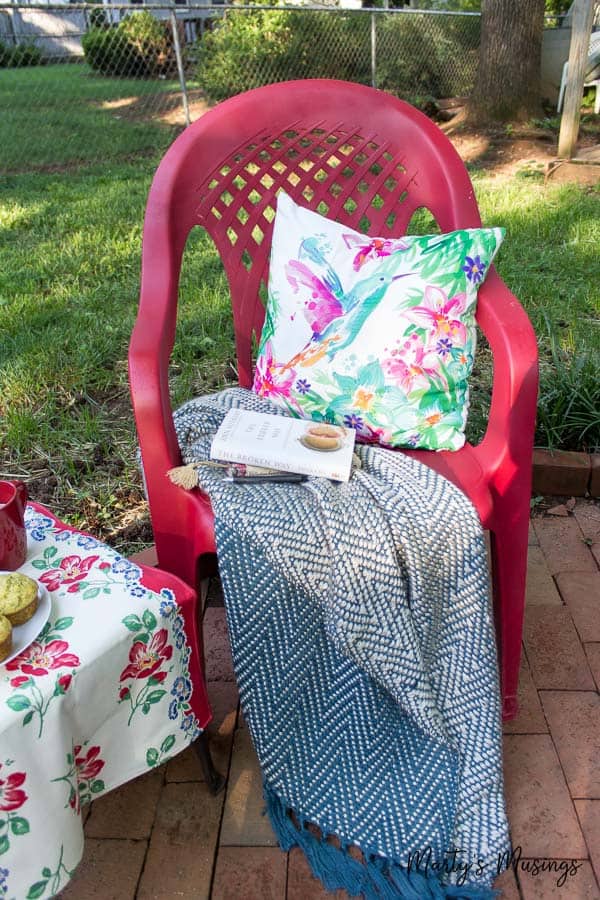
This chair was in dire need of transformation and since I love pops of color I knew the backyard was the perfect place for them.
Materials
(This post contains some affiliate links for your convenience. Click here to read my full disclosure policy.)
- Spray Cleaner (You can even get one specifically for plastic)
- Sandpaper Sheets
- Medium/Coarse Sanding Sponge
- Spray Paint for Plastic
Protective Gloss Top Coating
Instructions
Step 1. Find a chair or piece of furniture.
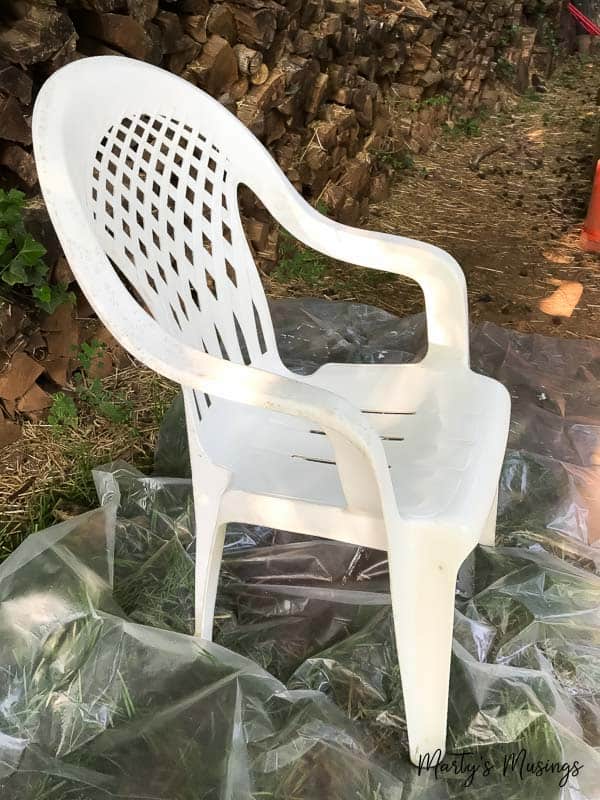
In our neighborhood, people are always throwing out chairs but you can also be on the lookout at yard sales and thrift stores.
Seriously, if everyone knew what a quick transformation a coat of spray paint provided those chairs would be snatched up!
Step 2. If necessary, sand to obtain a smooth surface.
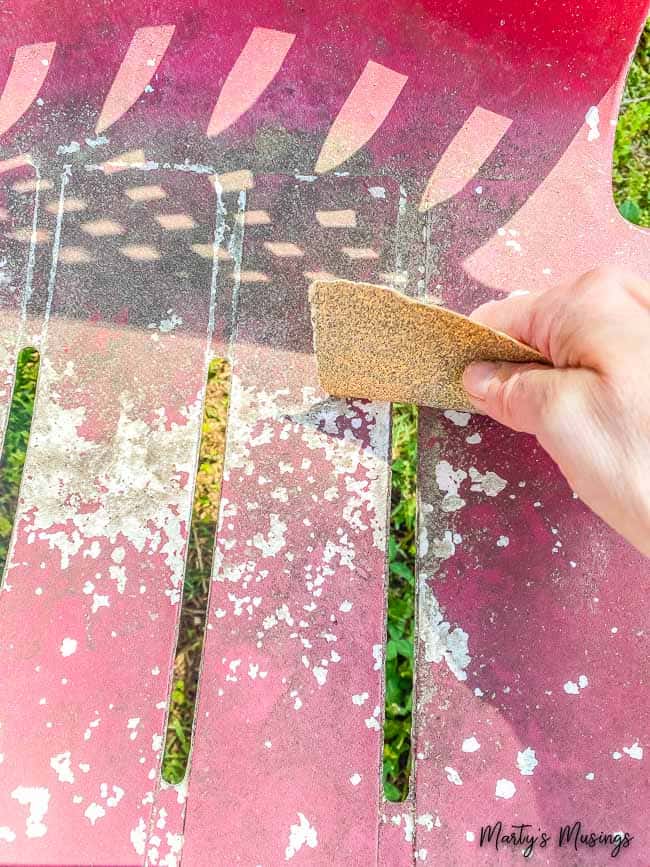
You can use whatever grade sandpaper you have on hand but a fine-grit sanding block will also work.
Update: I repainted this chair 4 years later and sanded areas that needed it when I repainted.
Step 3. Clean chair.
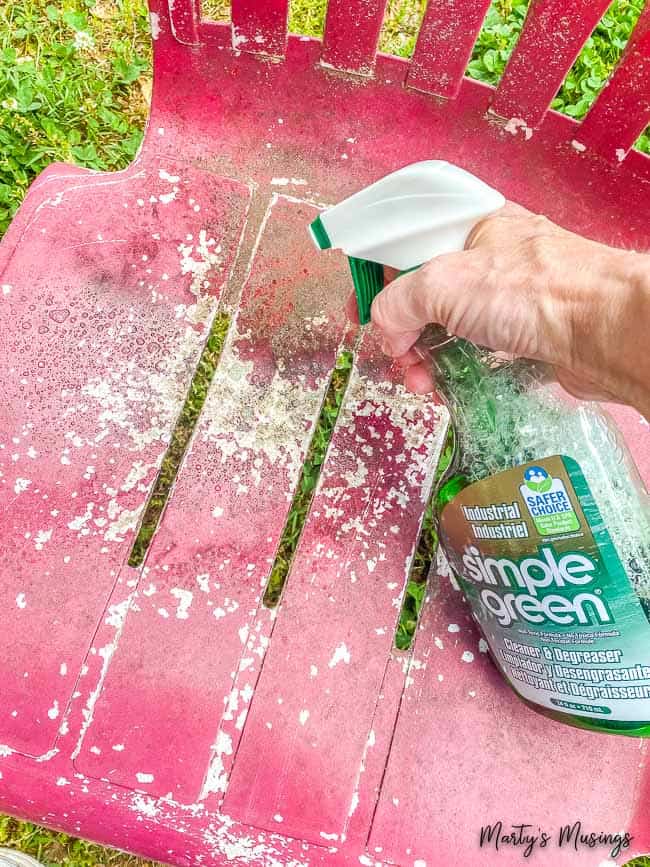
Plastic chairs tend to absorb all sorts of debris and stains from living outdoors in all types of weather.
All I did was scrub the entire surface with a good all purpose cleaner (you can even get one specifically designed for plastic) but more than likely you won’t get the chair perfectly clean. That’s alright! Paint covers a multitude of sins! You can also use a hose or pressure washer to blast off that dirt and old paint.
Step 4. Let the chair dry.
I made sure I saved plenty of time for the plastic to dry out so the paint would adhere well. No sense skipping this step and messing up the final product!
Step 5. What kind of paint do you use on plastic chairs?
The spray paint market is filled with all kinds of spray paint. Too many to choose from! I would choose a product that’s formulated especially for a plastic surface such as this spray paint for plastic.
If you’re not aware, prices of all supplies have gone sky high and often there are shortages. Just check big box stores, home and gardening stores, Amazon and google!

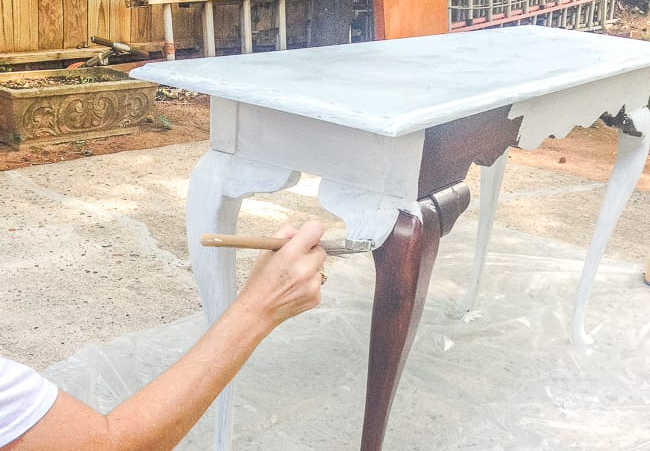
Step 6. Apply the first coat to the bottom of the chair and any areas that will be seen.
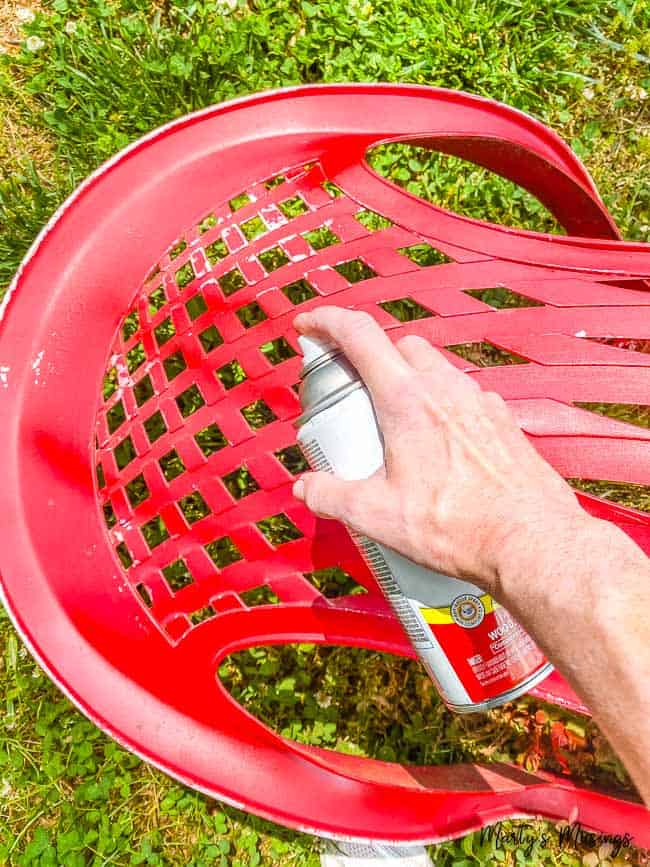
Nothing fancy about spray painting. No primer is needed but you can add a coat of outdoor spray paint and then top with the plastic type.
Make sure and layer on a decent first thin coat of paint and let allow drying times of about 45 minutes. Since I’m a messy painter I used plastic underneath to protect the outdoor areas. You might want to put on old shoes, too. ~eye roll~
Step 7. Turn your piece over and paint the remaining areas.
You don’t have to waste paint on the underside of the seat but check for nooks and crannies that will be visible. Let dry for another few minutes.
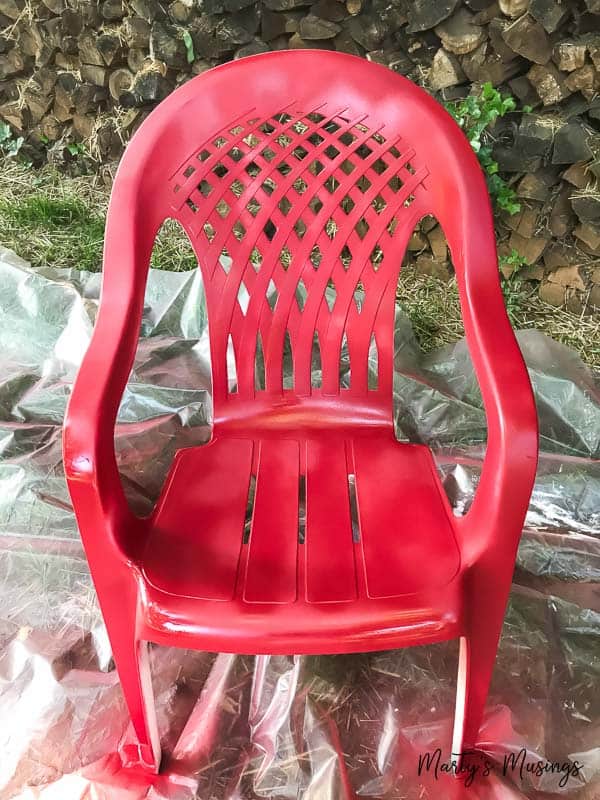
Step 8. Repeat for a second this coat of paint on all areas.
I found two coats to be sufficient, which ended up using about 1 1/2 cans of paint per chair. I’m probably a little more liberal but for just a few bucks you’ve got brand new chairs!
Step 9. Add a protective topcoat.
I actually chose a matte color and wanted a top coat that was also a gloss. But I recommend that you seal your chairs with a protective top coat, especially if they will be seeing any kind of weather.
FAQs about painting plastic
When I wanted to update them I simply sprayed them again with a gloss and love how it looks! It doesn’t have to be perfect especially if there is no protection from the weather.
I think learning how to spray paint plastic chairs qualifies as one of the easiest DIY projects anyone can do!
What do you think? Do you have some old chairs or furniture you want to paint now?
More Painting Projects
Practical painting tips for the home that anyone can use, including chalk painting, accent walls and choosing the right colors.

How to Spray Paint Plastic Chairs
Ingredients
- 1 spray cleaner
- 1 sheet sandpaper
- 1 can spray paint for plastic
- 1 can protective gloss top coating
Instructions
- Find a chair or other piece of furniture.
- If necessary, sand to obtain a smooth surface.
- Clean chair.
- Let the chair dry.
- What kind of paint do you use on plastic chairs?
- Apply the first coat to the bottom of the chair and any areas that will be seen.
- Turn your piece over and paint the remaining areas.
- Repeat for a second coat on all areas.
- Add a protective topcoat.
Marty I can’t wait to spray paint my 4 plastic chairs. I would love to do a bold color in the green family. You made it look so easy I hope I can pass the test. Lol Thanks!
Hi, Alice! I’d love to see them when you’re done! I’m sure you’ll do great!
Thanks for the great tutorial!
I live in Greensboro also, and I’m with you, loving this cooler weather while it lasts because I know the heat will set in soon enough!
Hi, Jeanine! How cool you live in Greensboro! How did you find my blog?
I am so happy to find this blog. For 3 years I moved from one country to another and at the beginning it is kind of expensive to buy all new furniture for a big apartment. I remember finding two plastic chairs on the street, someone was throwing them out. I gave them a home on my sunny balcony but they look bad… Bad. The white is more grey. This spring I plan give them a new life. Thank you very much!
So glad you found the tutorial helpful! Enjoy your new home!
We definitely need to do this to our plastic chairs. They’re looking way too old and worn out at the moment and with Christmas fast approaching we’re going to need them to look sit-worthy.
Oh, and Mr. Carson is such a cutie pie.
Paint the chair create a new change in the old chair and through this, you give a new look to the old chair. The method to ain the old chair that you mention in the above is useful and I also think to adopt when I pain my chair. Excellent Information.
Getting a new back deck this week and will definitely be trying this! ?
The previous owners of our house left some plastic Adirondack chairs in the back yard. I love the chair shape but they are brown! I am going to try this with a happier color!
I love this. My chairs look horrible and are boring white. I never thought of painting them. Thank you
Marty, your DIYs always inspire me so much! I’ve currently got a bathroom that I demo’d that I’m waiting to get finished up….. (inspired by you). Thank you for sharing your gifts with us, your readers. Be encouraged, my friend!
So thrilled you got to redo your bathroom and thank you for always encouraging me!
Great job, as usual, Marty. Loving Mr. Carson too.
Thanks so much, Karen!
I have always painted the underneath side of my projects first, too. Then you can turn it over and paint the top side while the underneath side is still wet and let them both dry at the same time. Saves time! Once dry, paint the underneath side again and flip over while wet and paint the upper side again and let dry. Much faster!
Great suggestion, Judith. Thanks for sharing!
I thought that this was a great idea. I have recently got into painting everything, so why not the garden chairs! I went to buy the spray and here in UK it’s actually more expensive per spray than the cost of a new chair ?
Hi, Patty. I’m so sorry! That’s so disappointing! Is it still the same way with Amazon?
Great job Marty. Especially love the colors. I have to say your table cloth looks vintage. Very similar to some I have. Love it all.
Hi, Karen. Yes, the tablecloth is vintage! I so love using linens that are beautiful and tell a story. Thanks for the compliment!
What a great tip…..I’ve never thought of painting dingy chairs (mine really need this!!!!)…..Let me share a tip I have about painting chairs…..paint the bottom first… Stools, tables, chairs, anything with legs….turn upside down and paint first….then flip it back over and paint. You don’t have to wait for anything to dry. (usually)
Hi, Renee. Thanks so much for sharing the tip about painting upside down first. So good!
Hi Marty ! Can you paint vinyl straps on outdoor patio chairs & chaise lounge. The are the topical pool white chairs.
Thank
Lucy Orr
Hi, Lucy. I’m not exactly sure because I’ve never tried it before. My thought is that the chalk paint wouldn’t adhere to the straps very well. You could always try it on the underside of the chair and see how you like it. Good luck!
This is perfect for some chairs i just bought. I like the chairs but not so much the color!! Thanks for sharing.
So glad for you, Yvette! Hope your project turns out perfectly!
Hi Marty, I don’t have plastic chairs that need spray painting but I do have a very old yellow plastic clothes hamper that could use a re-do. Thanks for this, now I can do it!! 🙂
Hi, Lynn. I’m glad you found my tutorial. Good luck with your clothes hamper! I’m sure painting it will be such an improvement!
Love the idea of sprucing up old plastic chairs and giving them a new life. The red colour just pops up in your backyard and looks so inviting. Thanks for the post, I will definitely paint my boring plastic chairs which I’ve been meaning to throw away 🙂 Time to go shopping now.
Great idea. I will try to do this at home. I got old chairs that need makeover.
When I was a kid, my mom , also expert at making things nice on a budget, she bought us kids a white plastic table/seat set that I always loved, but now it is hopelessly discolored. I kept it, hoping to one day find a way to save it….and now I have it! I can hardly wait to try it out & maybe find a place for this treasured set on my balcony.
Thank you & I look forward to finding more ideas on your blog!
Hi, Rachel. I’m so glad you shared the story of the table from your childhood. I do hope painting it will help you enjoy it even longer. I’d love for you to subscribe to my blog for more tips on creating a treasured home!
Thanks so much for this article. I Live in a high rise senior apartment building. My friend gave me two white plastic chairs and I have been wanting to clean them and spray paint them. I love the color of your chairs and you set them up so beautifully!Mr Carson looks like a wonderful addition to your backyard and I’m sure he is a treasured member of your family. I’m looking forward to two much prettier patio chairs thanks to you. God bless!
Hi, Connie. Thanks so much for sharing about your apartment and patio. I think it’s wonderful that you’re creating beauty wherever you can find it and I know you’ll enjoy those FREE plastic chairs even more now! And yes, Mr. Carson is a spoiled member of our household!
Love, love, love Mr. Carson….oh, and the chairs are pretty, too
Hi, Nancy. Mr. Carson is my dog and so spoiled but greatly loved! Can you tell? Thanks so much for visiting the blog!