How to Chalk Paint Furniture Step by Step
This post may contain affiliate links which won't change your price but will share some commission. Read more here.Don’t throw away that old piece of furniture! These easy step by step instructions will teach you how to chalk paint furniture instead.

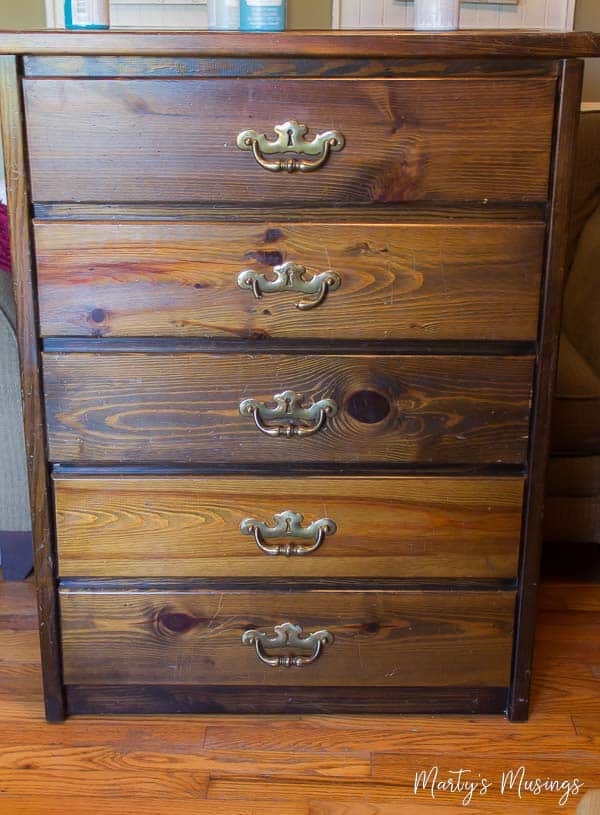
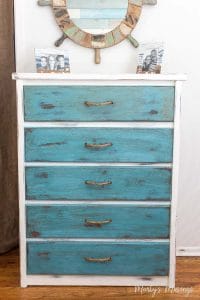
This oh so ugly dresser with the broken handle was beaten up and almost sent to the curb (literally). But there was beauty yet unseen in this solid wood piece of furniture. We just had to invest a little time and effort in discovering its potential.
Materials you’ll need


Instructions
Step 1. How do you prepare furniture for chalk paint?
Depending on where you find your furniture (I love side of the road treasures!) you’ll want to make sure and clean the outside well. The point is to wipe off any dirt and grime off the piece before you begin.
Fill any holes, gaps, chips, etc, with wood filler and sand smooth. If desired, you can lightly sand with 220 grit sandpaper just to remove any lumps in the wood.
Step 2. Do you have to sand before using chalk paint?
One of the best aspects of chalk painting furniture is that it requires almost no prep work and no priming. Prepping or sanding isn’t necessary unless the surface is uneven or is damaged and needs patching. I’ve had readers chalk paint over laminate that wasn’t in good condition, and in that situation you might need to sand first as well.
If what you are painting is very dark wood or a red wood like mahogany, you will want to prep by applying a sealer, specifically one that is shellac based for best results. If not the red may show through leaving a pinkish look if you’re trying to go lighter. (See my post chalk painted dresser.)
Step 3. Paint drawer fronts.
For this dresser, we knew it would live in a somewhat nautical-themed room, so the drawer fronts would be the accent color. (See the room reveal in the post DIY Beach Decor Ideas.) As such, we decided to start with this rather dramatic Deco Art Escape aqua blue chalk paint. It’s your decision whether you want to use straight line brush strokes or more criss-cross.

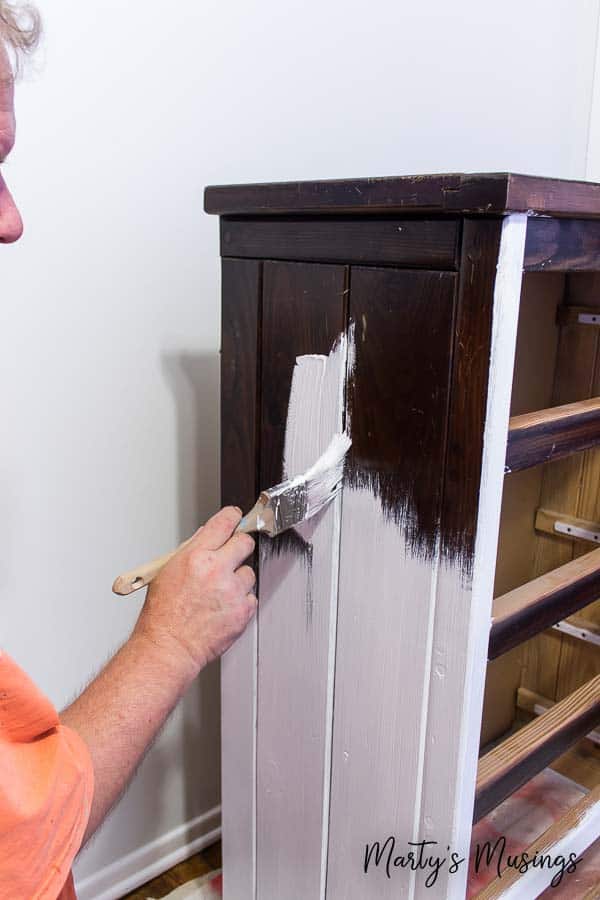
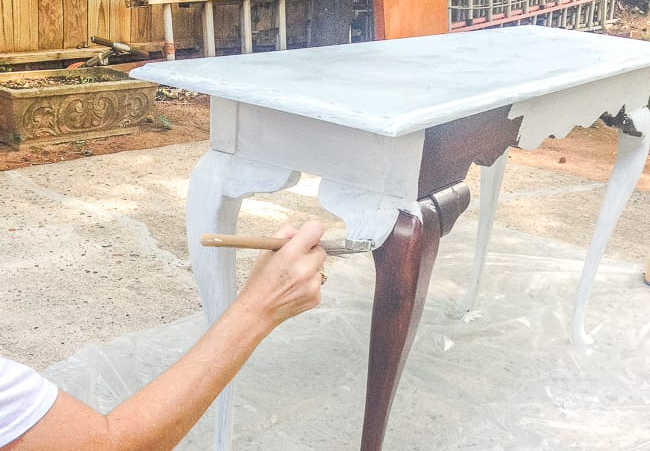
Step 4. Paint body of furniture (dresser).
While those drawer faces were drying, we were free to move on to the body of the piece with a first coat of Deco Art Everlasting White chalk paint. Pretty drastic change from the dark wood, but this product really covers well. Notice NO PRIMING first!! That is one of the best things about treating pieces this way.
Apply as many coats as you think necessary but usually a second coat is always required.
However, if your are NOT going to distress at the end, you may want to consider priming with an oil-based primer first to ensure durability. You can also still wax or put polyurethane on top as well.
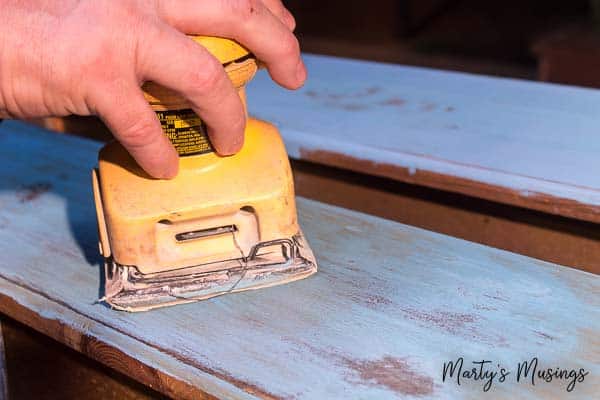
Step 5. Distress or sand to your liking.
We felt like the blue was a bit heavy for what we wanted, so we used the palm sander to distress the wood. You can easily see how much we took back off!
Play with this part to suit your taste. The worst that can happen is that you re-coat and start over. Don’t be afraid to just use sandpaper, a sanding block, or even steel wool instead of a power tool. Again, if you’re not interested in the distressed look skip this part!
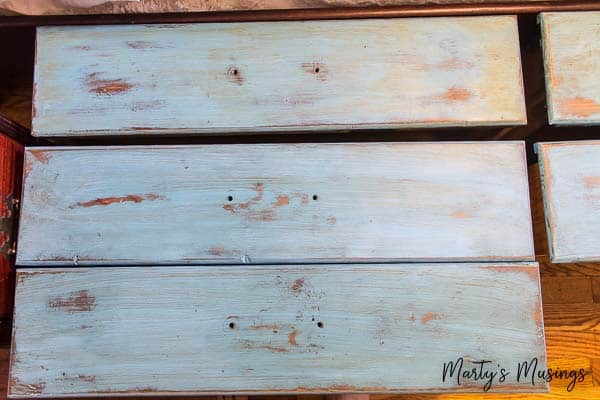
Here’s a good look at the five fronts together. Pretty fair amount of removal, but we were still looking for a more weathered look, plus we wanted to try something we had never used before…dark wax!
Step 6. Apply wax and let dry.
(Make sure and wipe down the furniture before applying wax.)
Dark wax is very dramatic, especially on white surfaces, so a little goes a LONG way. The more dimensional the surface, the more dramatic the effect. The wax tucks down into those crevices and corners and stays there.
To me the dark wax looks more antique or vintage. This was definitely an experiment here!
Since these fronts have a smooth finish, we merely wanted to highlight the bare wood and “dirty” them up a bit. Apply to the desired degree and then remove to your preference. You can also use a wax brush to apply the wax to the top coat of your furniture piece
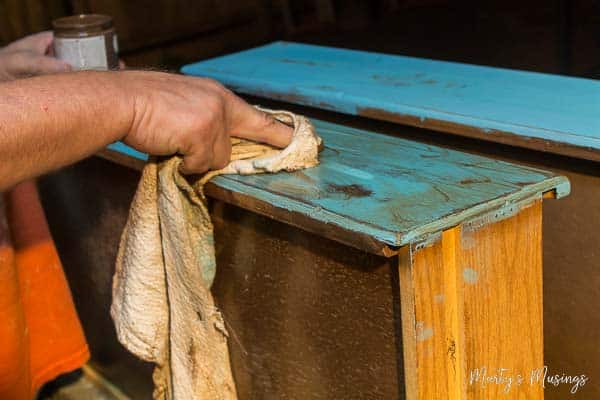
Step 7. Buff with a clean cloth.
No picture but this step is merely wiping down the piece with a clean cloth.

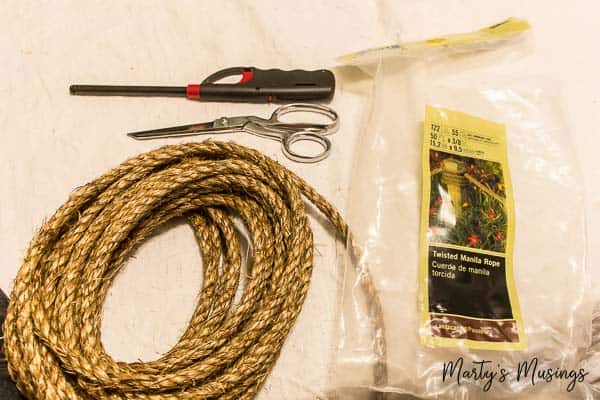
Step 8. Make your own handles with rope.
And now we get to the fun part! There was no way “normal” drawer pulls were going back on this piece, so we pondered a variety of unique options and landed on twisted manila rope for the handles. We could use the existing holes, although they would need to be enlarged, and we could use rope we already had in the shop.
While we knew we would have some variation in the end result of each handle, I did want them to be as similar as possible, for functionality if nothing else. The first one became the template!
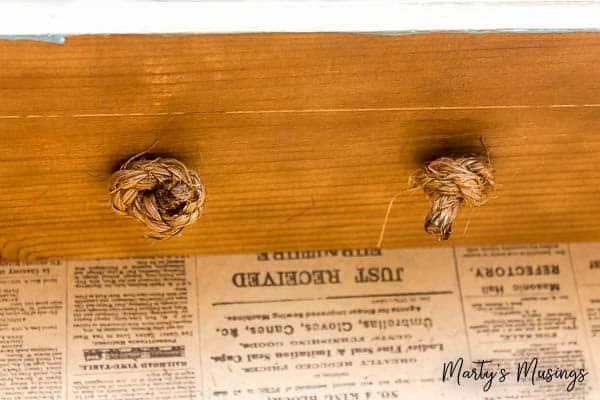
The idea was to feed both ends through the front of the drawer and tie knots on them on the inside of the drawer. If you’ve worked with twisted rope in any capacity, you know that it’s important to seal the ends so it doesn’t unravel over time.
Our preferred method is to burn them, forming a hard, burnt crust that bonds the strands together. Careful! We are talking about fire here!
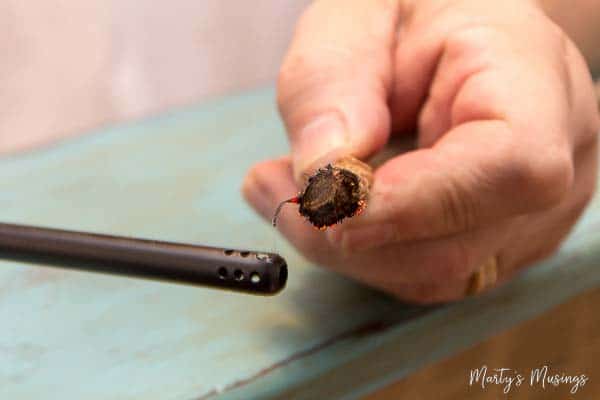
We were testing the size of the holes here, because we’re actually doing the process backwards (feeding the rope from inside to outside = backwards.)

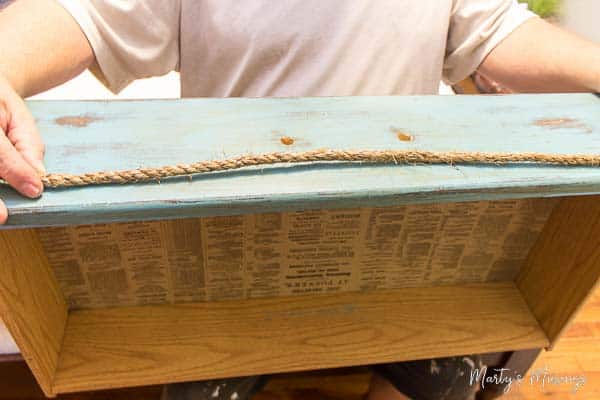
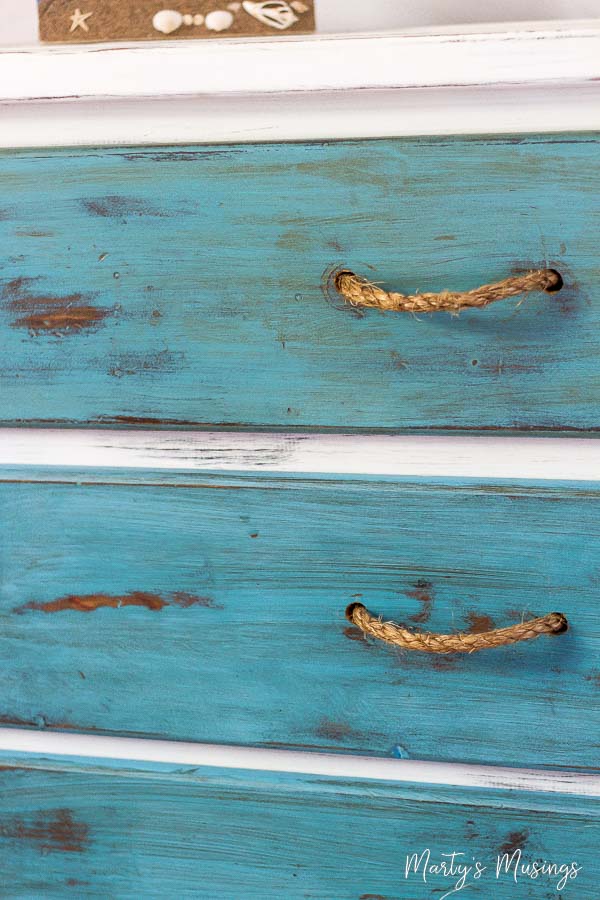
Here, our method has been corrected and the ends are inserted from the outside. Then we simply tied a single knot to hold the loop in place. The key is to just size the outside loop at a comfortable and functional place for the user’s hands, then knot accordingly.
Voila! Your own home-made twisted rope handle for a beach feel. This rope looks a bit prickly here, but it’s really fine. It also wears well and softens over time.
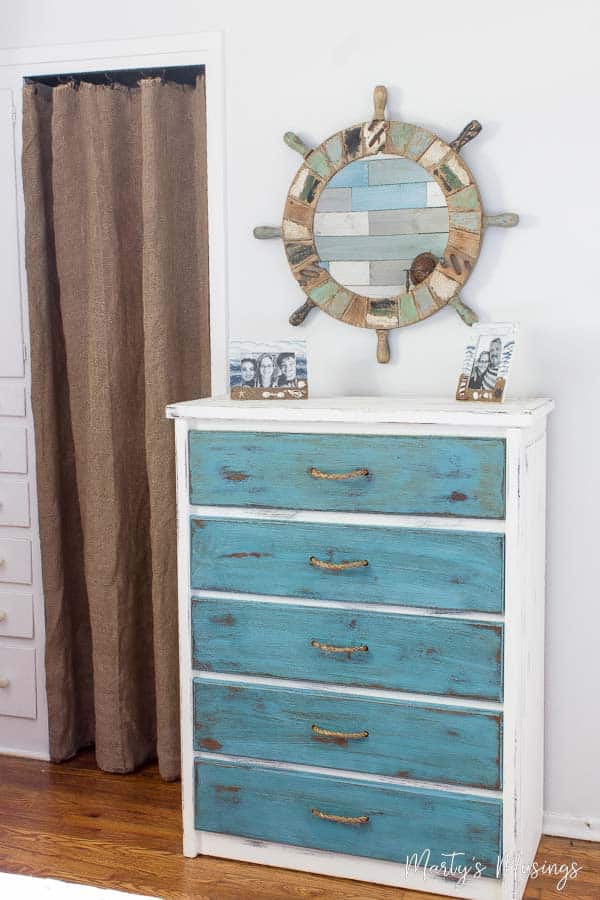
Here’s the finished product! Pretty cute and a BIG change from the clunky old original.
It’s always amazing how chalk paint totally transforms a beat-up piece of furniture into a treasured part of a room makeover.
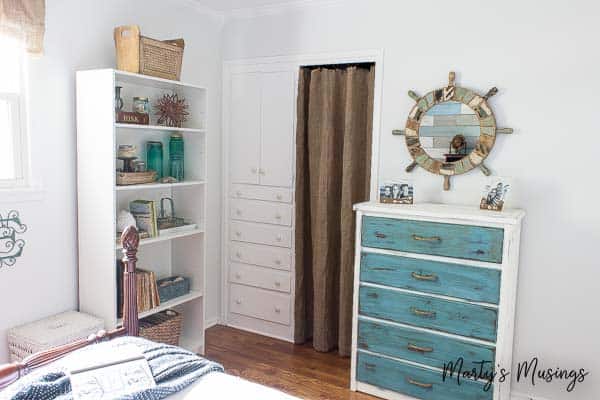
You can learn how to design a room from a single inspiration piece and the way I decorated it almost completely with yard sale and repurposed items. It was truly a labor of love.
FAQs about chalk painting furniture
Were you inspired to try something new today? I’d love if you’d share this with a friend! Us budget decorators need to stick together!
More Chalk Paint Ideas
Tips and projects for beginners and pros alike that prove that anyone can learn to paint furniture and home decor accessories with chalk paint!


How to Chalk Paint Furniture
Ingredients
- 2 jars Chalk paint
- 1 jar Dark wax
- 1 jar Creme wax
- 2 Paint brushes
- 1 piece Rope material
- 1 Palm sander
- 1 pkg Steel wool
Instructions
- How do you prepare furniture for chalk paint?
- Do you have to sand before using chalk paint?
- Paint drawer fronts.
- Paint body of furniture (dresser).
- Distress or sand to your liking.
- Apply wax and let dry.
- Buff with a clean cloth.
- Make your own handles with rope.
I noticed you used the dark wax on the drawers but did you use a clear wax on the sides???
Hi, Pam. Yes, we did use a clear wax on the sides. I will add that info to the post. Thanks!
I never knew I could use chalk paint, thanks for giving this idea. Thanks for sharing this. I will give it a try.
Just got into Chalk Painting, was inspired by my sister, if she can do it, I can was my attitude. I found a piece at a thrift store a framed mirror that looks like a mirror. I had taken some items to last Saturday and found this gem.. Bought my supplies, I work at Michael’s and love the employee discount! Today, a week later, my husband hung my finished product in the guest bathroom! I have a chest of drawers in the guest room and an end table in the sunroom next on my list.
I had watched a couple of videos on chalk painting and felt quite inadequate. However, after reading your helpful hints and tips I have new found confidence.
Thanks, Marty and Tim!
Hi, Susan. How great to work at Michael’s! I’d spend all my income there! I know you’ll do great with chalk painting. It really is so easy and I’m no painter. My husband is the real deal. I just do it in home decor and it always turns out great!