Stamped Books DIY
This post may contain affiliate links which won't change your price but will share some commission. Read more here.Create your own unique farmhouse decor with these DIY stamped books using cheap paperback books, chalk paint and rubber stamps.
These stamped books are one of my favorite easy projects to make to create an authentic, one of-a-kind home. They’re perfect for holidays and you can find short little sayings that are perfect in every room of your home!
I thought the project was adorable when I saw my friend Christina from The Frugal Homemaker demonstrate her easy tutorial on Instastories. So good I couldn’t resist trying them myself!
How do you add words to stacked books?
My tutorial will show you how to do this with chalk paint and alphabet stamps. But if you’re a person who has excellent penmanship you could just use markers and see how you like it!
How do you stamp a painted book?
In the tutorial below you’ll see the specific process I used. Trust me, there was a lot of experimenting going on! I’m somewhat of a perfectionist and this style lends itself more to imperfection. Challenging but the end result is perfect!
The best part of this craft is you may already have everything you need on hand. If not, the supplies are very inexpensive and easily available.
How to Make Hand Stamped Books:
Materials:
(I’ve included some affiliate links for your convenience. Click here to read my full disclosure policy.)
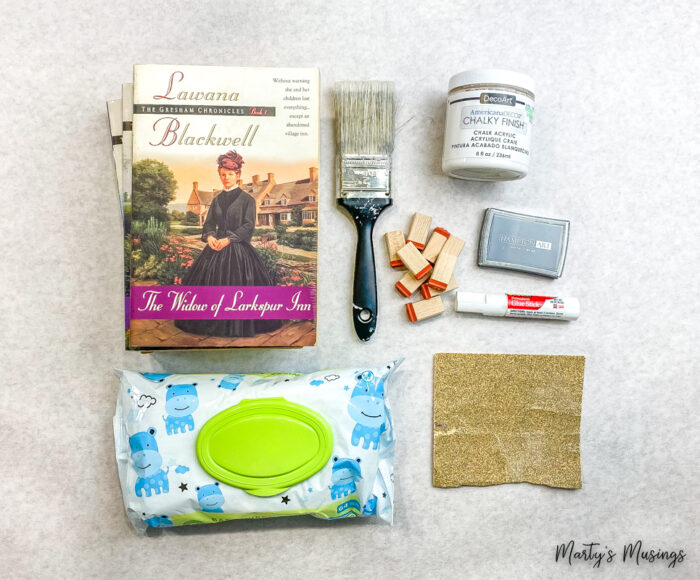
Old paperback books
Chalk paint
Rubber alphabet stamps (make sure the size fits the spine of the book)
Black stamp pad
Foam paint brush
Baby wipes
Sandpaper
Glue stick
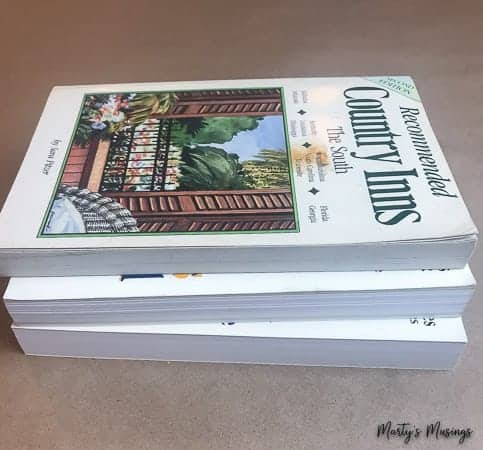
Step 1. Find a few inexpensive paperback books of similar size.
There are many places to find cheap paperback books including yard sales, thrift stores, dollar tree or used bookstores with a “free” pile. (Read my best yard sale tips here.)
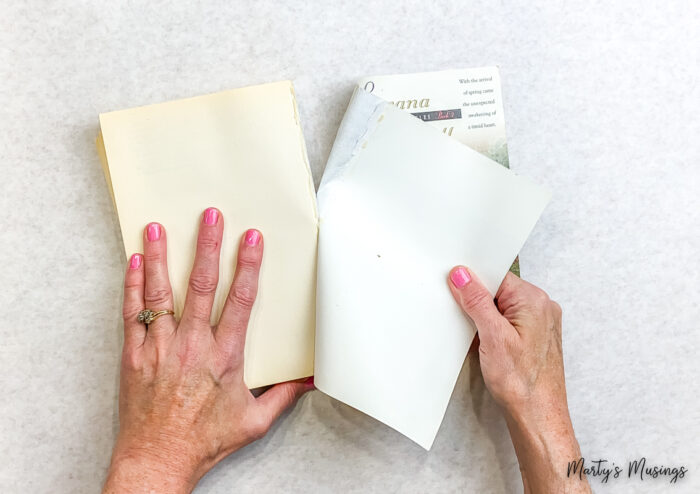
Step 2. Tear the cover off each book.
Simple step but make sure you get as much of the rubbery glue off so you’ll have a smooth surface to stamp.
Step 3. Find a page with no writing if possible and chalk paint.
You really only need to chalk paint the top book of the stack but since I was figuring it out as I went I chalk painted all of them.
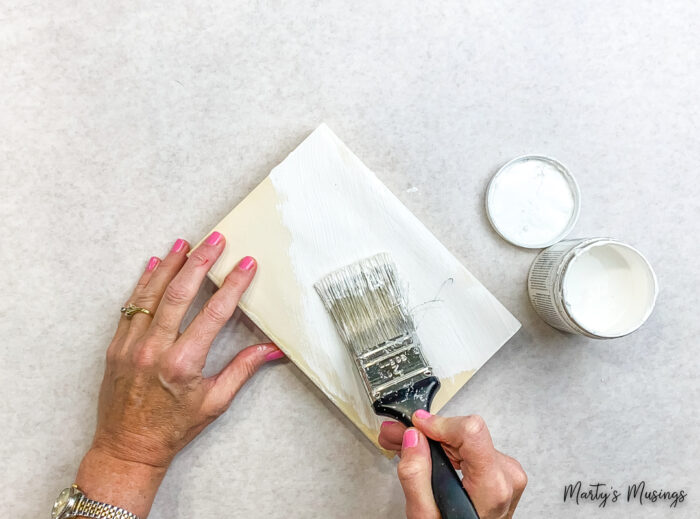
The number of coats depends on whether your page is blank or you’re covering words. I did three coats if there was no lettering on the page.
Step 4. Chalk paint the book spine.
Even though the spine is white I still added white chalk paint to give the stamps something to cling to.
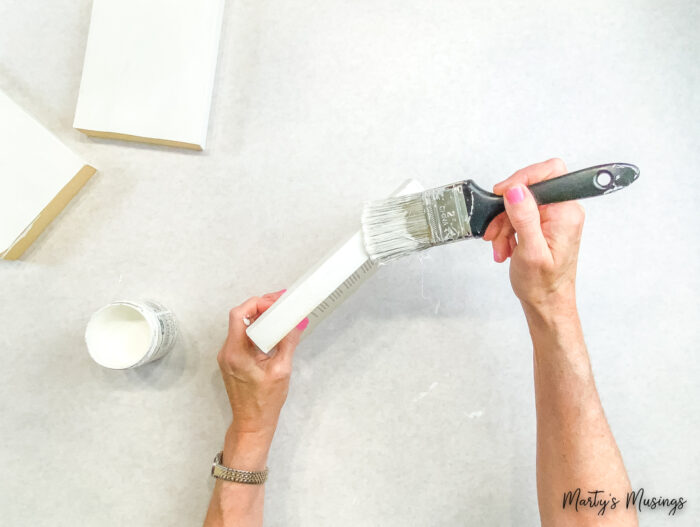
Step 5. Distress spine if desired.
If you have any glue leftover on the spine and want to achieve a smoother surface, try sanding it. This is also good if you want a more rustic look to your books.
Step 6. Glue pages together if curling.
If you find your pages aren’t staying flat you can use a glue stick to attach pages to each other.

Step 7. Press stamp onto ink pad and remove excess ink.
I used my rubber alphabet stamps and a black stamp pad to create the letters. The harder you press into the ink the better the letters will be on the book.
Use a baby wipe to wipe around the letter and remove any excess ink you don’t want to show on the book.

Step 8. Stamp spine of book.
This is the step where you’ll need to let go of perfectionism! I had to practice stamping just a bit.
I wanted to be able to line up the letters perfectly each time but it’s hard! If you get too much ink on the stamp it will leave inked edges. Since these are farmhouse books the imperfections can just be part of the process.

But if the stamp doesn’t come out as desired, simply paint over the letter/s and start over!
I found I got the hang of things as I went along. And I DID make some mistakes and repainted! That’s the beauty of chalk paint. It dries quickly!
(Did you know I’m a huge fan of chalk painting and have all my best tips on the blog?)
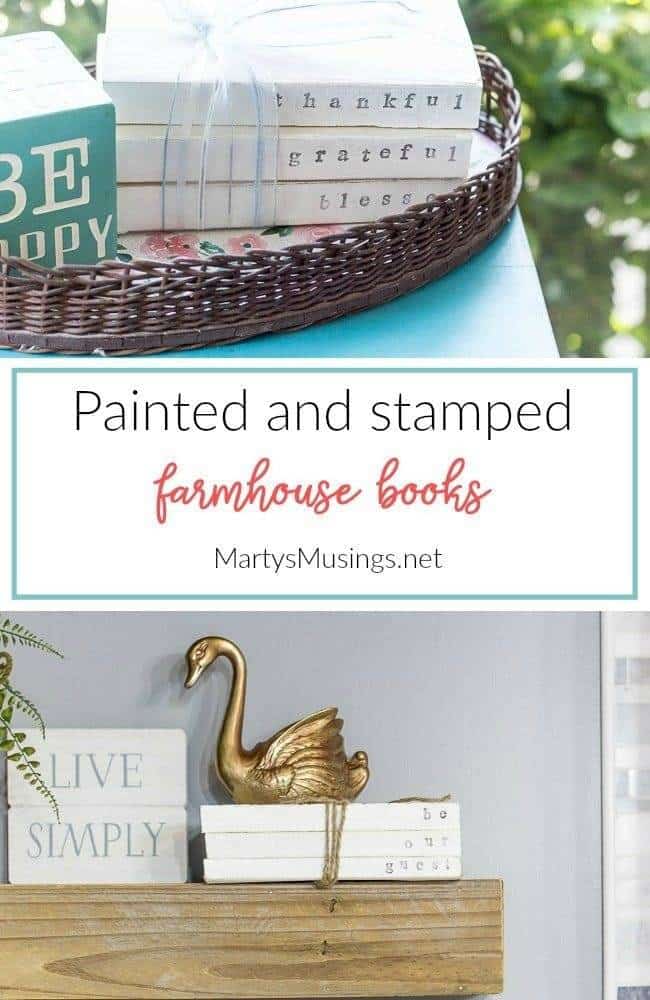
We remodeled one of our bathrooms in my former home (see the full reveal here.) I thought it would be adorable to have a stamped book stack wrapped in jute or twine with “be our guest” on them.

These floating shelves and were a favorite addition to this space!

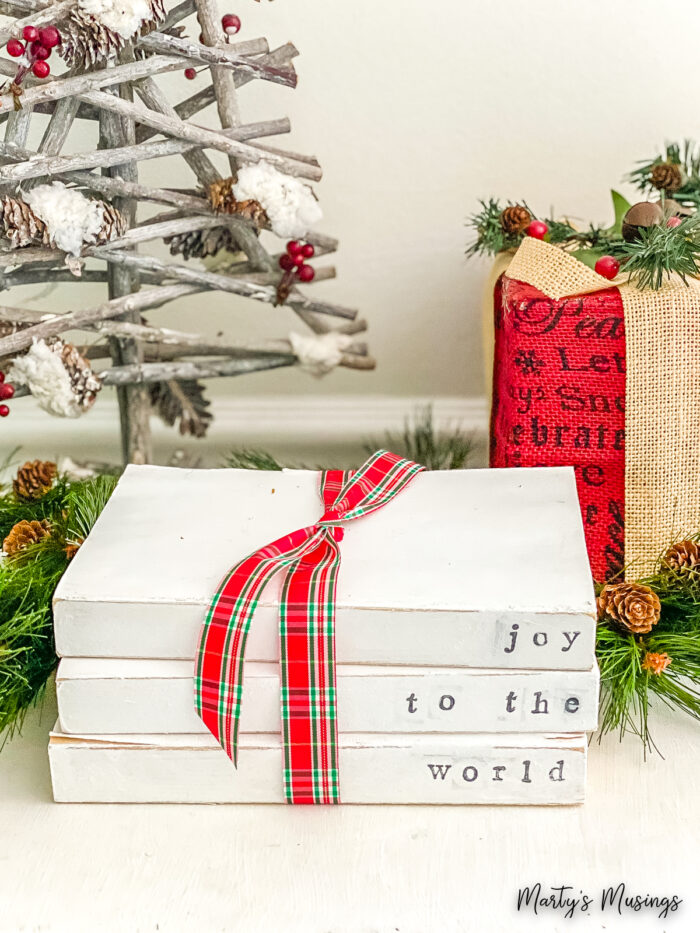
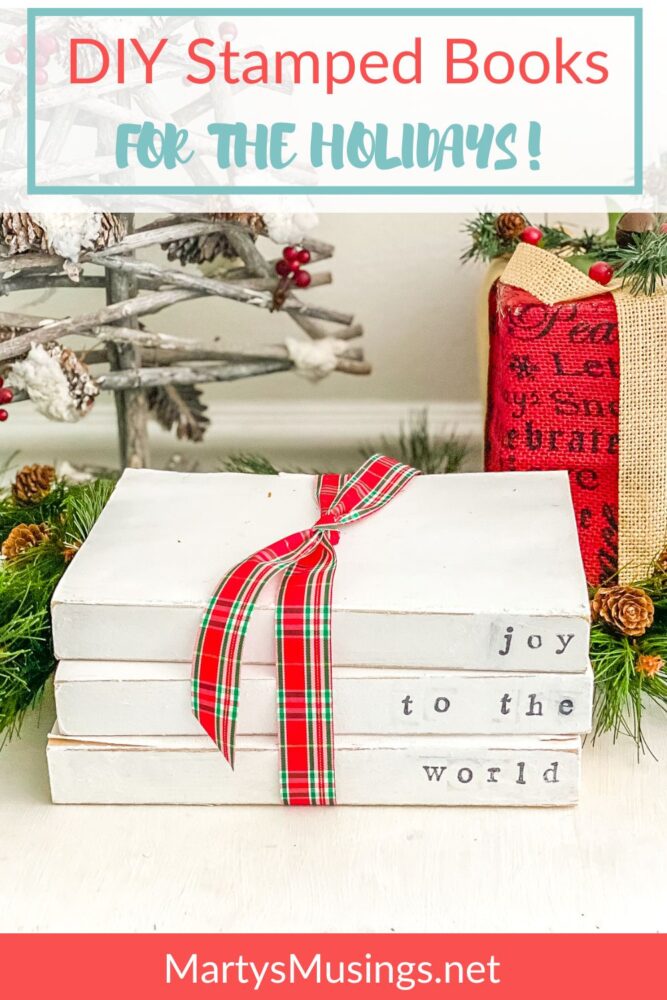
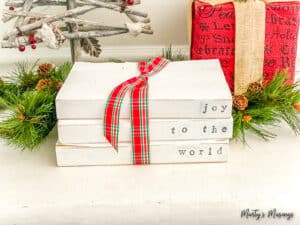
Once I finally got this process down I decided I had made such a mess I needed to do some more books! I love this “joy to the world” book stack as part of a vignette.
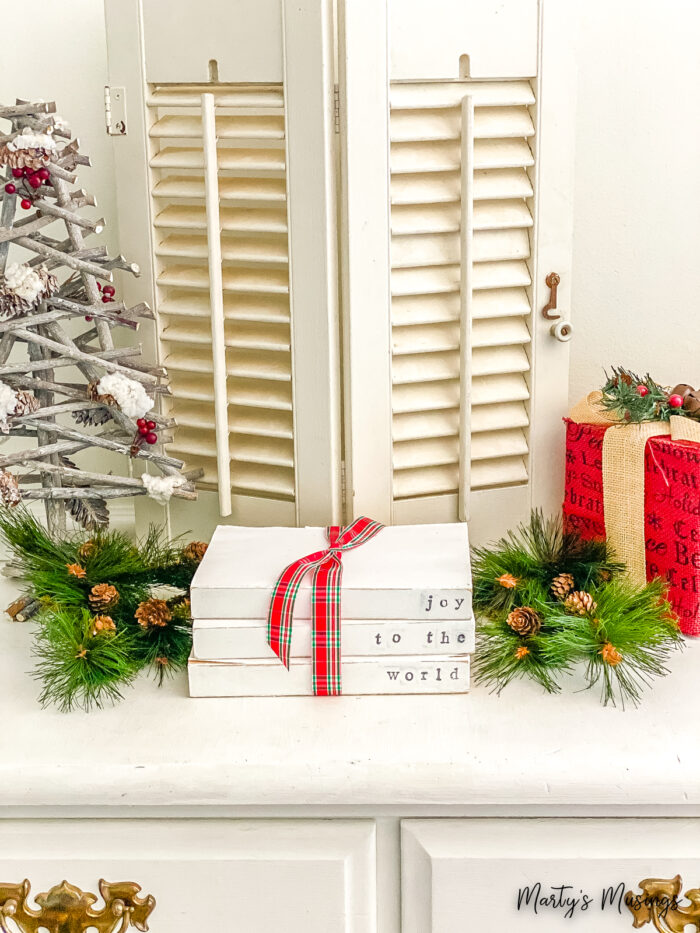
I love using books in my home decor because they’re inexpensive and can be dressed up or down!

I added a ribbon to these “thankful, grateful, blessed” books and set them on my chalk painted table right by the front door for Thanksgiving.

By stacking them in a basket lined with scrapbook paper, it sets them apart and adds interest to this little table.

So easy, my friends! What do you think of this stamped books DIY project? Where would you like to add this easy craft in your home?
Stamped Books Printable Instructions + Video
Ingredients
- several Thrifted paperback books
- 1 jar Chalk paint
- 1 set Rubber alphabet stamps
- 1 Black stamp pad
- 1 Foam paint brush
- 1 container Baby wipes
- 1 sheet sandpaper
- 1 Glue stick
Instructions
- Materials:
- Find a few inexpensive paperback books of similar size.
- Tear the cover off each book.
- Find a page with no writing if possible and chalk paint.
- Chalk paint the book spine.
- Distress spine if desired.
- Glue pages together if curling.
- Press stamp onto ink pad and remove excess ink.
- Stamp spine of book.
Video
More Easy Crafts:
- DIY Framed Jewelry Organizer
- How to Spray Paint Plastic Chairs
- DIY Textured Vase
- How to Chalk Paint Old Books
- Repurposed Pie Pans with Photos and Recipes
- No Sew DIY Bed Skirt
- DIY Step Ladder Shelf
Wonderful! I love it and you make it look so simple. Thank you.
Thanks so much, Deana. I loved this project and appreciate you sharing it so much!
Seeing your creativity and fun ideas inspires me. I LOVE book crafts. It’ll be fun to try this idea soon.
Thanks Marty!
Thanks so much, Meegan! I think book crafts are fun as well! Thanks for sharing!
What a great idea! Definitely need to make some of these!
Thanks, Maureen! It’s such an inexpensive and easy craft! Thanks for sharing!
Such a fun project!!!
Hey, girl! Thanks for sharing and enjoying this easy craft!
I’ve always loved the look of color co-ordinated books but couldn’t figure out how to add some kind of title. Thanks for this Marty. Brilliant idea
Hi, Michelle. It’s the coolest project isn’t it? Thanks for sharing it!
Great tutorial. I ‘ve admired those stamped books and now I can make them!
Thanks, Lori. I had done the same thing and wanted to make some of my own. Thanks for sharing!