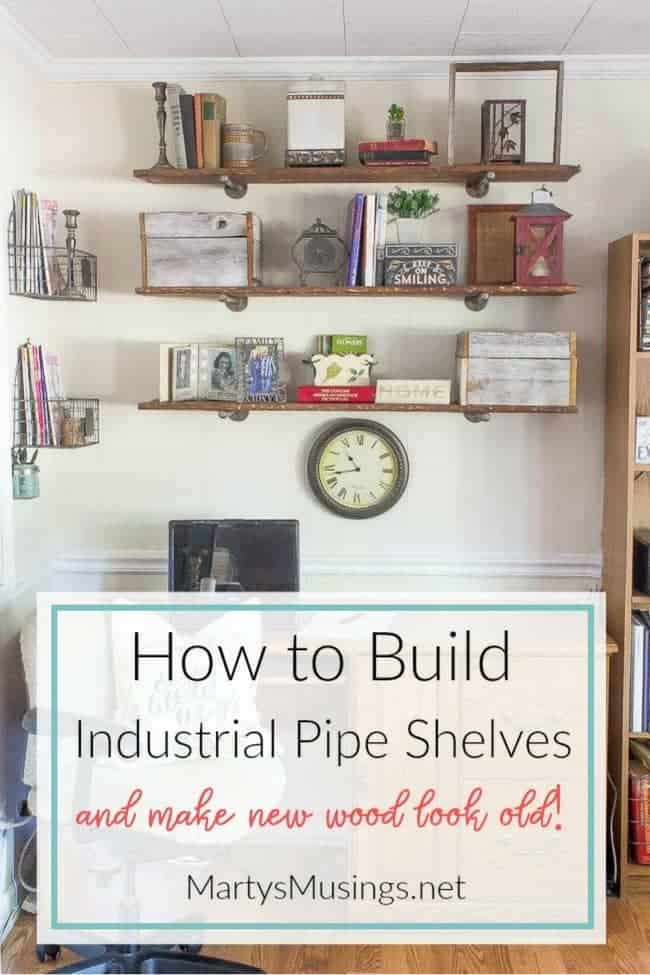
How to Build Industrial Pipe Shelves and Make New Wood Look Old
This post may contain affiliate links which won't change your price but will share some commission. Read more here.Learn how to build industrial pipe shelves and make brand new wood look old and distressed with these step by step instructions and tips.
My readers tell me all the time they struggle with a couple of different universal themes: lack of money and creative ideas!
Can you relate? I sure can!
From my early childhood days mixing mud pies with pretty flowers to learning cross-stitch patterns in high school, I’ve always been creating something.
But I don’t always FEEL creative or full of original ideas. In fact, I felt so strongly about encouraging other women I wrote an entire post on how you CAN decorate your home even when you don’t feel creative.
As a blogger I think I have to reinvent the wheel and be the first one to come up with a unique idea. That’s a lot of pressure for this average decorator, bargain hunter and lover of all rustic wood things.
Here’s the deal: even if you use an idea you see on Pinterest or on Pottery Barn’s website, it’s still going to look different in your home.
I’ve seen tons of tutorials for DIY Industrial pipe shelving (including this one from Cherished Bliss.) Today, however, I wanted to share how my equally creative husband also turned new wood into an amazing weathered and distressed barn wood look alike.
Everyone needs more shelving, and it might as well be a little rustic with a touch of industrial thrown in!
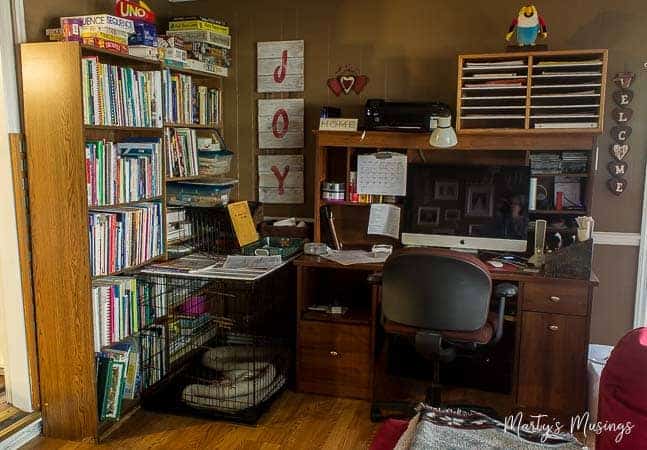
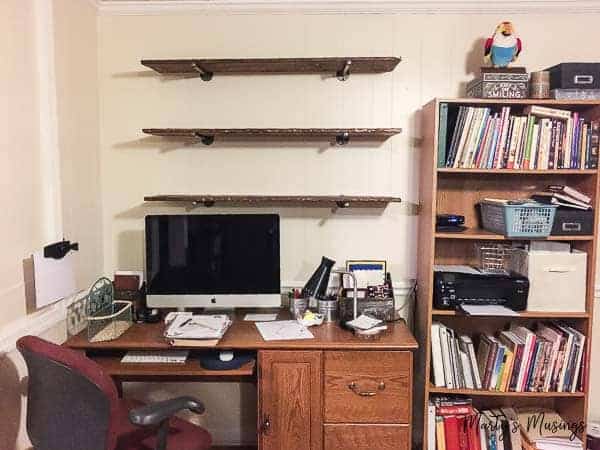
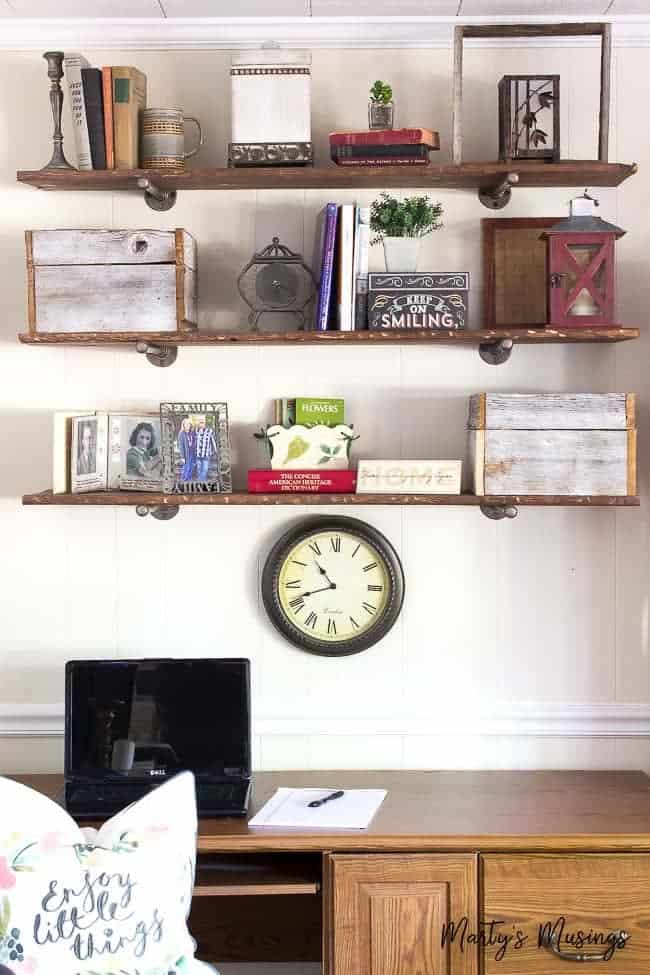
Here’s where we started. Even though this looks like a lot of books it’s just the remnants of 23 years of homeschooling, combined with a work at home office. And dark brown paint. With a parrot that talks.
Pretty, I know.
Was this a budget project? How does it fit in with the style of the rest of our home? Are these shelves even practical? Stay tuned to the end of the post and I’ll answer all those questions!
(You can read all the details on my thrifty home office nook makeover here.)
How to Build Industrial Pipe Shelves and Make New Wood Look Old
Materials
(This post contains some affiliate links for your convenience. Click here to read my full disclosure policy.)
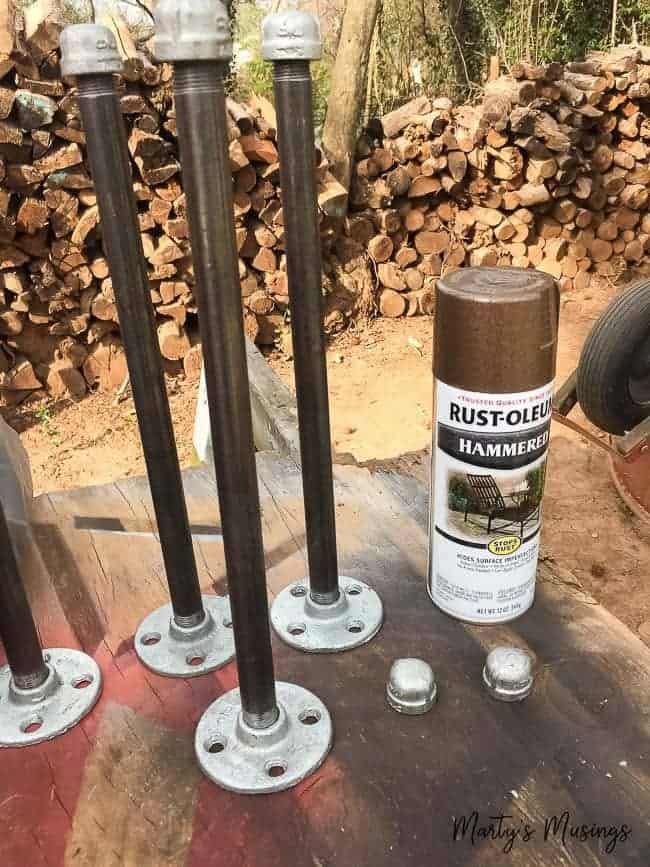
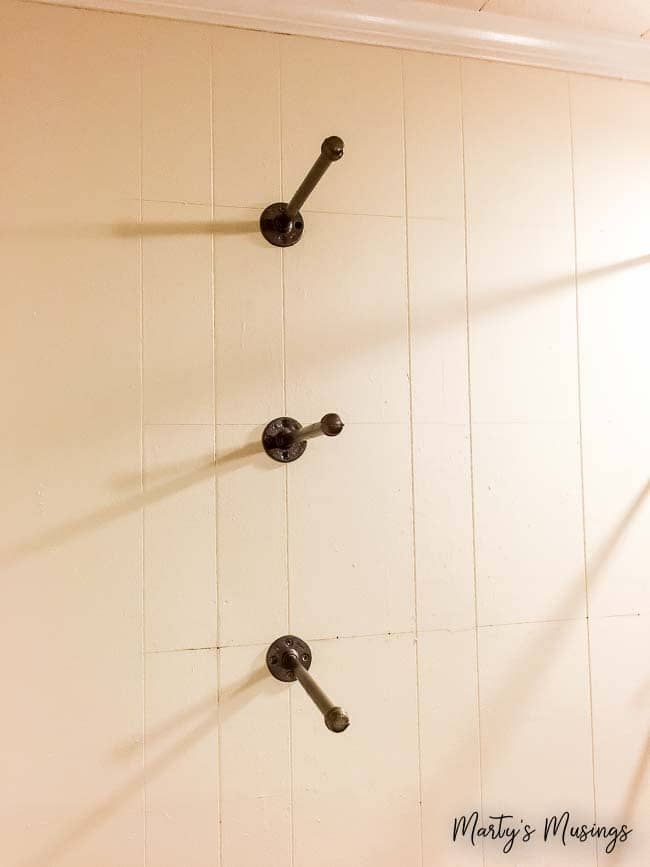
- (6) 3/8″ Black Iron Pipe @ 12″ length
- (6) 3/4″ Pipe Cap
- (6) 3/8″ Flange
- (2) 1×12 cut to desired length
- Brown Hammered Spray Paint
- Minwax wood stain (we used English Chestnut)
- Wood screws
- Power Grinder, Palm Sander or Coarse Sandpaper
Here’s my hubby to give you the details on how to build industrial pipe shelves and make new wood look old (a two-for-one tutorial!)
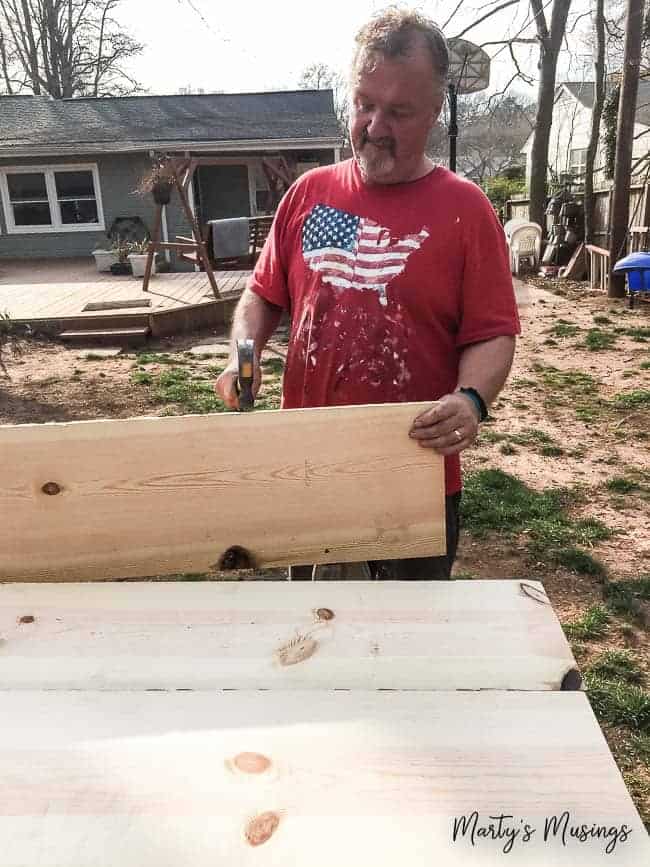
Step 1. Distress boards
One of the more difficult things to accomplish with repurposed wood is “straight and true”. In the case of shelving, this is especially true.
The answer is to use nice, new wood and make it look like repurposed wood (we love barn wood and fence board!)
Begin this process with new 1″ x 12″ lumber by just beating up the wood all over the surface with a hammer! You won’t accomplish a lot on the face, but you can really make some nice dings on all the edges.
To distress the face I used a grinder. Not a sander, but a grinder! You can REALLY do some damage here, so go easy.

I like the random swirls and the idea is to make the wood look like it’s been through a battle. The stain later will hide a lot of what you may not like, so don’t fret too much now.
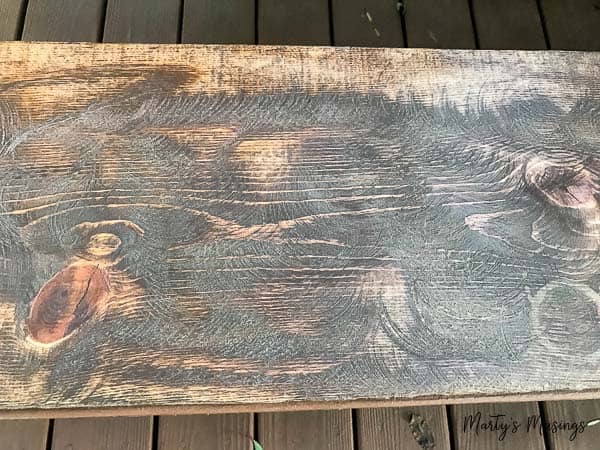
I also ran the grinder along the edges to further distress. The random imperfection is what you’re going for.
If you don’t have a grinder or even an electric sander, just go crazy with the heaviest grit sandpaper you can get your hands on. Use anything at your disposal to damage the wood!
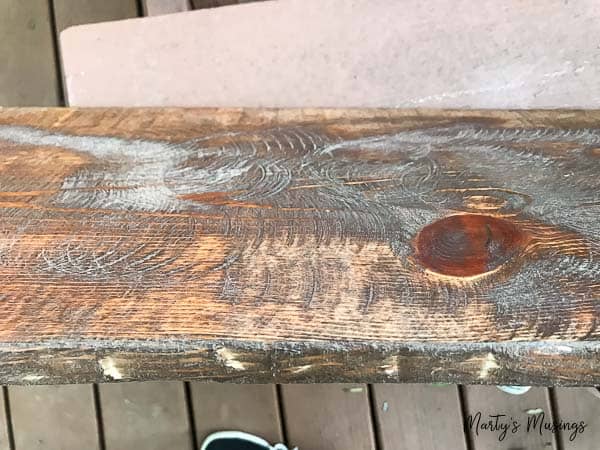
Step2: Stain wood
After you get where you think you want to be, rub on some wood stain to your color and depth preference. Any Minwax oil stain will do, and your color is the right color!
Step 3. Spray paint pipe, flange and cap
Sorry, no pictures of this step but it’s pretty self-explanatory! If you’re a messy painter like my wife, spread some plastic or newspaper underneath these items. Always remember to spray paint outdoors!
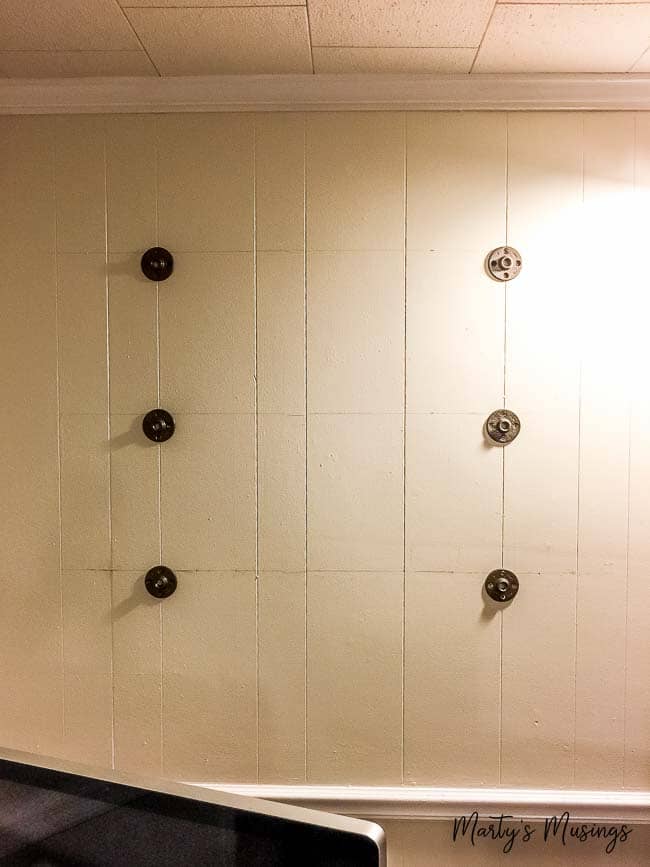
Step 4. Install supports
Now we can move on to the wall where you’ll be installing the shelves. If at ALL possible, you want to hit studs where these mounts will be installed. I would even go so far as to say that you MUST hit studs, since you’ll likely load these shelves with some amount of books and stuff.
Once you find the studs, match up your shelf length for spacing. You may not need a brace on every stud, but you will need one as close to each end as possible. Use a level to ensure straight and true and mark your lines. Then screw the flanges along the lines into the studs.
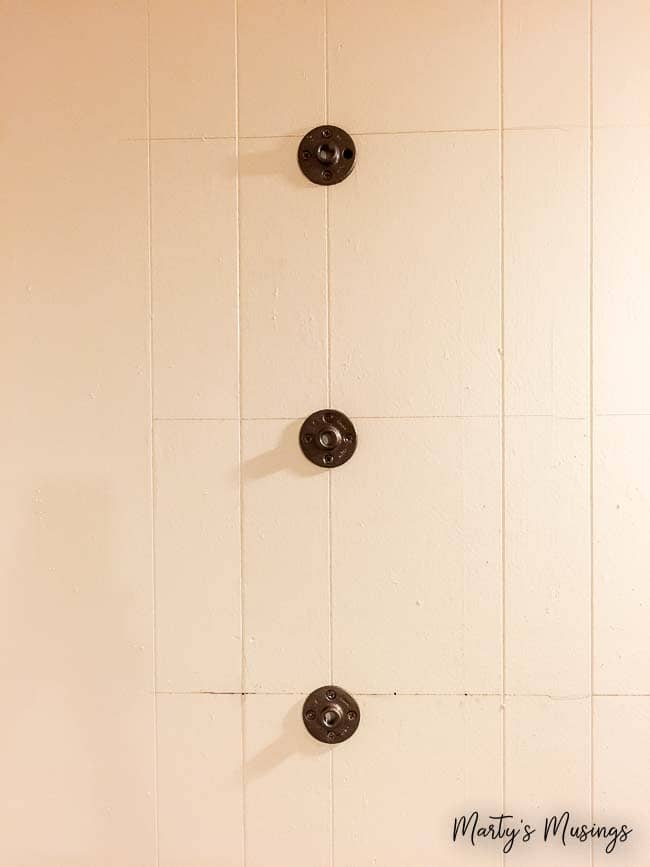
Because my shelves were not terribly long and I was using good lumber, I only needed a support flange near each end. Longer shelves and less expensive wood or plywood may require additional support.
Step 4. Assemble supports
This step is just assembling the painted caps, pipe and flanges together. It is all already threaded to receive the other pieces, so super simple!
Step 5. Mount shelves
And there we are! Hang distressed shelves on painted industrial piping! These shelves are just resting on the pipes, but you could easily install a u-shaped pipe clamp to the underside of the shelves around the pipes so they wouldn’t flip off or move. Totally up to you.
However, if you don’t secure the shelves, remember to balance the weight of your decorations. I’m just sayin’…
Back to Marty: Such a difference! Now it’s my turn! It’s lighter, brighter and there is less STUFF!
I had fun adding my thrifty touch while still needing to remain a bit practical. Those two fence board boxes Tim built me contain a lot of office supplies but look much prettier.

I have room for my all of my yard sale decor (get all my best shopping tips here.)
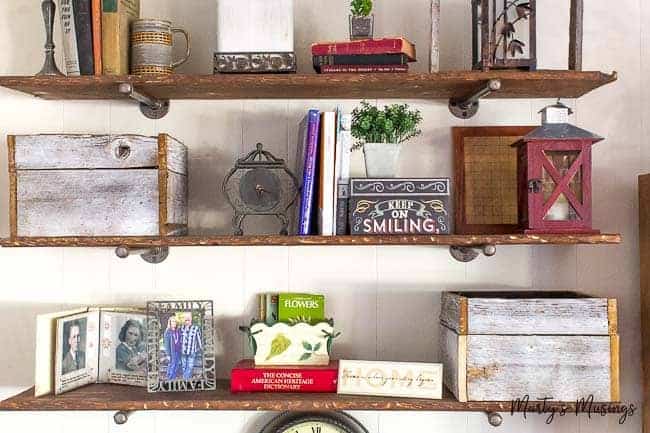
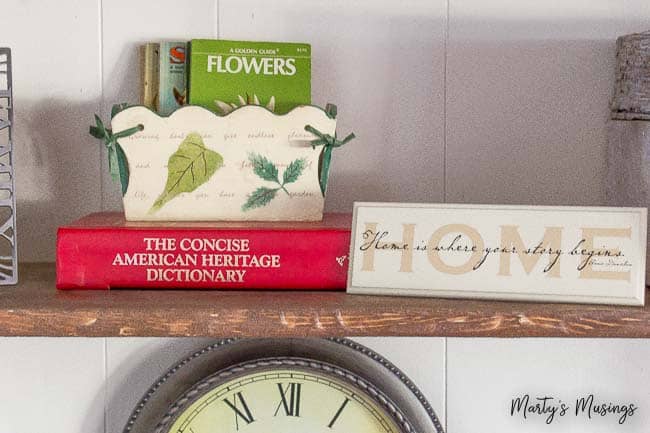
“Home is where your story begins” was my first tagline for the blog and still holds a special place in my heart.
Back to some of the first questions. Was this a budget project and do they fit with my decor? The supplies cost a little over $100 so it wasn’t my usual trash to treasure project. To me, however, it was worth it for the custom look and the way the weathered boards and industrial hardware helped my style continue to evolve.
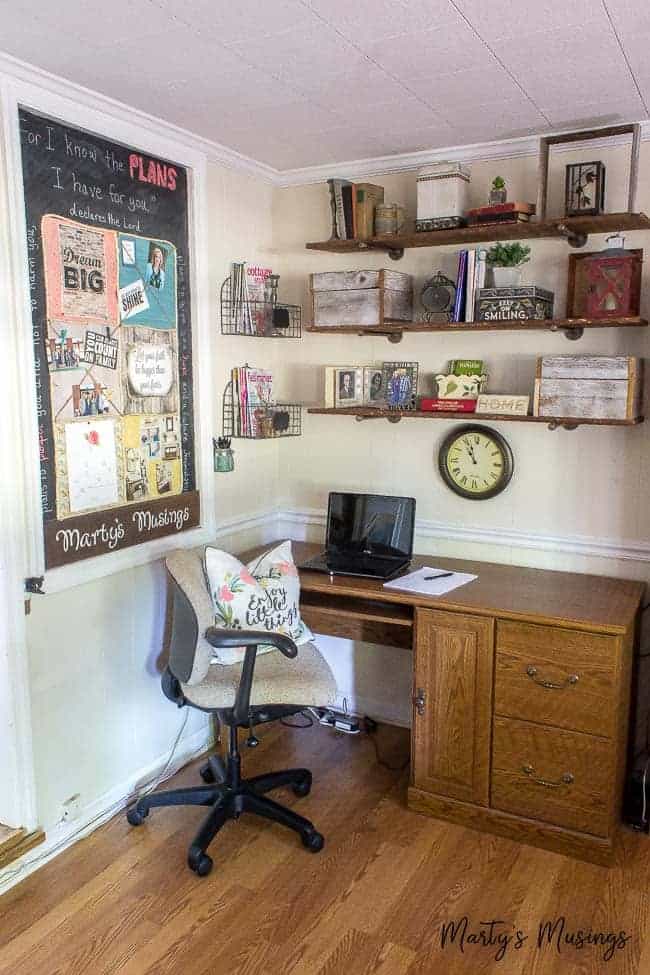
My office nook is such a happy place for me! You can read all about my DIY Bulletin Board and my full thrifty home office nook.

SaveSav
Love the shelves and the way you displayed your treasures. FYI: If someone doesn’t want to paint the pipes Hobby Lobby has pipes for shelving in the knob department.
Hi, Diana. Thanks for the tip on the pipes. I’m a huge Hobby Lobby fan!