How to Avoid a Paint Can Mess
This post may contain affiliate links which won't change your price but will share some commission. Read more here.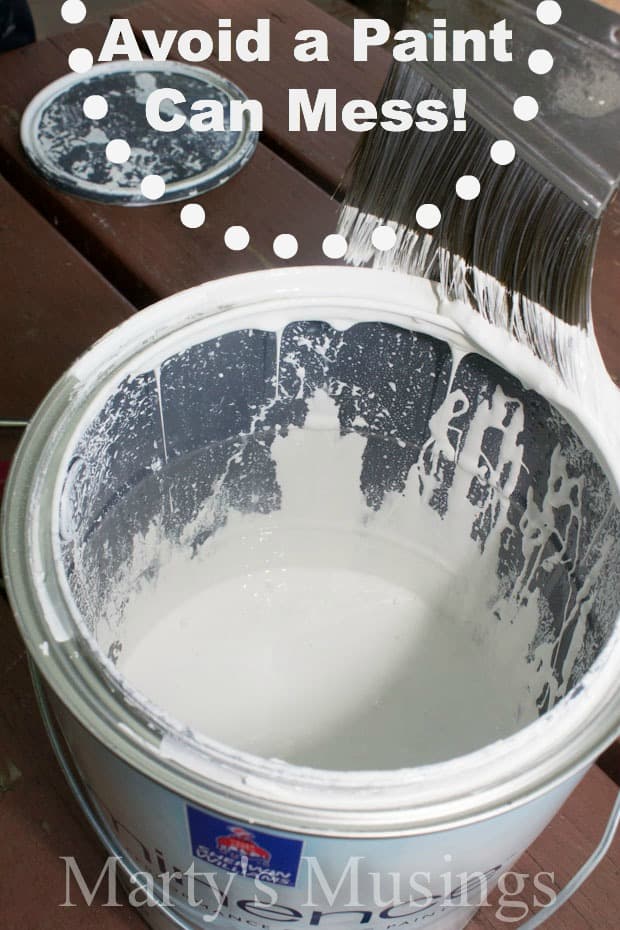
My DIY husband is back with a request to help a reader avoid a paint can mess. You’ll love this easy and efficient tip from a professional painter.
From Tim: Let’s talk about that paint can. Many of you may have heard of putting a layer of plastic wrap over the opening before tapping the lid down. Not a bad idea, but not fool-proof. The brave among you may even combine that tip with storing the can upside down. Potentially disastrous and still not a complete fix.
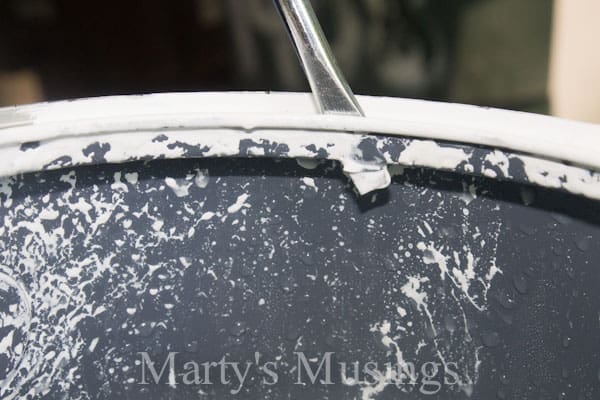
There is a step prior to closing that lid at the end of your project that can make a HUGE difference, both while you work and long after you’re done. The trick is this; metal paint cans have a groove all the way around the top. This is designed to accommodate paint that is rubbed off your brush after you dip into the paint. It does the job, but most DIY painters are notoriously messy here. Look at the side of the can! Catastrophic.
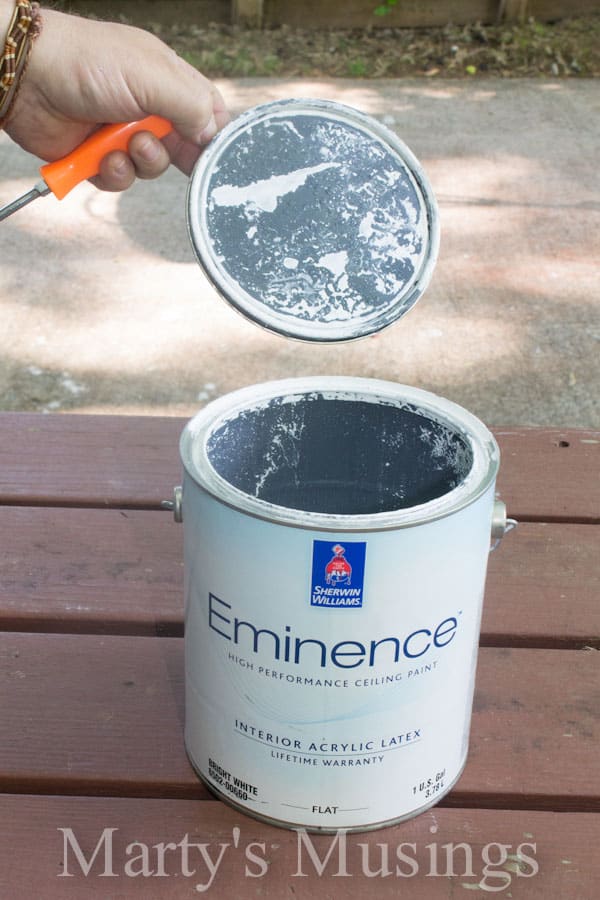
So here’s what you do: immediately upon opening the can for the first time, Get a standard sized slotted screwdriver (not the one that looks like an asterisk, the other one) and a hammer.
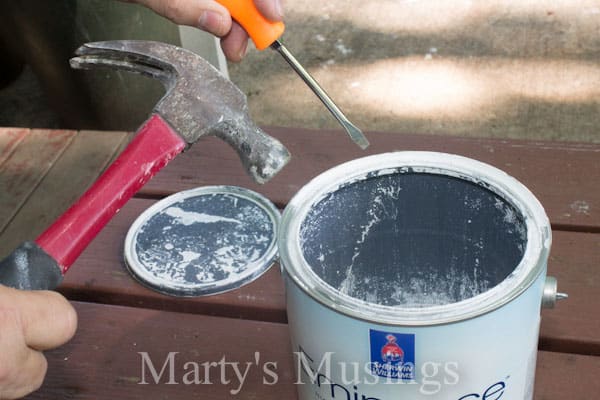
Punch three holes in that groove along the top of the can.
Space them about three inches apart, lightly enlarging each one after the screwdriver penetrates the can.

DON’T do this all the way around the lip! These holes will allow the paint to run back down into the can!
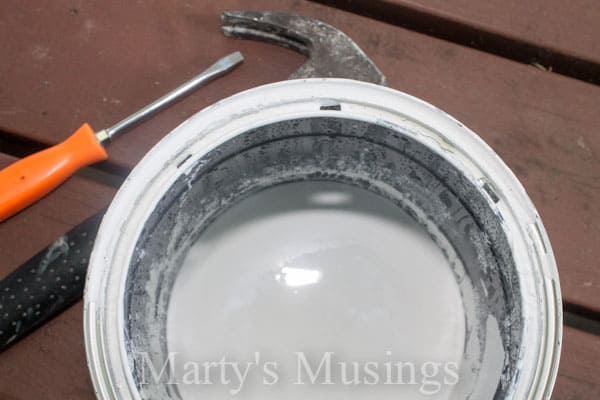
Occasionally clean the groove with your brush tip and the excess will be directed to the holes and drain away.
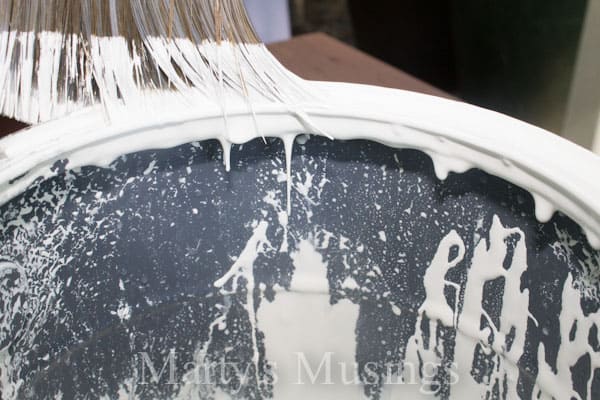
If you force yourself to only drag the brush across the side of the can with the holes (I consistently make that the label side with all the instructions), your can will stay clean, you will have FAR less drips as you work, and, with a much cleaner groove without a bunch of dried paint interfering with the seal, that lid will fit nice and snug where it’s supposed to go.
Good luck!
More Painting Tips
Practical painting tips for the home that anyone can use, including chalk painting, accent walls and choosing the right colors.
I always pour the paint I think I will use in that session, into another container with a plastic bag inside the container.
I put the top of the bag down using a rubber band so that it doesn’t come out of the container while I’m using it.
This also makes it easy to clean up by tying up the bag & tossing it out. I also use a container that I have a lid for so that I can seal it up if I don’t use it all.
This is also helpful if I find that I need to add a little water or thinners to the paint instead of having to add to the whole can. It’s also helpful if I want to add another colour to the paint, eg. white paint to give a shaded effect on drawers.
Hi, Wendy. Thanks for sharing your tip. MY husband’s the professional so I leave the paint cans up to him! I’m purely a chalk paint gal myself. 🙂
Love this tip Marty! Thanks for sharing and to your hubs!!
Hey, Bonnie. I’m glad you liked my husband’s paint can trick. He’s full of bright ideas and is pretty good about letting me share them!
Thank you!! I tried this once years ago but used a nail instead of a flat screwdriver. The hole was too small for the paint to drip down. I will try again using a flat screwdriver and make more holes.
Hi, Jeanette. I’m so glad my husband’s paint lid tip was helpful. He’s full of helpful ideas! If you click on the DIY tab you can see his Ask Tim posts. Thanks for visiting!
Great tip that really makes a difference! Thanks for sharing this at my Pin Me Linky Party.
Oh! I have tried using nails, but nail holes fill with paint and becoming self-sealing, which undoes the hole. But a screwdriver hole, that makes sense. Why not do it all the way around?? However, If I had known this, I wouldn’t be in the jam (paint jam) that I am in now, with a mess….
I am going to get a clean new can from the hardware store, and do this for the paint that is left so It can be treated and keep the last of the paint for my room in pristine condition!
Thanks
Nancy
Yeah, Nancy! Glad my husband’s painting tip helped you!
Great tip! I will be trying this with my next paint project!
Glad you liked my husbands painting tip. Thanks for visiting Marty’s Musings!
Such good tips! I’d love if you’d like up to The DIY’ers: http://homecomingmn.blogspot.com/2013/05/the-diyers-and-some-favorites.html
Genius! LOL ~ thanks for the tip.
I’m visiting you today from Uncommon Slice of Suburbia. I co-host a Linky Party Tuesday (opens at Midnight Mon). I hope you get a chance to stop by my blog, link up and leave a comment, too!
~ Megin of VMG206
Join me each Tuesday for Brag About It Link Up Party
I have some huge paint projects in the future, so this is a super tip. Thanks tons and thanks also for joining Inspire Me. Hugs, Marty
This idea is fantastic!
Thanks for sharing.
Hope to see you on my blog:)
Greetings from Singapore…
When this goes viral, I want residuals! 🙂
Haha! I hope it goes viral. It’s been slow going so far. I always wonder if my pic helps or hurts and if the graphic is just right. Silly, I know, but I’m still learning!
I’m about to take on a new painting project and this is a FABULOUS tip! Thanks.
Popping in from Oh, Mrs. Tucker!
That’s a perfect solution! Thanks, expert Tim. 🙂
That works soooo much better than nail holes. I will be doing this for sure!
Smiles, Alice
What a fabulous idea! And so simple, too!
Totally brilliant! I am so doing this the next time I paint! I popped over from Or So She Says… thanks for sharing!
~Abby =)
Hi, Abby. I’m glad you liked my husband’s DIY paint tip! He does this for a living, but he’s also a handy DIY guy! Have a great day!
I love simple solution for a messy problem. Thanks for the tip.
brilliant ! pinning to my great idea boards on Pinterest…thank you…xo
Hi, Lucy. I’m so glad you liked my husband’s paint can tip. He has great ideas, doesn’t he? He actually has written some posts for me (Ask Tim) if you want to check out his handy DIY skills! Thanks for stopping by!
This is such a great idea! I love to paint and always love good tips! I would love if you have time for you to share this at my linking party today! http://www.fidlersunderoneroof.com/2013/05/linking-party.html
hope to see you there!
Thanks for sharing the tip!!
Happy Painting!!
Have a great weekend!!
So that’s how you do it! This info came just in time as my hubby and I are in the middle of a whole house re-paint (inside). Thanks for sharing this! I found you on the Stonegable blog hop.
Hey, Vickie! I’m glad my hubby’s paint can tip helped you as you’re painting! Hope your house looks amazing when you’re done!
This is a fantastic idea! I would love it if you linked up to my Create It Thursday post…it’s live now! http://www.lambertslately.com/2013/05/create-it-thursday-2-plus-features.html