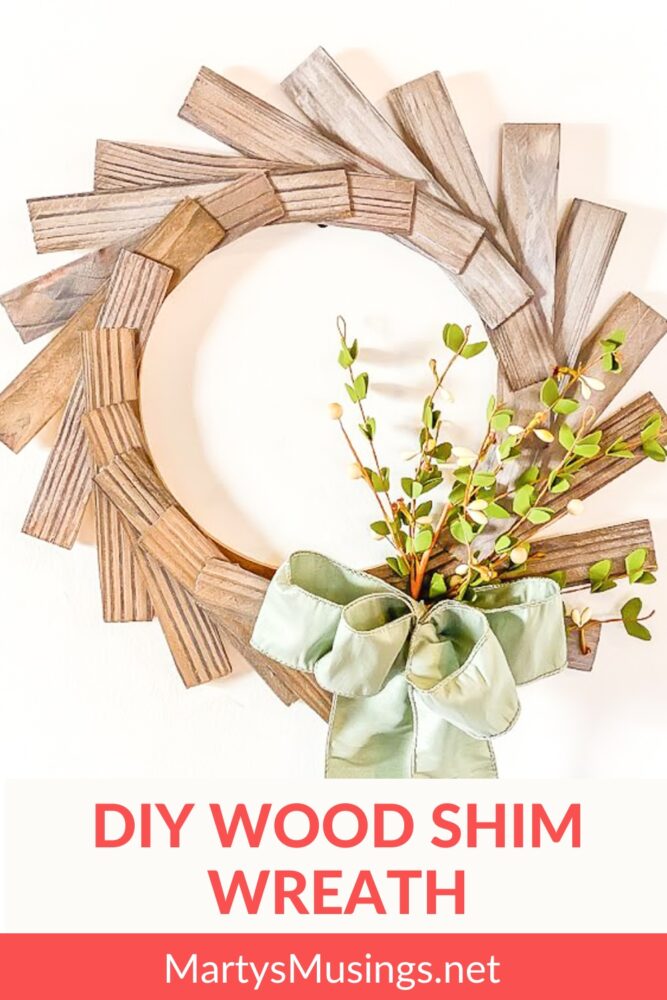
DIY Wood Shim Wreath Tutorial
This post may contain affiliate links which won't change your price but will share some commission. Read more here.This one-of-a-kind DIY wood shim wreath is so simple yet perfectly unique and can be used for any season of the year!
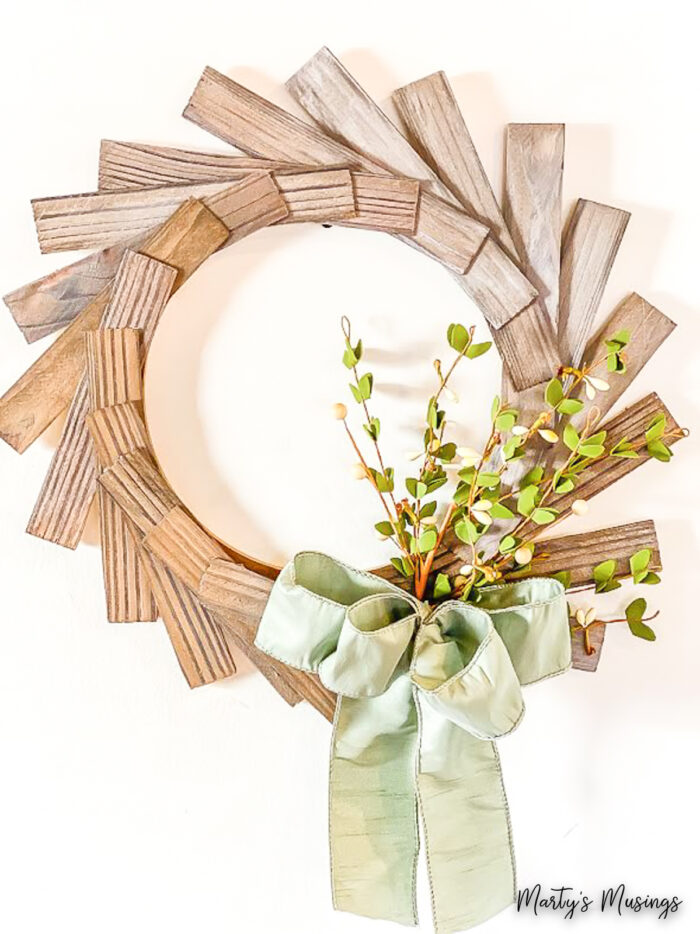
My inspiration for this project was repurposing unusual objects for my home decor and this DIY wood shim wreath is so fun and different! Purchase some stain, whitewash and inexpensive wood shims and this quick tutorial is ready!

Materials you’ll need


Instructions
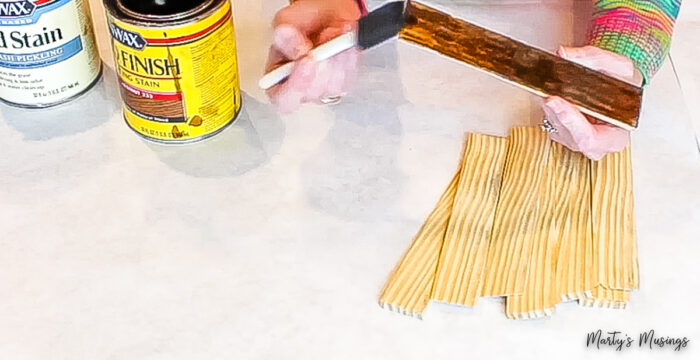
Step 1. Work outside on a covered surface when you use the wood stain.
If that’s not possible, make sure the area you’re working in is well ventilated. Always make sure fumes are manageable and wear a mask if necessary.
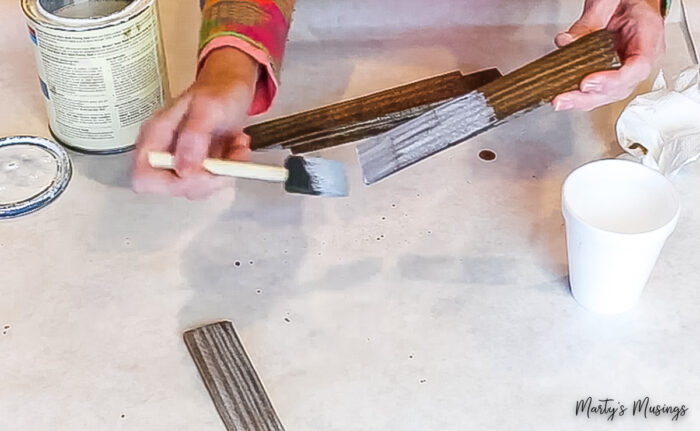
Step 2. Stain one side of all the wood shims and let dry.
Make sure your surface is covered so the stain doesn’t leak through. If preferred, you can wear gloves to protect hands. Let shims dry.
Know that each shim is imperfect and adds to the beauty and uniqueness of the finished product.
Step 3. Stain the wreath form and let dry.
Apply same stain to wreath form and let dry.
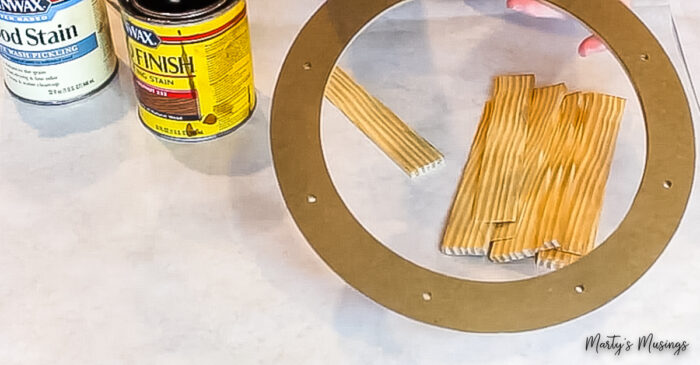
Step 4. Stain the edges and ends of the wood shims.
You want your project to have a finished look so this is a necessary step.
Step 5. Add a coat of white wash pickling stain and let dry.
This is the type of project that is personal preference but I loved adding some pickling stain on top of the wood stain. I actually diluted it 50/50 with water and pickling stain.
You could also use a small amount of paint diluted with water (my preference chalk paint) for convenience instead of buying the pickling stain.

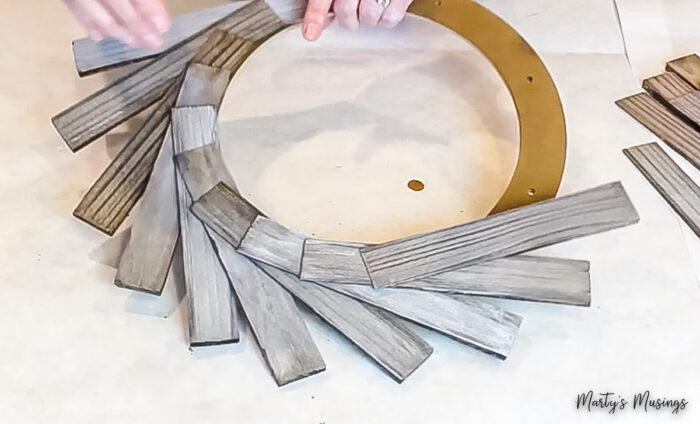
Step 6. Apply two inches of hot glue to the back of the thin end of the shim and attach to the wreath form.
Line up the shim with the inside of the wreath and hot glue. Continue to add shims at an angle moving around the wreath, leaving about 2 inches of the thin end exposed.

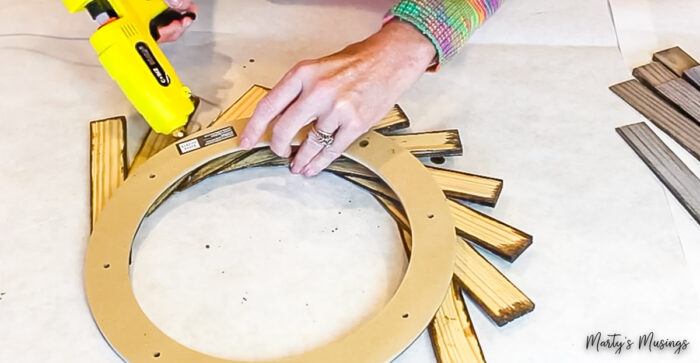
Step 7. After all the shims are attached, turn the wreath form over and glue the loose sections to the back of the wreath.
There may be some sections that aren’t completely secure so take the time to glue from the back side. If necessary, place a heavy book or object on top of the wreath to help the glue attach.
Step 8. Make a simple bow using ribbon and attach to wreath with floral wire.
Step 9. Arrange silk flowers and tuck into wreath or attach with hot glue.
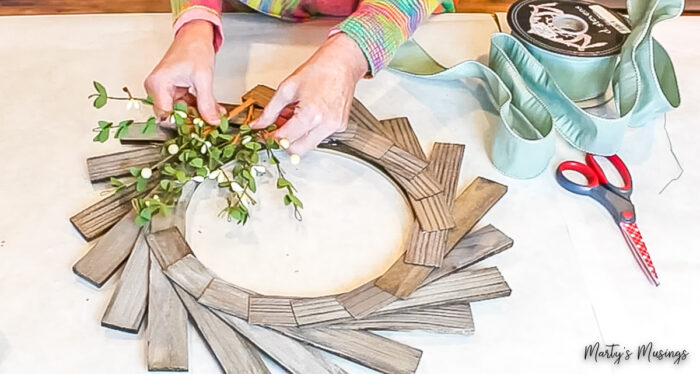
Step 9. Hang on front door or wherever desired.
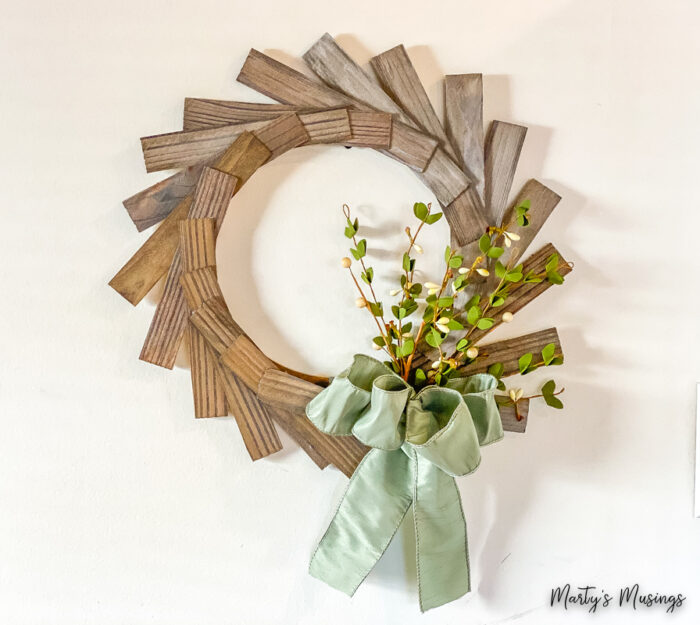
This is the cutest spring wreath but think outside the box and use seasonal ribbon and flowers to change up this project.
FAQs about wood shims
More Easy Crafts
Try these fun and easy crafts anyone can do! A little spray paint, a few inexpensive supplies and creativity turns boring into fun!

Wood Shim Wreath
Ingredients
- 1 12” wooden floral and craft wreath form
- 2 pkg Wood shims (12 shims per package)
- 1 can Wood stain (I used English Chestnut)
- 1 can Pickling wood stain
- few Foam brushes
- 1 Hot glue gun
- 1 bunch Silk flowers
- 1 roll Wide ribbon
- 1 roll Floral wire
Instructions
- Work outside on a covered surface if possible when you use the wood stain.
- Stain one side of all the wood shims and let dry.
- Stain the wreath form and let dry.
- Stain the edges and ends of the wood shims.
- Add a coat of White Wash Pickling stain and let dry.
- Apply two inches of hot glue to the back of the thin end of the shim and attach to the wreath form.
- After all the shims are attached, turn the wreath form over and glue the loose sections to the wreath form.
- Make a simple bow using ribbon and attach to wreath with floral wire.
- Arrange silk flowers and tuck into wreath or attach with hot glue.
Video