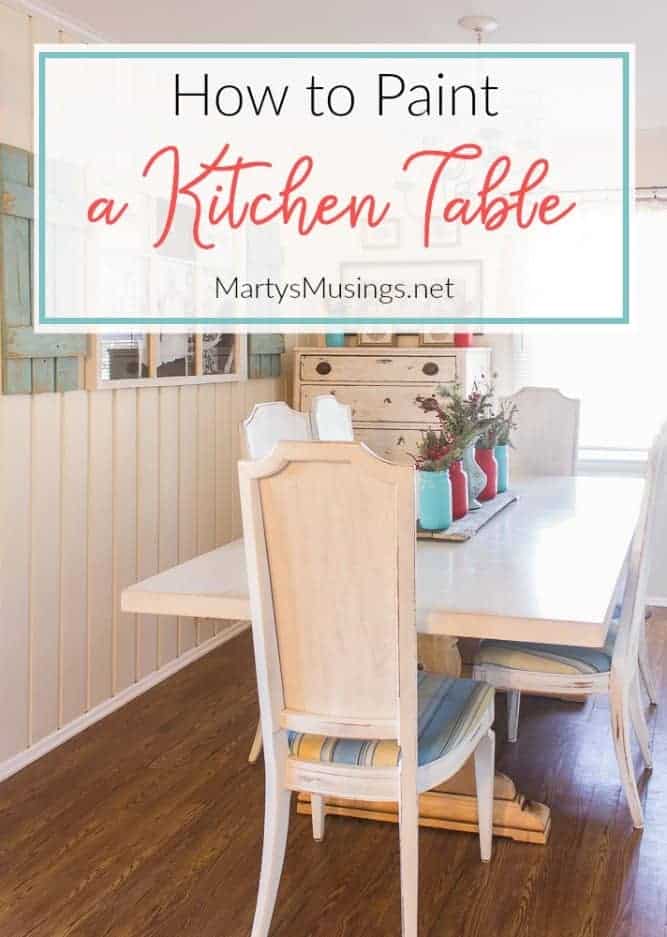
How to Paint a Kitchen Table
This post may contain affiliate links which won't change your price but will share some commission. Read more here.Want to know how to paint a kitchen table the right way? Just follow these easy steps and you’ll have a farmhouse DIY project that lasts for years to come!

How do you know when it’s time to makeover a piece of furniture or time to pitch it out onto the curb for garbage pickup?
Our previous kitchen table had seen better days. I bought it for $150 (including six chairs) at a yard sale many, many years ago. It served as both kitchen and dining room table in our ranch home.
Watermarks, scratches, dents and wood stains. This table had been well loved.

Try to sell it and get a few dollars or give it a makeover? Since we still believed there was life left in our farmhouse looking kitchen table now was time to give this solid wood table a fresh new look. (Read all my favorite painting tips here.)
(***You’ll want to read to the end of the post and see how the paint job has lasted over these last 5 years!)
What is the best paint to use for painting a kitchen table?
Latex
Latex paints are popular for kitchen tables because of their low price and easy accessibility. But you must pay close attention during preparation: cleaning; sanding; and priming the table. This paint can also dry fast, but the curing time may be long. Often the paint still has that flimsy and soft appearance afterward.
Flat
A flat finish is often the most common and popular choice. However, just because it is common doesn’t automatically mean that it is good. A flat finish is known for its lack of durability.
Although it has a nice matte appearance, a flat finish is more susceptible to damages and scratches. All in all, take into consideration how much use your table will receive.
High Gloss
The high gloss finish looks good and is durable. However, note that high gloss needs the most amount of maintenance and preparation.
Satin
The satin finish combines the matte appearance of the flat finish and the durability of high gloss. It’s also easier to clean the satin finish because it tends to be more washable than other options.
Semi Gloss
A semi gloss finish has a shiny and nice looking appearance and is often the best option in terms of durability. Scratches aren’t likely to be an issue due to the high resin concentration, and this is the best choice to consider if you plan to use your table daily.
Acrylic
Acrylic is a water-based paint that has a close resemblance to latex. While little preparation is required when using this paint, give the table a good sanding before applying acrylic paints.
The pros for using acrylic paint are that it’s scratch-resistant and resilient, easy to apply and available in a wide variety of colors. The cons include being prone to brushstroke marks and sold in smaller containers.
Is white paint a good choice?
If you’re concerned about the final look it’s not a bad idea to get a few samples of the paint you’re considering. White may not really be white! When we remodeled our kitchen I wanted white walls. We tried several different colors and my ex husband ended up painting the walls a second time because the white didn’t have the right tint.
What is the best way to remove a finish from a wood table?
There are three ways to remove the finish from a wood surface: solvents; chemical strippers and sanding.
Removing the varnish by sanding is good for paint, acrylic, varnish, lacquer and shellac. This may be a labor intensive project but if you’re wary of chemicals and solvents this would be the way to go.
Shellac and lacquer are alcohol-based finishes, which can be removed with a variety of solvents available from your neighborhood hardware store. Shellac can be removed with denatured alcohol. If alcohol doesn’t work, try lacquer thinner.
Chemical strippers are good for polyurethane (acrylic), varnish, and paint. If you’re able to work with the appropriate safety gear in a very well-ventilated area such products make quick work of removing finishes.
Always do your research before tackling a large project like a kitchen table and find a good tutorial to follow!
(I’ve included some affiliate links for your convenience. Click here to read my full disclosure policy.)
Materials:
Electric Palm Sander
5-inch Disc Sander
Cordless Drill
Purdy Paint Brush
White Latex Ceiling Paint
Minwax Water Based Polycrylic
Instructions:
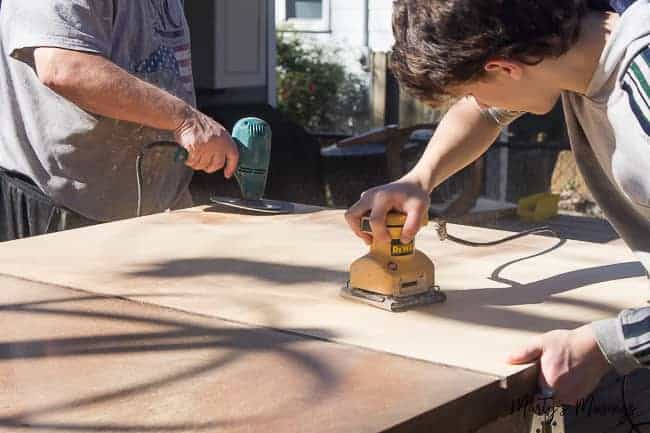
Step 1. Dismantle table and haul outside.

Taking the table apart may be time intensive but if you’re able to DIY this project in warmer weather it’s essential! Luckily for us the weather was perfect since we needed outside space to sand the table down to bare wood.
Step 2: Remove finish from old table.
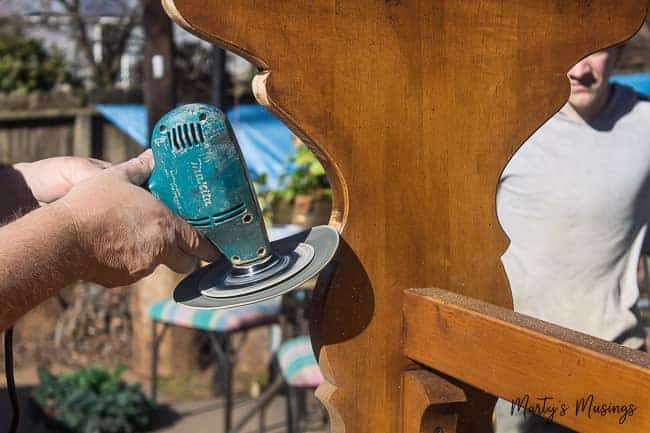
The first step was to use a grinder to remove as much of the finish as possible without damaging the wood. This tool has a 60-grit pad on it; that’s basically gravel glued to a circular disk! It makes quick work of anything, but you do have to be careful not to go too deep.

Because the grinder did leave swirly circles in the wood, we went back over the entire surface with a palm sander and 80 medium grit paper. This was just enough to even out the surface, revealing a really beautiful pine surface. Not exactly what we wanted.
Perhaps the biggest danger in a project like this is hitting the wall and getting sick of sanding. But once you make that first pass, you’re committed. This larger flat surface wasn’t too bad, but the story changed when we moved down to the base.
With no other choice, we flipped the base on top of the over-turned top to use as a workspace and started over. This was MUCH more tedious and difficult since we had curves, crevices, and sharp stops.
There were, indeed, areas that needed a hand sander with grit sandpaper and remained darker than the bare pine. However, this actually added some character in the end.

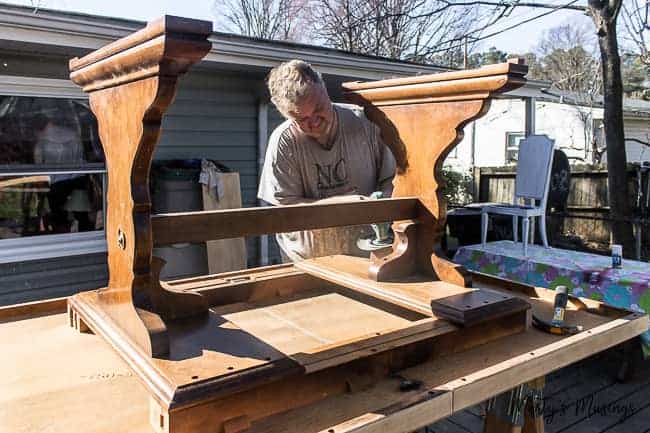
You get an idea of the variance in the surfaces. We also had to be mindful of the fact that we were working upside down; what we couldn’t see as we sanded would be easily seen when the table was flipped over.
Progress, but still not finished. See the swirls from the grinder? The palm sander takes care of those.
Before it was all over, the table legs were removed as well. I hadn’t intended to do that, but it was clear that the more access we had to each nook and cranny, the better the result. It was a good choice and allowed for a suitable result.
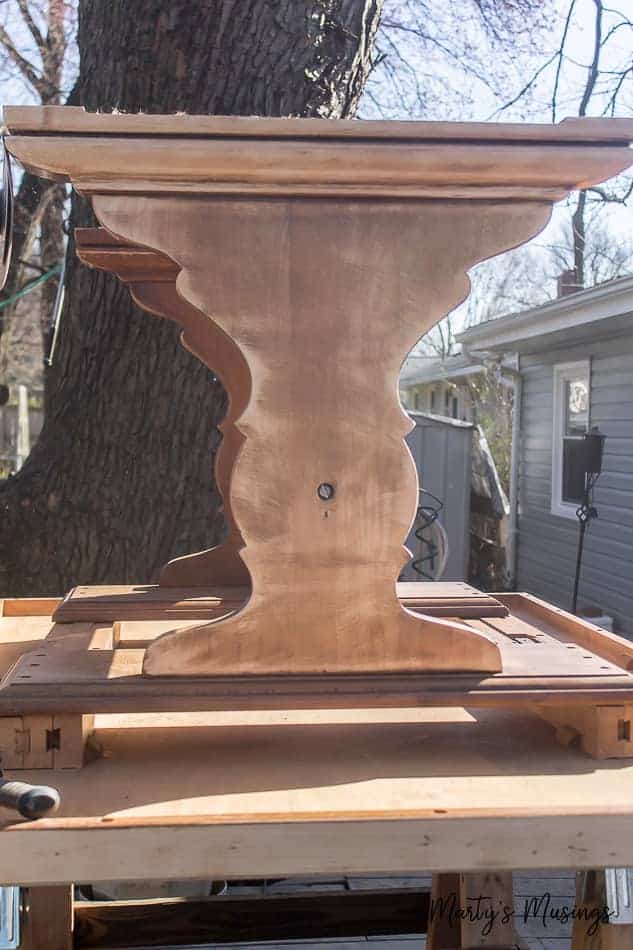
And this is the stripped table, top to bottom! It was attractive…in an unfinished, unattractive pine sort of way.
This would end the outside work, since I decided to re-finish inside. Too many birds, bugs, critters, pollen, dirt and debris.

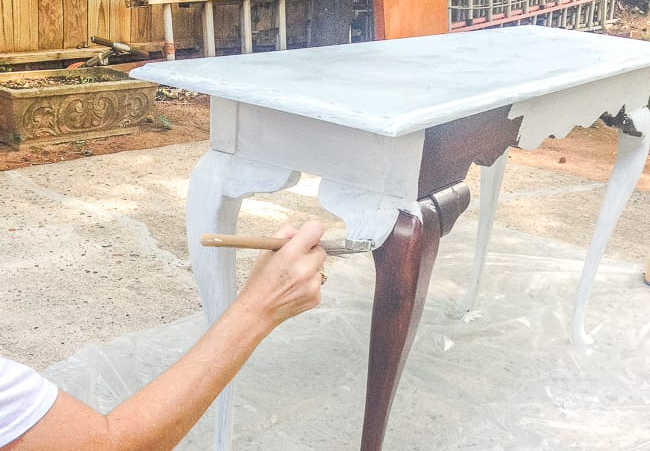
Step 3: Apply paint mixture.
I made the decision to go white and then try and work backwards with some kind of “faux distressing.” Yes, that may be a new technique with unknown results, but forward I went.
The direction I went may startle even the most weathered artisan; I chose to mix white latex ceiling paint with the Minwax Polycrylic in a clear satin finish.

With 23 years experience as a painting contractor, I knew the go-ahead was the fact that these were both water based products. Normally, and under any other circumstances, mixing paint and poly would be a bad idea. But, you can go ahead as long as you mix water with water or oil with oil. Oil and water do not mix.
There was no magic formula or ratio. I just mixed, starting with small portions and sampling on a spare pine piece of lumber. When the right effect and depth was achieved, I increased the ratios and went to the table.
The first coat of the primer went right on top of the table. The leaf, in the center of the table, was done first and ended up being my experimental area.

If I totally blew whatever happened on the leaf, I could just pull it out and start over without re-working the entire table top. Working with the grain here in nice, long strokes and catching any drips at the edges.
I wasn’t completely sold on the solid white effect, so I experimented on the leaf by lightly dragging a rag dipped in dark walnut stain across the surface. Bad move – didn’t like it at all. So I quickly removed as much as possible and re-coated with the paint/poly stuff.
Critical tip when mixing paint:
If you are custom mixing any kind of multiple products, be SURE and mix enough at the very beginning for the entire project, even if it means you finish with too much. If you run out before you finish, it is highly unlikely that your new mix attempt will match the first round you started with! Trust me, you don’t want to let this happen.
So here is the top with a first and second coat of the milky paint and polyurethane combination, not quite dry. I still wanted just a bit more depth, so a third coat of the same and then two top coats of just the polyurethane to seal. It took five coats in all, taking time to lightly sand and wipe in between each.

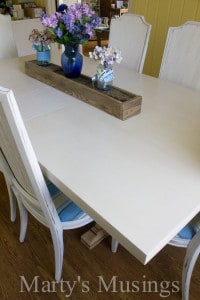
And here is the end result. The grain of the leaf actually runs opposite the rest of the top, so it looks slightly different in color in this picture. Not as jarring in reality.
Before the divorce we used the table for several years and were pleased with the way this process turned out.
Here’s the table with a shot from Christmas. What do you think?

We love the contrast of the wood base with the painted top. The dining space felt so much lighter with the big white table instead of the large dark slab.

Who knew when we painted our kitchen tabletop that a few years later we would take down our living room wall, totally gut our kitchen and start over?
FAQs about painting a table
More Painting Tips
Practical painting tips for the home that anyone can use, including chalk painting, accent walls and choosing the right colors.

ALL POSTS IN OUR KITCHEN REMODEL:
♥ Small Ranch Home Kitchen Remodel: The Dream Begins!
♥ How to Save Thousands of $$$ on a Kitchen Remodel
♥ 5 Practical Tips on How to Choose Flooring for Your Home
♥ How to Take Care of Your Pets During Your Remodel
♥ Set up a Temporary Kitchen During a Remodel
♥ How to Install Laminate Flooring: DIY Tips and Tricks
♥ How to Choose Kitchen Cabinet Hardware
♥ How to Paint a Kitchen Table: Farmhouse DIY (you are here)
How to Paint a Kitchen Table
Equipment
- 1 Electric Palm Sander
- 1 5-inch Disc Sander
- 1 Cordless Drill
Ingredients
- 1 Purdy Paint Brush
- 1 gallon White Latex Ceiling Paint
- 1 gallon Minx Water Based Polycrylic
Instructions
- What kind of paint should I use for a kitchen table?
- Is white paint a good choice?
- How long will the paint last on the table?
- What is the best way to remove a finish from a wood table?
- Can you chalk paint a kitchen table?
- Dismantle table and haul outside.
- Remove finish from old table.
- Apply paint mixture.
Video
Can your finished tabletop withstand some heat from warm dishes?
I would like to paint a solid wood Ethan Allen pedestal Table and chairs. I want to refinish the top to current wood color (it is damaged) and the rest of the table black. Same with Chairs, seat current wood and the rest black. I would appreciate any advise on how to paint. It is great furniture and I want to do a good job. I can send pictures. Thank you.
Hi, Cindy. I don’t advise people on specific projects, just with general knowledge about the process. You can find YouTube tutorials that will help you make the best decision. Good luck!
Kinda strange how your plans change at different times what you do with a piece of furniture or a wall, hmmmm? So far am really liking your white trestle table top with pine base. I have an antique trestle table out in shed, been meaning to refinish it for long time, has dark stain on it from when I bought it in KY few years ago.Where I would put it tho who knows.
Other than it ,used as side table, usually, we don’t have dining table,chairs , or dining area in our single wide mfg.home . We sold our other table/chairs couple years after we bought this place. Had a nice buffet/hutch also but no room for it along with my hoosier. Later realized by taking out a bottom/top cabinet in kitchen would have had room for hoosier. By then way too late as had sold hoosier also right after we moved in here.. This place wasn’t what we had in mind to buy but at price of places here was all we could afford./still had our place in Ky paying for on our SS. Is very expensive to live here in many regards. Lots of well to do people and older people with money. G.J.Is most expensive city in CO for medical bills as well as car/house insurance and other amenities.. Internet service is horrible and way too expensive without good choices. No cable out here in rural areas at all.. If I had known how expensive it was wouldn’t have wanted to move here from KY. Still miss our great house and 1 1/2 acres of land.
Enjoy your “newly redone” table,looks great,lots of work huh? Think mine will be also. The white sure does lighten up your dining area.
Hi, JaneEllen. I wish you good luck with your table! It was definitely a lot of work for my husband but it has held up well and was a better solution for us than spending a lot of money buying something new. Thanks for reading!